Accepting appointments is available starting from the Business hosting plan and above. Consider upgrading to a higher plan if you’d like to start accepting appointments.
If you use Hostinger Website Builder and want to accept appointments, follow the instructions below 👇
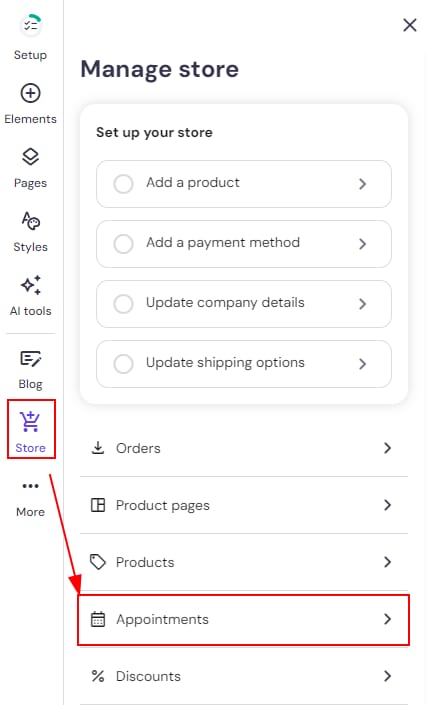
Enabling appointments
Within the builder, click on the Store button on the left sidebar and select Appointments from the settings list:
In the section Your availability, specify your working hours by clicking on Edit availability. There, you can either select time slots from the dropdown or select unavailable times as well:
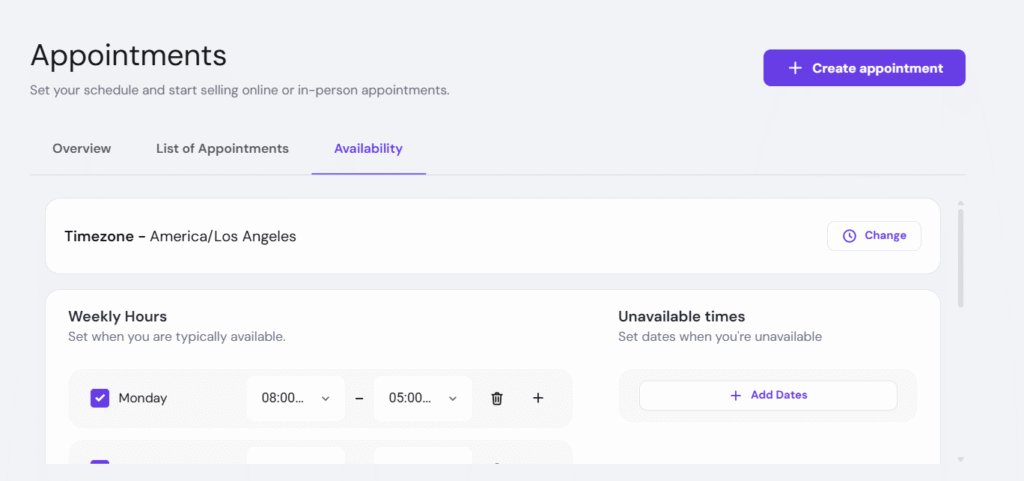
In the calendar below, you will find all the time slots booked by your customers.
The availability and time slots apply to all products and services. In other words, it’s not possible to set different availability and time slots for different products or services 💡
Creating an appointment
To start offering services, you need to create an appointment product:
-
In the store management area, go to the Products section and click on Add product
-
Choose the product type: appointment.
-
Optional – Upload product images.
-
Enter the product title — it’s automatically used as the meta title of the product page.
-
Optional – Enter the product subtitle, add a product ribbon and/or product description
-
Make sure the Add to bag button is enabled.
-
For the price type, select Amount or Free; the free option allows your clients to reserve specific time slots without payment.
-
If you select Amount, specify the price: it can’t be discretionary or set to zero.
-
The minimum product price is 1 USD, or its equivalent in other currencies.
-
Optional – Specify the discount price.
-
-
Optional – Assign a product to a category.
-
In the Duration & Location section, specify the duration of the event (minimum 15 minutes) and the location.
-
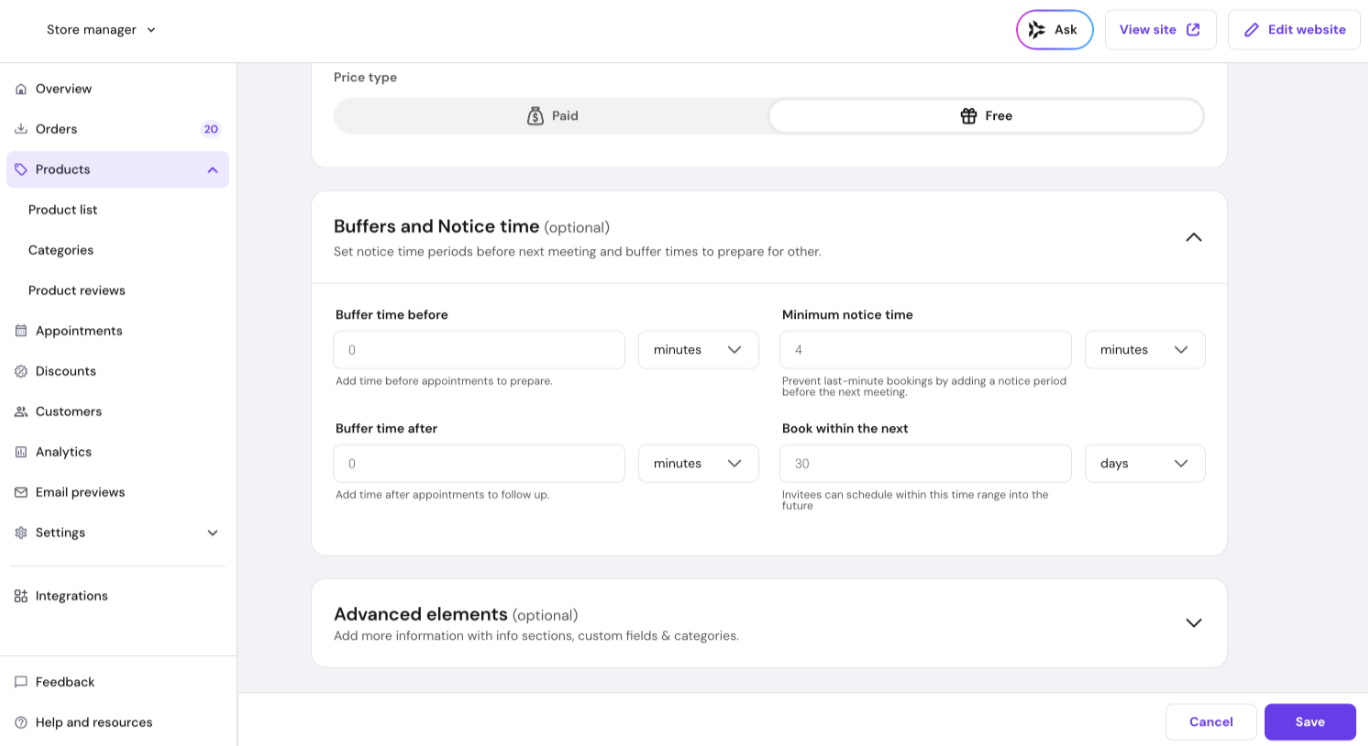
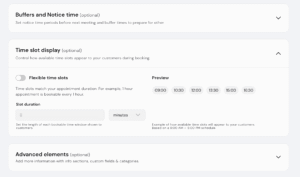
Open the Buffers and Notice times section (collapsed by default) to configure booking constraints:
-
Buffer time: Set a preparation period before or after each appointment.
-
Minimum notice: Set how much time you need before a booking (e.g., prevent same-day bookings).
-
Book within the next: Use this setting to limit how far in advance customers can book your services.
-
- Use the Advanced elements section if you need to assign the product to a category or add specific attributes.
- Click Save.
Once you create a product, the product page is created automatically. To display products on your website, use product sections.
Store owners now can configure buffer time before and/or after each appointment in the appointment settings. Buffer time is set per appointment product. The store owner sees the full slot; customers see a shifted start time based on the configured buffer.
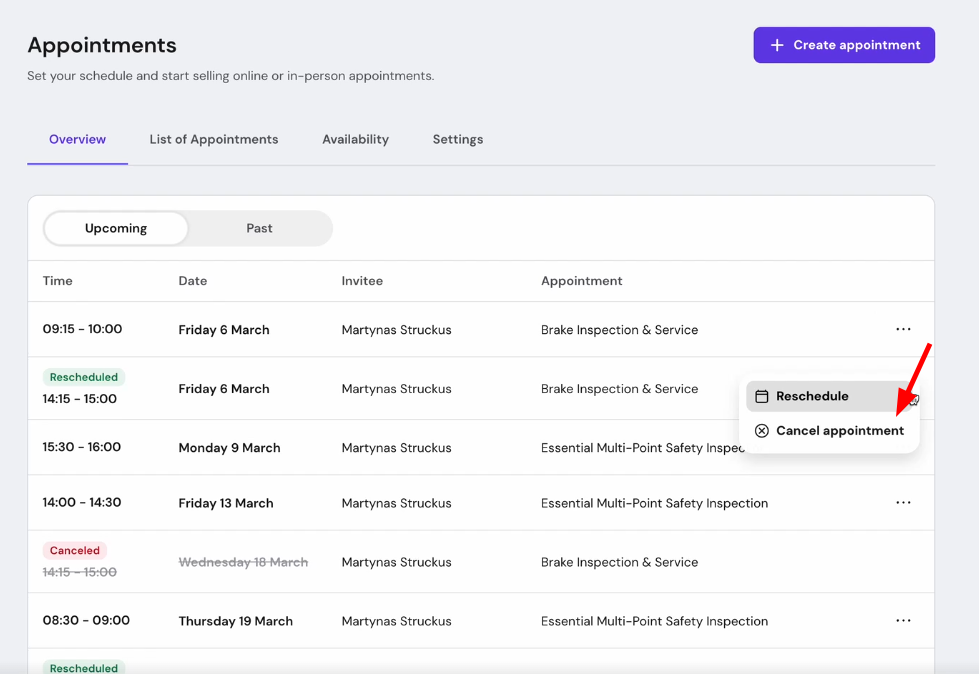
Canceling an appointment
Only unpaid and unfulfilled appointments can be canceled. If your client had already paid, issue a refund first.
Store owners can cancel or reschedule appointments directly from Store Manager. A reason is required for both actions; rescheduling also requires selecting a new time slot. The Appointments overview displays the status of each appointment (active, cancelled, rescheduled).
In Store Manager → Appointments → Settings, two toggles are available: Allow customers to reschedule and Allow customers to cancel. When enabled, customers receive cancel/reschedule links in their appointment confirmation email. Clicking a link opens the relevant modal on the store page.
Time slots
By default, available time slots are spaced at the appointment’s duration. For example, a 30-minute appointment generates slots at 9:00, 9:30, 10:00, etc.
To customize the slot interval independently of appointment length:
- In the appointment product settings, go to the Time slot display section.
- Enable Flexible time slots.
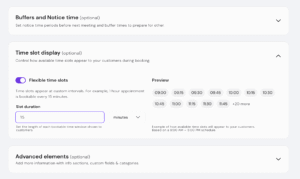
- Set a custom Slot duration (minimum 15 minutes). Slots will now appear at this interval regardless of the appointment’s length.
- A preview is shown based on a 9:00 AM – 5:00 PM schedule so you can see how the changes will appear to customers before saving.
- This is useful for longer appointments where you want to offer customers more granular booking options.
Time zones
Your specified working hours are set based on the timezone of your device. When it comes to your clients, available time slots are displayed based on their time zones.
For example, if you’re located in London and have a free time slot on Feb. 1, 10 AM (UTC), your potential client from Chicago will see it available on Feb. 1, 4 AM (UTC-6).