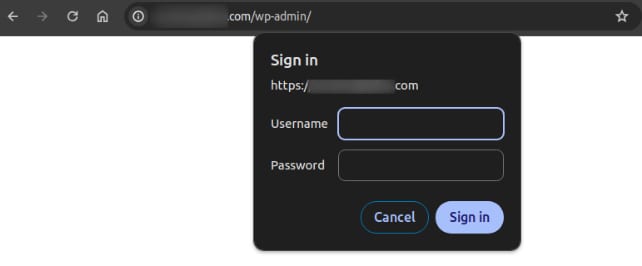
If you encounter issues accessing your WordPress admin area using the default login page (domain.tld/wp-admin), for example, it’s blocked, not found, or it asks for an additional password, it may be due to an additional layer of security placed on it.
If you cannot reach your WordPress admin login page (/wp-admin), it is usually due to a domain configuration error, a plugin conflict, or security settings. This guide combines multiple troubleshooting methods into one clear path to help you regain access quickly.
Step 1 – Check for firewall or IP blocks
If you see a 403 Forbidden error or a connection timeout, your IP address may have been flagged by our security systems. This often happens if an IP is linked to previous malicious activity or has a poor reputation.
- Verify your IP: Find your current IP address (e.g., search “what is my IP” on Google).
- Contact Customer Success: Reach out to our support team via live chat. We will check if your IP is currently blocked by our firewall.
- Review the outcome: Our team will confirm whether the block can be safely removed.
- If the IP has a history of harmful behavior, we may not be able to unblock it for network safety.
- In such cases, you may need to contact your ISP for a new IP or use a VPN to access your dashboard.
Step 2 – Check DNS records
Ensure that the domain points to Hostinger by either nameservers or A record.
Step 3 – Deactivate plugins
There are a few plugins that can protect the login page by restricting access to it, adding 2-factor authentication, or captcha features, such as WordFence, Force Login, WPS Hide Login, among others.
There are a couple of options if you wish to deactivate some plugins but don’t have access to your WordPress administrator page.
Disabling plugins via the WordPress dashboard
In your Hostinger account, go to Websites → Dashboard next to the site in question. Then, search for Security on the sidebar and click on it:

Scroll down to the section Installed plugins to find all the plugins currently installed on your website. Move the toggle to disable or enable them:
Disabling plugins via the file manager
If you don’t have the WordPress dashboard enabled or prefer managing data via files, you can disable the plugins using the file manager.
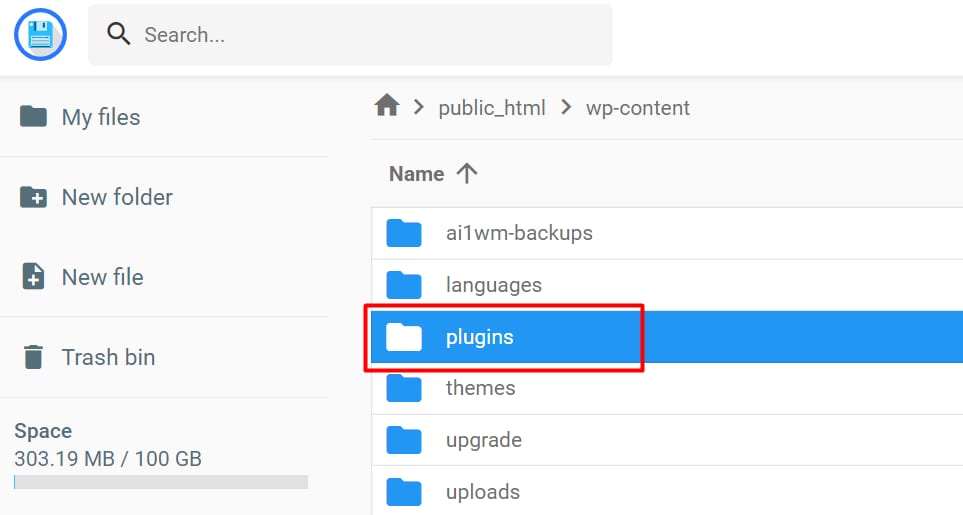
- Open your website’s File Manager and access its wp-content folder (
domains/domain.tld/public_html/wp-content). There, you’ll find the plugins folder:
- You can rename the entire plugins folder to plugins_disabled (or any different name) – this way, you’ll disable all the plugins inside this folder:
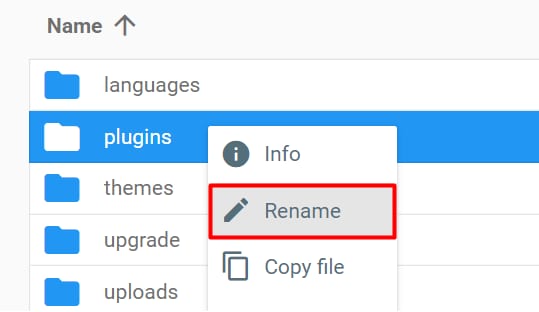
Alternatively, rename the specific plugin folder within the plugins folder.
Now try access your WordPress admin and see if it works.
Step 4 – Disable password protection in .htaccess file
If you have enabled password protection for your WordPress wp-admin page:
You can disable it by following these steps:
-
Reach the wp-admin folder using a file managing tool.
-
Open the .htaccess file in edit mode.
-
Remove or comment these lines:
AuthType Basic
AuthName "Protected 'public_html/wp-admin'"
AuthUserFile "/home/dir/.htpasswds/public_html/wp-admin/passwd"
Require valid-user
To comment out a line, add a # symbol at the beginning. This will prevent its content from being executed 💡
Save the changes, and test it by accessing your wp-admin again, it should load now ask only for the WordPress username and password.
Alternatively, disable the .htaccess by renaming it to .htaccess-disabled (or any other name)
Step 5 – Reset to default .htaccess file
If the issue persists, create a new .htaccess file and paste the default code.
-
Access the website’s webroot folder in the file manager.
-
Find .htaccess file there and rename it. You can rename it to .htaccess-old. This will disable the old file.
-
Create a new file called .htaccess and add the following default WP code.
You can find it here
#BEGIN WordPress
<IfModule mod_rewrite.c>
RewriteEngine On
RewriteBase /
RewriteRule ^index.php$ – [L]
RewriteCond %{REQUEST_FILENAME} !-f
RewriteCond %{REQUEST_FILENAME} !-d
RewriteRule . /index.php [L]
</IfModule>
#END WordPress
Step 6 – Reset to default wp-config.php
If the issue persists, enable a default wp-config.php file
-
Access the website’s webroot folder in the file manager.
-
Find wp-config.php file and rename it. You can rename it to wp-config.php-old
-
Create a new file called wp-config.php and add the default sample WP code that you can find here.
-
Locate and copy the following details from the old file: wp-config.php-old and fill them under the new wp-config.php file:
-
Database name
-
Database Username
-
Database password
-
Database prefix
-
Keys/salts. These can be either copied from the old wp-config.php file or generated here
-
Step 7 – Check Malware scanner report
If you see that the domain is pointing correctly, but the admin page still does not open, check out malware scanner to see if no malware was detected:
- Go to your website dashboard.
- Find security tab at the left side of your dashboard.
- Click on Malware Scanner category under security tab.
- If your website has been affected by malware – follow cleanup steps: How to fix malware-infected WordPress Website at Hostinger.
Other important things to check if the issue persists:
-
If the domain is not pointed to Hostinger, follow the guide here: How to point a domain to Hostinger
-
Check if the database limit is reached and follow the steps here: What to Do If the Database Size Limit Has Been Reached
-
Check if the website is affected by malware: How to use the malware scanner at Hostinger
-
If you encounter a 403 error on your website, restoring the core WordPress system files can help resolve the issue.
-
If you see the ERR_SSL_PROTOCOL_ERROR, follow this step-by-step SSL troubleshooting guide to fix the problem.
-
If you’re experiencing a 503 error, it may be due to exceeded resource limits on your hosting plan—try reducing usage or optimizing your website to restore normal performance.