A content delivery network (CDN) is a geographically distributed network of proxy servers that enhances your website’s high availability, performance, and resilience against DDoS attacks. By serving your website from the nearest and fastest servers to your visitors, it significantly reduces load times.
At Hostinger, if you have a Business, cloud or Agency hosting plan, you can use the Hostinger CDN to access various optimization tools.
- If you have a Single or Premium hosting plan, you can upgrade your plan to access this feature.
- Hostinger CDN is not available for VPS. You may use a third-party service like Cloudflare instead.
Before you start
- Ensure your domain is pointing to Hostinger nameservers and the IP address of your hosting plan.
- Only one CDN should be enabled at a time. If you use a third-party service like Cloudflare, disable it before activating Hostinger CDN.
- Hostinger CDN settings can be customized for websites created with PHP, HTML, Node.js, or an open source CMS like WordPress.
How to enable Hostinger CDN
- Go to hPanel → Websites.
- Click Dashboard next to the website.
- For web and cloud hosting, select Performance → CDN on the left sidebar.
- For Agency hosting, select CDN directly on the left sidebar.
- Check the CDN status. If inactive, click on Enable.

How to manage Hostinger CDN settings
Once enabled, click the Manage button to access optimization and security features. The Hostinger CDN dashboard is divided into four tabs: Analytics, Website optimization, Traffic blocking, and Security.
Analytics
The Analytics tab provides a visual overview of your website’s CDN performance. Use the Select period dropdown to filter data by 1 hour, 6 hours, 1 day, or 7 days. This section includes:
- Cache statuses: Displays how requests are handled: Hits (served from cache), Miss (fetched from origin), Dynamic (bypassed), Bypass (skipped by config), and Revalidated (refreshed content).
- Status codes: Shows the distribution of HTTP response codes, such as 2xx (success), 3xx (redirects), 4xx (client errors), and 5xx (server errors). This helps identify traffic patterns or errors.
- HTTP requests: A line chart showing the total volume of requests handled over time.
Website optimization
This tab contains tools to improve site loading speeds:
- WebP image compression: Automatically converts images to the WebP format, which is approximately 30% smaller than JPEG without losing quality. This is enabled by default; to disable it, click on the toggle.

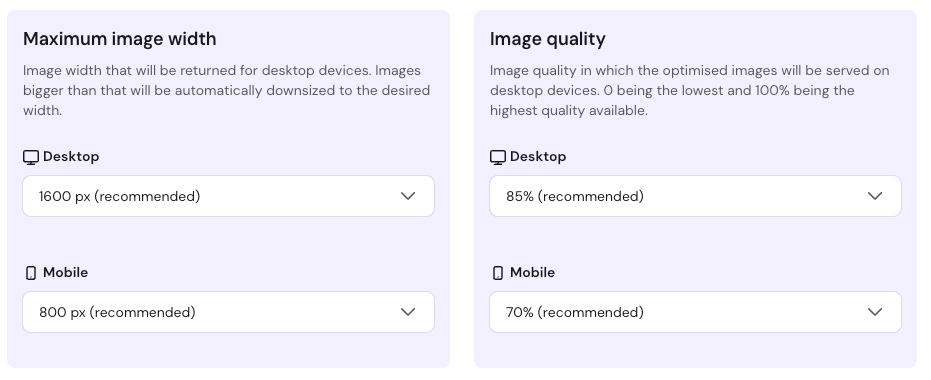
- Smart image optimization: Automatically determines the best image width and quality for desktop and mobile devices. You can customize these settings manually or toggle the feature off.
Traffic blocking
The Traffic blocking tab allows you to restrict access at the CDN edge, preventing unwanted traffic from reaching your origin server:
- IP Blocking: Click Block IP address to restrict a specific IP or range.
- Country Blocking: Click Block country to select specific regions from a searchable list. You can manage and remove these rules at any time.
Security
The Security tab provides tools to protect your site from malicious threats and enforce encryption:
-
Security level: Use the dropdown to set how aggressively the CDN challenges visitors based on their threat score, including protection during active DDoS attacks.
-
Use only the latest TLS version (TLS 1.3): When enabled, this restricts connections to TLS 1.3 only for improved security. By default, both TLS 1.2 and 1.3 are supported to ensure compatibility with older devices.
-
Traffic over TLS: A chart showing your traffic distribution by encryption protocol (Plain, TLS 1.2, or TLS 1.3) over the last 24 hours.
How to disable Hostinger CDN
You can disable the service in two ways depending on your needs:
- Development mode: Use this to temporarily disable the cache for testing and reviewing website changes in real time.

-
Disable: Use this button to fully turn off the service, such as when switching to a different CDN, installing a custom SSL or modifying your domain’s A, AAAA records or www CNAME record.

By following these steps, you have successfully optimized your website delivery using the Hostinger CDN. Your visitors will now experience faster loading speeds and improved stability.
Additional resources
- Hostinger Tutorial: Complete guide to image optimization.
- You can learn more about how a content delivery network works in the following video.