To move your website to another Hostinger account and another domain name, check the video tutorial or find detailed steps below 👇
❗IMPORTANT NOTES❗
-
This procedure doesn’t apply for websites created with Hostinger Website Builder: moving builder-based sites between Hostinger accounts is not yet available
-
The below steps are meant for WordPress-based websites
-
For other content management systems, the flow might be slightly different
-
However, you’ll still need to download and upload files (and databases, if applicable) for all kinds of CMS
-
Step 1 – Generate and Download Your Website’s Backup
Before generating the backup, check and note the correct database name. If you’re not sure which database, check your website’s configuration file and look for the name of the database. If you use WordPress, you may also refer to this tutorial: How to Find Your WordPress Database Name 💡
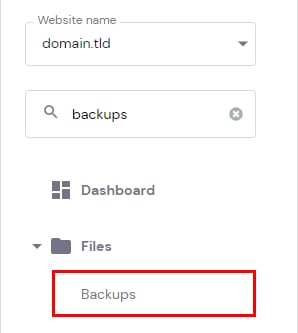
On hPanel, go to Websites and click on Manage next to the website in question. Then, search for Backups on the left and click on it:
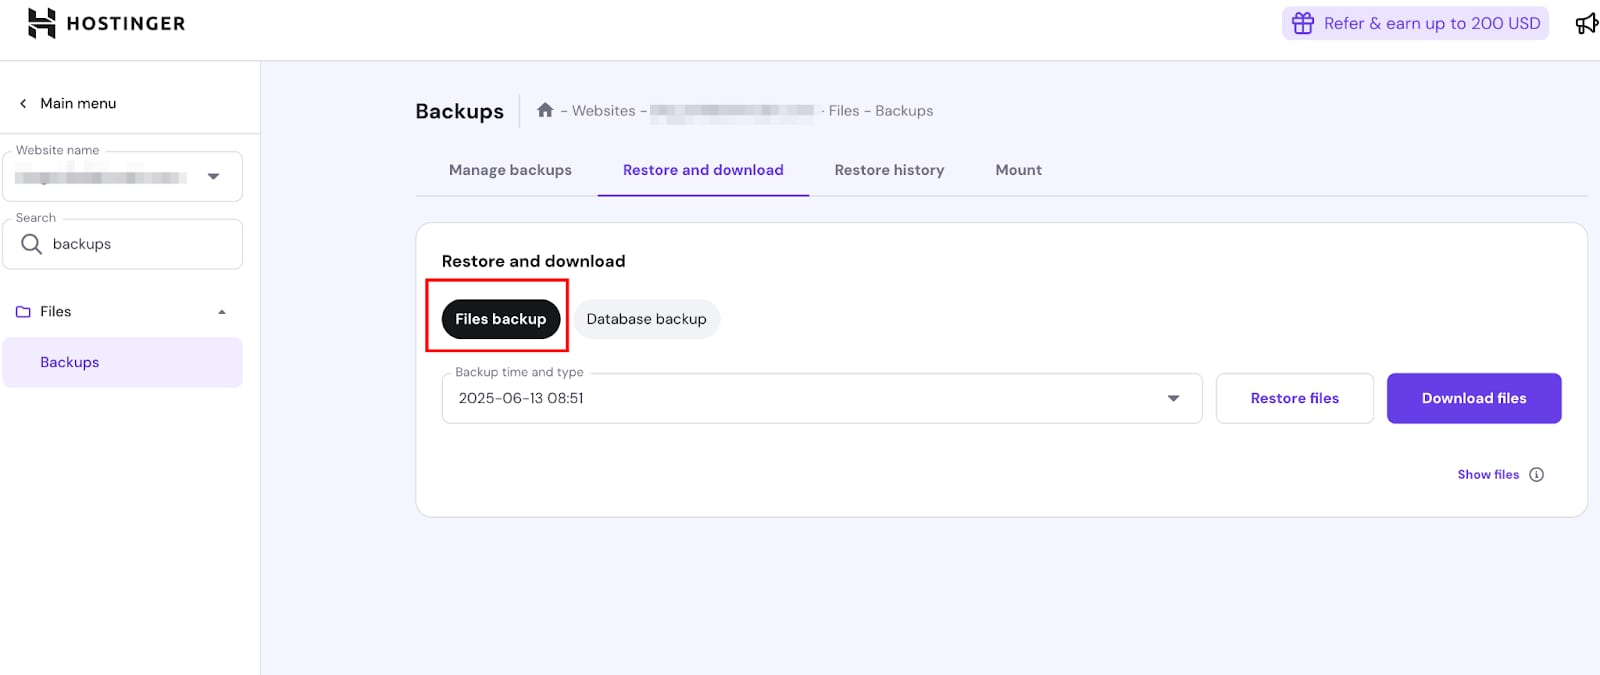
To download your files, go to Restore and download, and select Files backups:
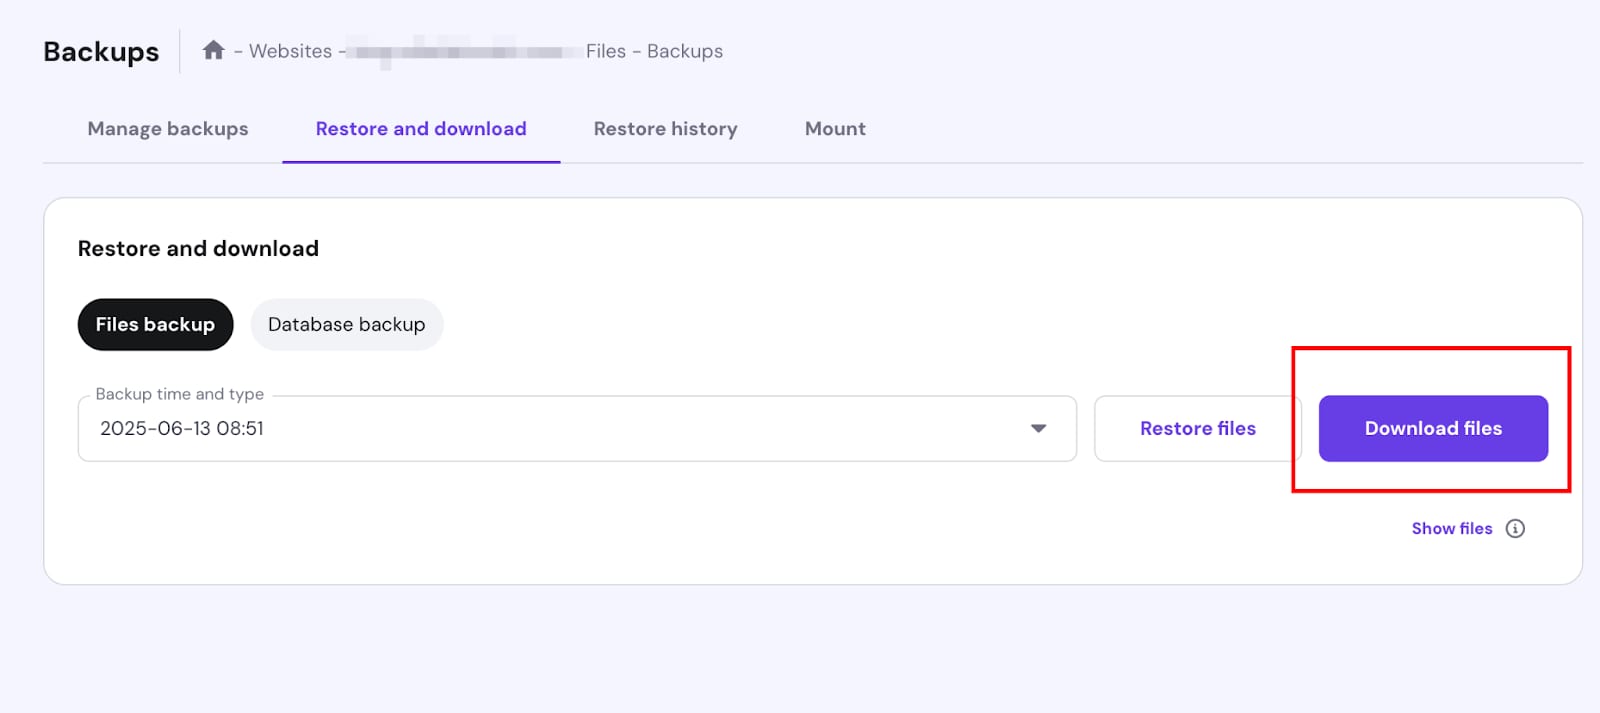
The complete list of all the available backups by date will be shown on the drop-down menu. The time indicates when the backup was created, in your local timezone.
Choose the backup preferred date from these options and click Download files:
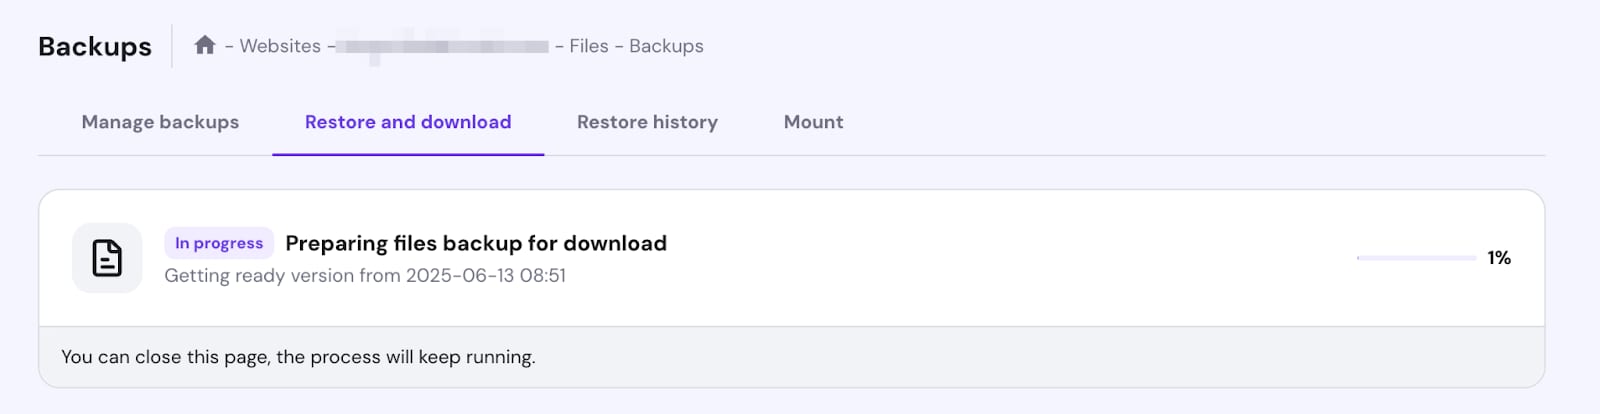
After clicking on Download files, you will be notified that backup preparation has started. The time will vary depending on the size of your backup. You can monitor the progress in the Restore and Download tab.
When it is ready, the option to download it will appear. Click on Download:
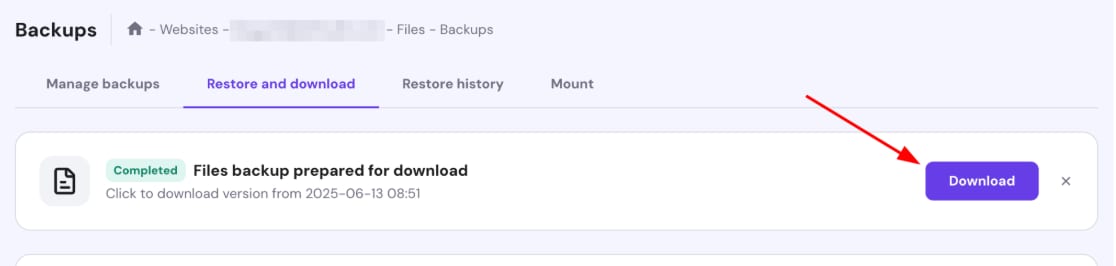
That’s it! The downloaded archive will contain all of your website’s files 😊
A similar process applies when downloading generated databases – select Database backups. Select your website’s database and the backup date, then click on Download database:
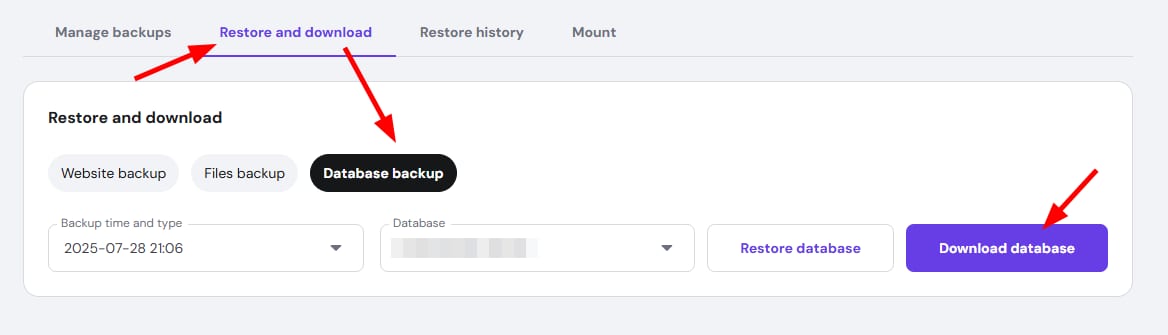
Ensure the database selected matches your website’s configuration.
That’s how you download your website’s files and databases.
Step 2 – Add a New Website to Your Preferred Hostinger Account
On hPanel, go to Websites, click on Add website, select the preferred hosting plan, and click on Select plan:
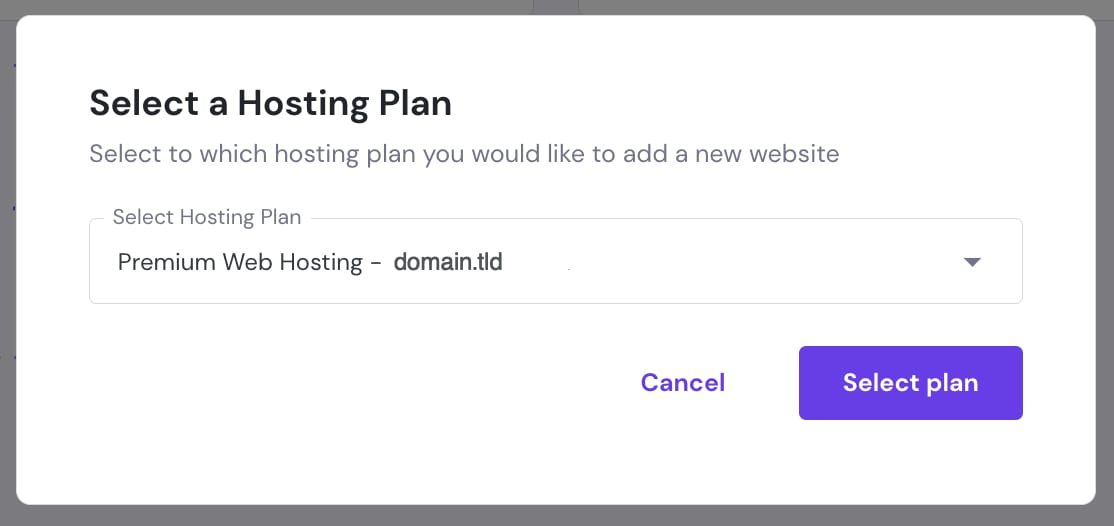
You won’t be asked to specify the preferred hosting plan if you only have one 💡
In the step Select a Platform, select WordPress and insert the required details. Finally, specify the preferred domain name and click on Continue.
If you want to use a domain that’s in another Hostinger account, you may be asked to verify the domain ownership – it’s easy – follow these instructions 💡
That’s how you add your website to another hosting plan. Now, all you need to do is upload your website’s files and databases.
Step 3 – Upload Your Website’s Backup
There are multiple ways to upload backups, but the easiest one is to use the file manager – the upload limit is 100 GB. There’s no big difference if you upload the website’s files or its database first.
Upload Website Files
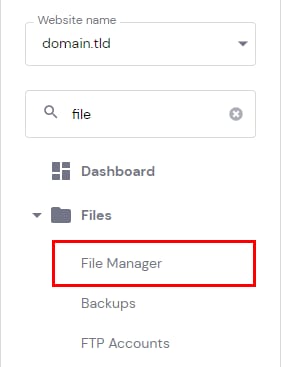
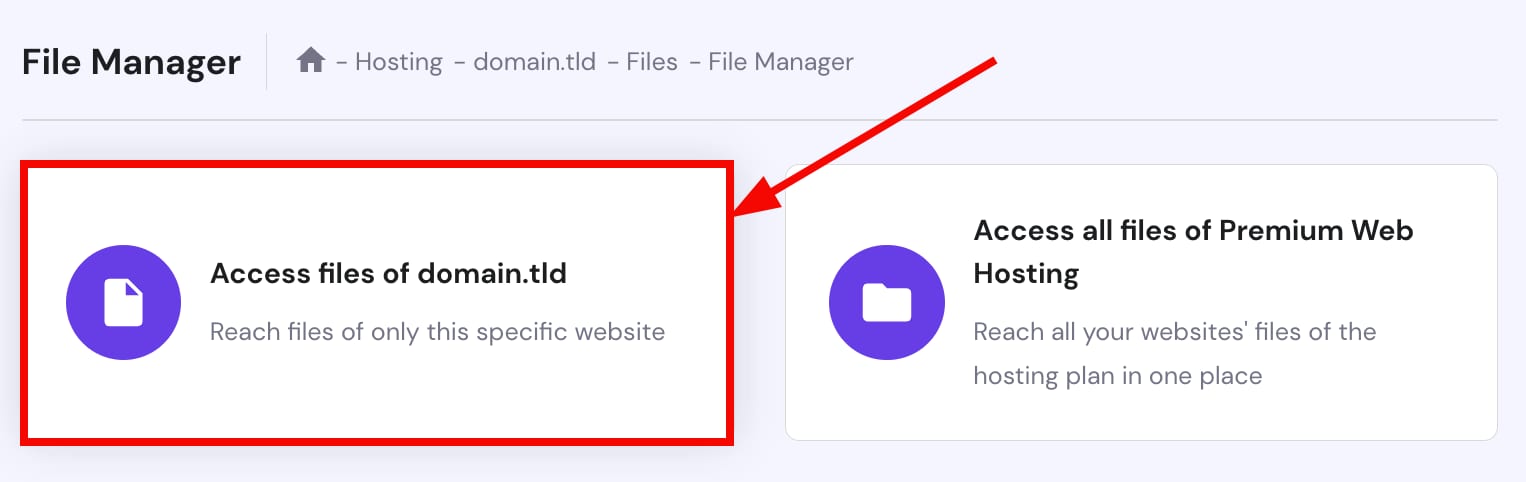
On hPanel, go to Websites and click on Manage next to the website in question. Then, search for File Manager on the left and click on it:
Access the files of a particular website:
Open your website’s public_html folder, and click on Upload in the top-right:
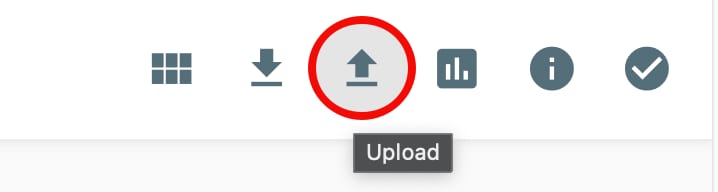
Then, select File and upload the backup of your website’s files (.tar.gz). Sit back and give it some time: depending on the size of the backup and the internet speed, it may take up to an hour.
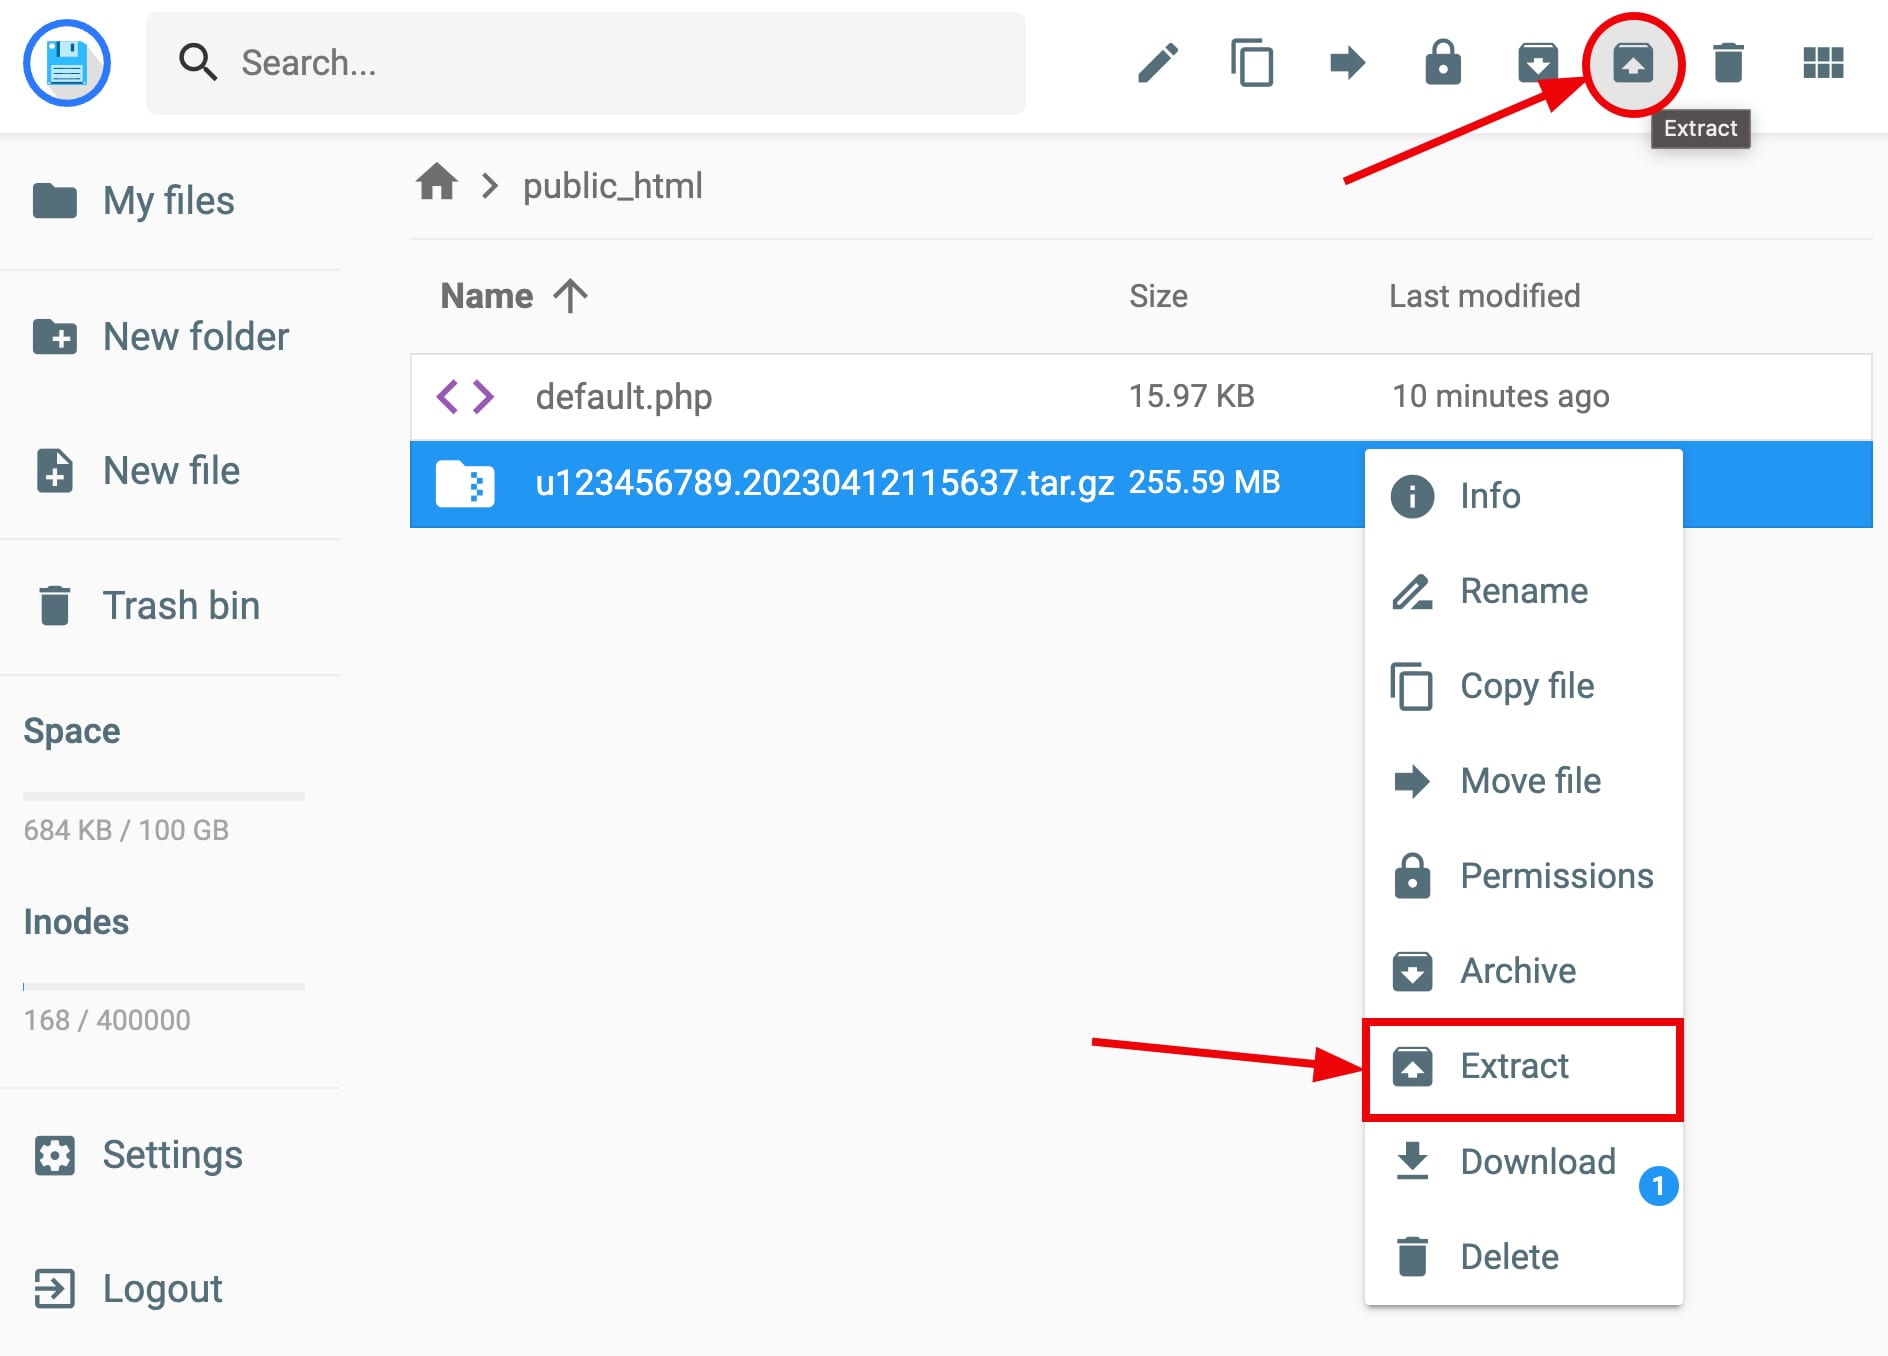
Extract the Archive of Your Website Files
Now, right-click on the backup file, and choose Extract, or click on Extract in the top-right:
Insert a folder name, e.g., backup, and click on Extract:
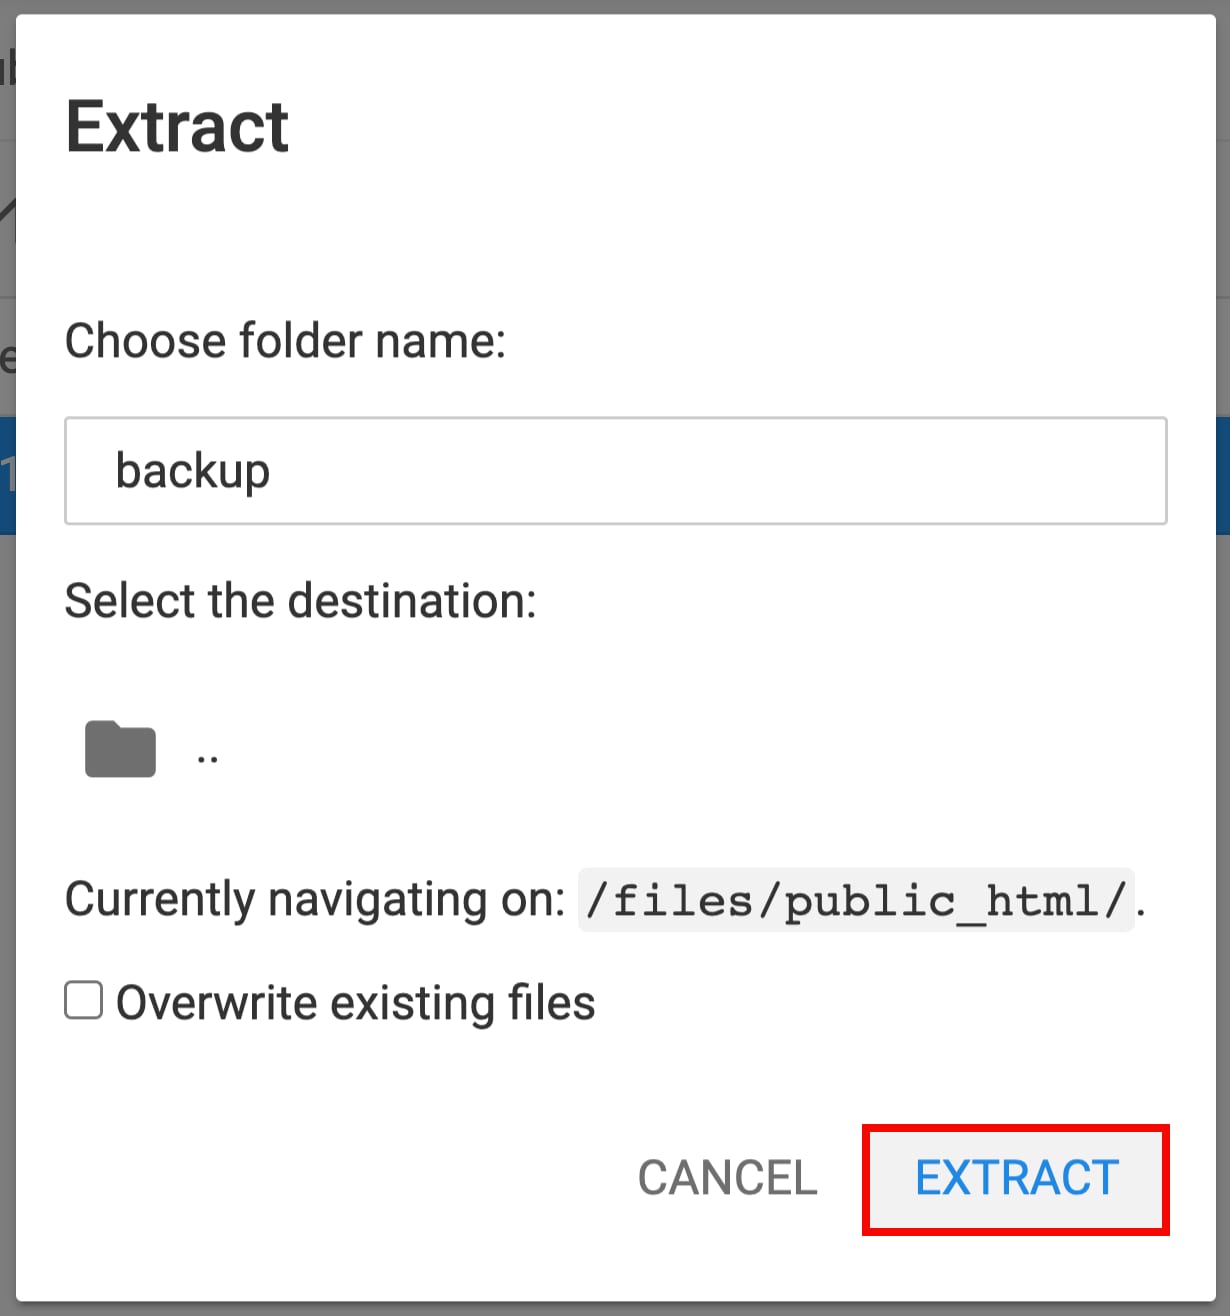
Once the website files are extracted into a dedicated folder, you may delete the backup .tar.gz file 🧹
Now, let’s move your website files to the correct folder. To do this, open the folder containing the extracted website files (in our case, it’s called backups) → domains → select the domain in question → open its public_html folder, select all the files, and click on Move file in the top-right:

Double-click on .. to go to the parent directory so that the destination would be /files/public_html, and click on Move:

The goal is to have all the website files in the public_html folder.
Upload the Database
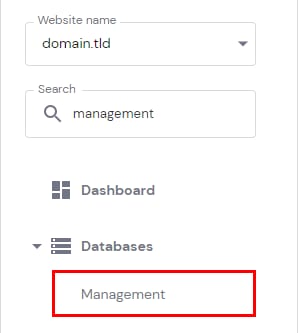
You need to create a new database and import the backup there. To create a database, go to Websites and click on Manage next to the website in question. Then, search for Management on the sidebar and click on it:
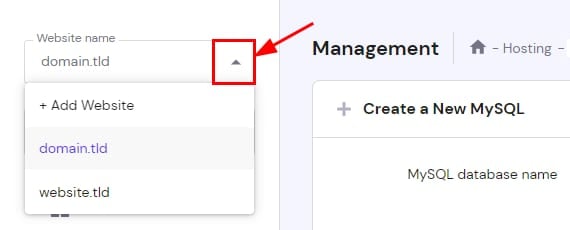
Make sure the correct website (the one you want to upload the database) is selected on the left drop-down menu:
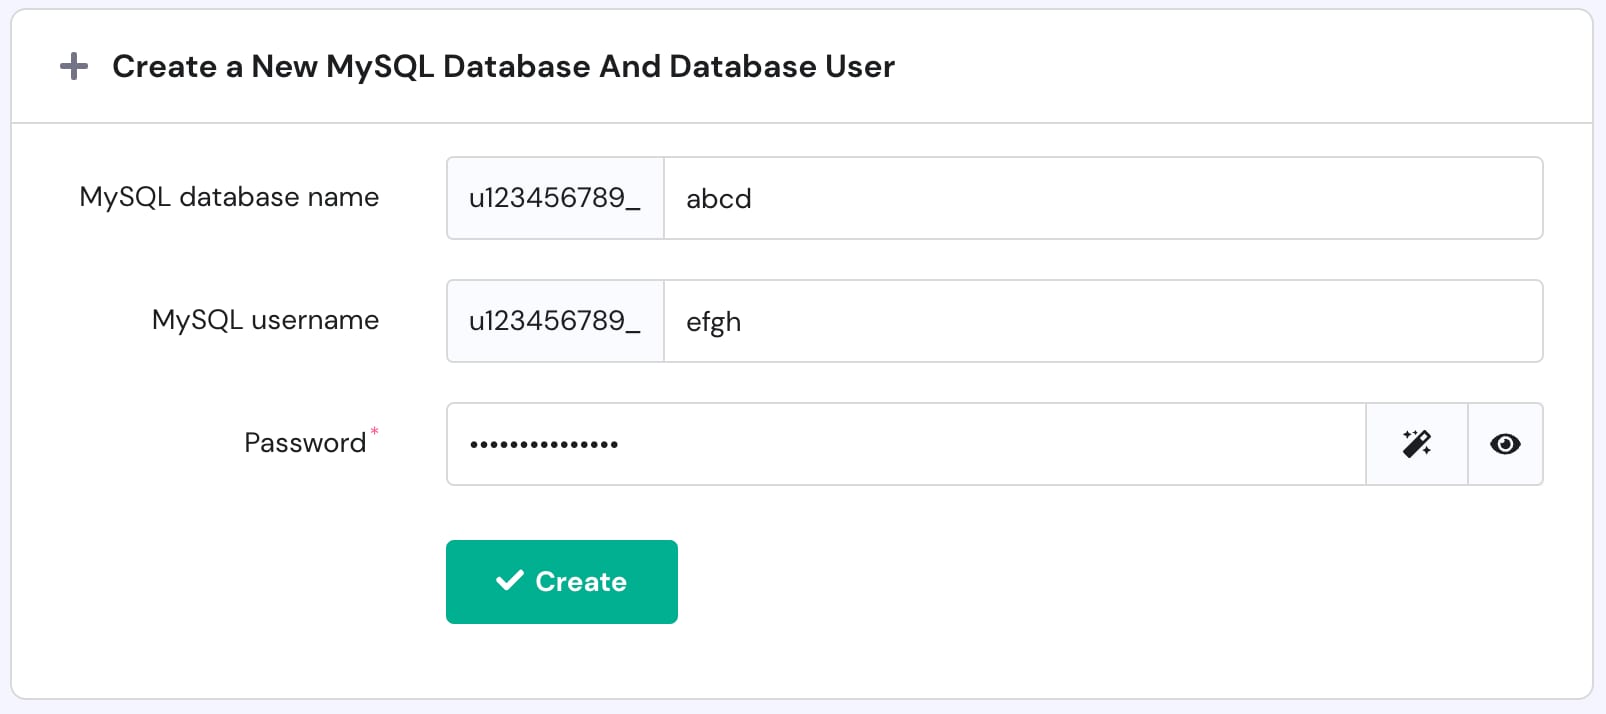
In the section Create a New MySQL Database And Database User, enter the name, username, and password of your database.
It’s recommended to use the same name and password as in the original database. You can find and copy those details by opening your website’s configuration file in the file manager.
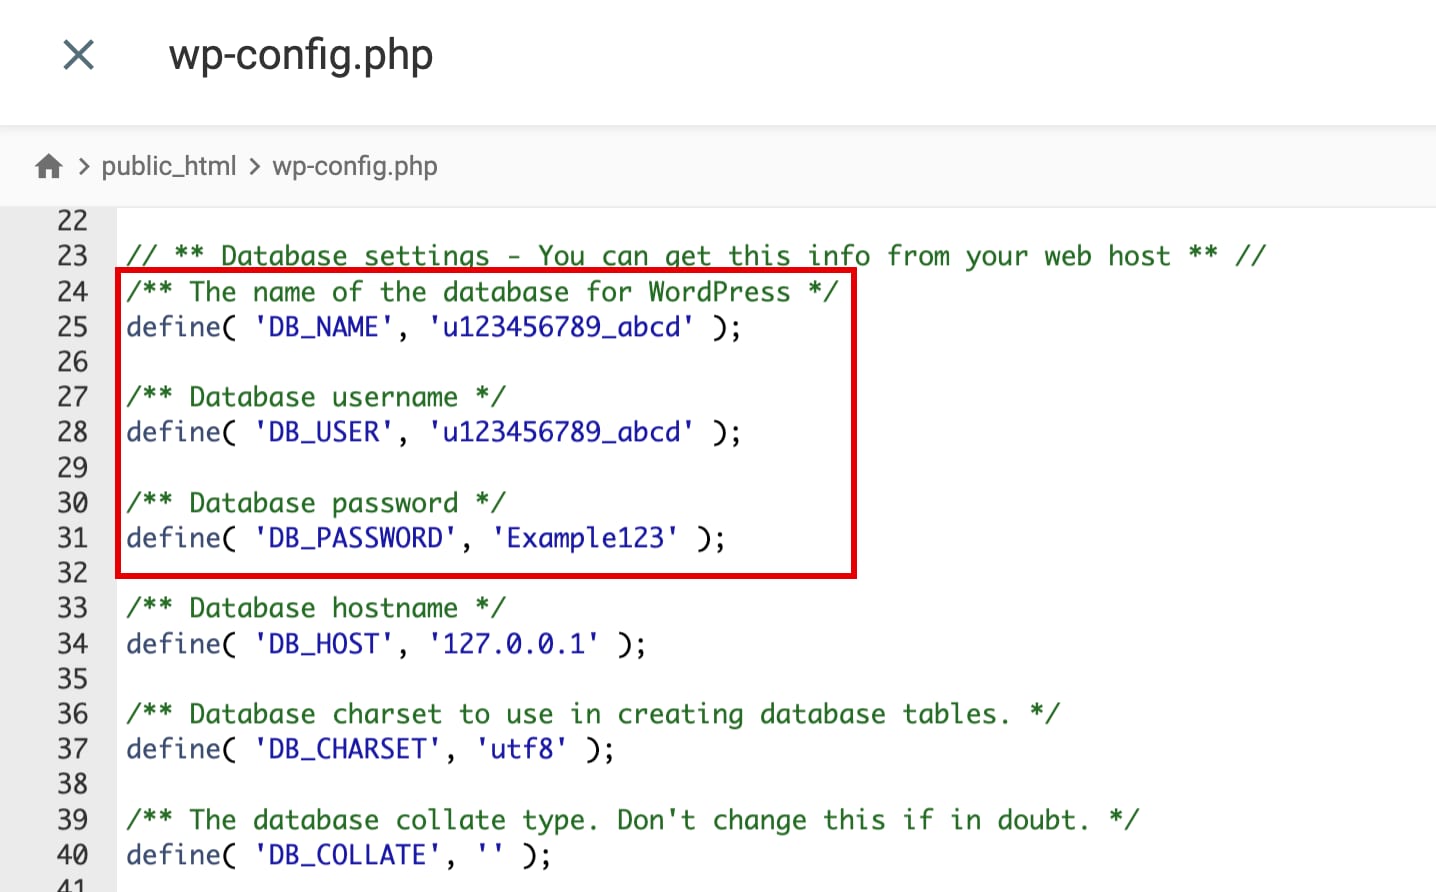
For WordPress websites, it’s in the public_html → wp-config.php file:
-
DB_NAME = MySQL database name, e.g., u123456789_abcd
-
DB_USER = MySQL username, e.g., u123456789_efgh
-
DB_PASSWORD = your preferred password
Once you fill in the details, click on Create:
This way, a new database is automatically assigned to the selected domain and appears in the List of Current MySQL Databases And Users section, where you will be able to manage it.
The first part of the database name and username (u123456789) is unique and cannot be removed or changed 📌
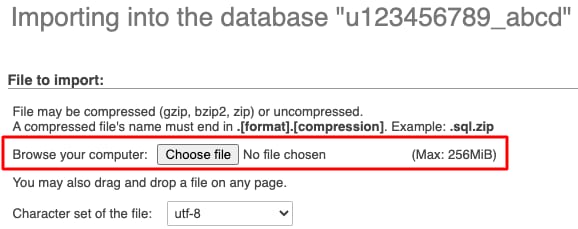
To import the backup of your database, click on Enter phpMyAdmin next to the newly created database. On phpMyAdmin, your database will be selected by default, so click on Import:

Select the database backup that you’ve downloaded previously (.sql.gz):
Proceed further without changing anything on the settings and click on Go or Import.
If you can’t import the .sql.gz file, extract it to the .sql format and try uploading it again; learn more about possible issues when importing a database 💡
After migrating the website from one domain to another, it’s crucial to update the site URL throughout the whole website. If it’s a WordPress website, you can use the Search and Replace function by following this tutorial: How to Perform a WordPress Search and Replace in the Database
That’s how you upload the backup of your database!
Update the Database Details in Your Website’s Configuration File
The final step is to make sure that your database connection details (name, username, password) match the details in your website’s configuration file: How to Find MySQL Database Details 💡
Once the database is imported, open your website’s configuration file and update those details to match those of the new database. Make sure to update the username, as it will definitely be different.
For WordPress websites, it’s in the public_html → wp-config.php file:
-
DB_NAME = MySQL database name, e.g., u123456789_abcd
-
DB_USER = MySQL username, e.g., u123456789_efgh
-
DB_PASSWORD = your preferred password
That’s it! Now, you know how to move a website to another Hostinger account and another domain 😊
Fixing common issues after migration
If, after migration, you are not seeing the correct content, this might be related to browser cache. There are some steps you can take to see your website working, starting with the easiest ones:
-
Access your website using Incognito mode
-
Then, clear your browser’s cache: How to Clear Browser Cache
-
Use a different device/computer/mobile connectivity (3G/4G/5G) instead of Wi-Fi
-
Turn off your modem/router for 2 minutes and reboot it
-
Clear your DNS cache by following this guide
If you get a 403 error when accessing your website after migration, it might be due to DNS propagation: different hosting plans have different IP addresses, therefore, the A record has changed and is undergoing propagation.
Give it some time, and your site will work like a charm!