For your domain to work with your VPS hosting, you need to point the domain to your server’s IP address. There are couple ways to do that, depending on where your domain is registered.
Domain purchased at Hostinger
Go to the Domain portfolio page on hPanel, click on Manage next to your domain, and select DNS / Nameservers from the left sidebar of the domain dashboard.
Create two A records:
-
Find the IP address of your VPS.
-
Access your domain’s DNS zone, and delete any A, AAAA or CNAME records that include @, www, or cloudflare-resolve-to in its name.
-
Add these two A records:
|
A Record 1 |
A Record 2 |
|
Name: @ Points to: your VPS IP address TTL: default |
Name: www Points to: your VPS IP address TTL: default |
Remember that domain propagation may take up to 24 hours before fully pointing to the VPS.
Domain purchased elsewhere
If your domain is registered with another provider, you have two options:
Option 1 – Create A records at your current registrar (recommended)
The simplest approach is to add two A records directly in your current domain registrar’s DNS settings — no need to transfer anything.
-
Find the IP address of your VPS.
-
Log in to your domain registrar and navigate to the DNS settings for your domain.
-
Delete any existing A, AAAA or CNAME records for @ or www.
-
Add these two A records:
|
A Record 1 |
A Record 2 |
|
Name: @ Points to: your VPS IP address TTL: default |
Name: www Points to: your VPS IP address TTL: default |
Domain propagation may take up to 24 hours. For help with specific registrars, refer to this guide: Managing DNS records at different registrars.
Option 2 – Point your domain to Hostinger nameservers
Use this option if you want to manage your domain’s DNS entirely from Hostinger’s hPanel.
Go to the VPS page on hPanel, click on Manage next to your server, and select DNS Manager from the left sidebar of the VPS dashboard.
Next, enter your domain name and click on Add:

You will be assigned custom nameservers to verify domain ownership, and you must add them to your domain provider’s Nameservers management.
Here is an example of custom nameservers:
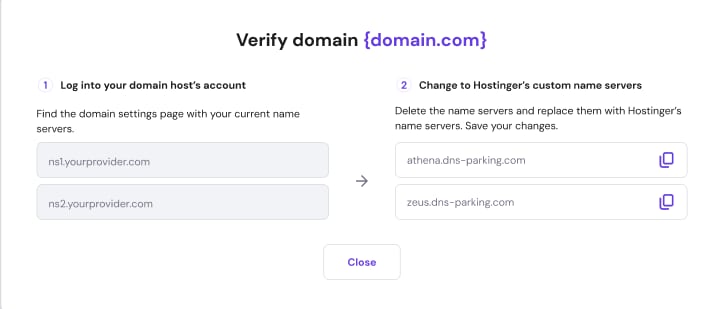
Before you continue ✋
The nameserver changes should be made on your domain provider’s platform; that is, where your domain nameservers reside.
If you would like to learn more, please refer to this guide: Managing DNS records at different registrars.