With the Hostinger AI Website Builder for WordPress, you can launch a fully functional, customized website in minutes. This tool uses a conversational interface to understand your brand and automatically configures your theme, colors, and content.
The AI Website Builder for WordPress is available with Business and Cloud hosting plans.
Step 1 — Choose the AI Generation Flow
When setting up a new website or adding one to your hosting plan, you must first select the platform and creation method:
- Select the platform: Choose WordPress from the available website building options.
- Select the creation method: Click on Create a website with AI. This will trigger the specialized AI flow designed to build your site based on your specific requirements.
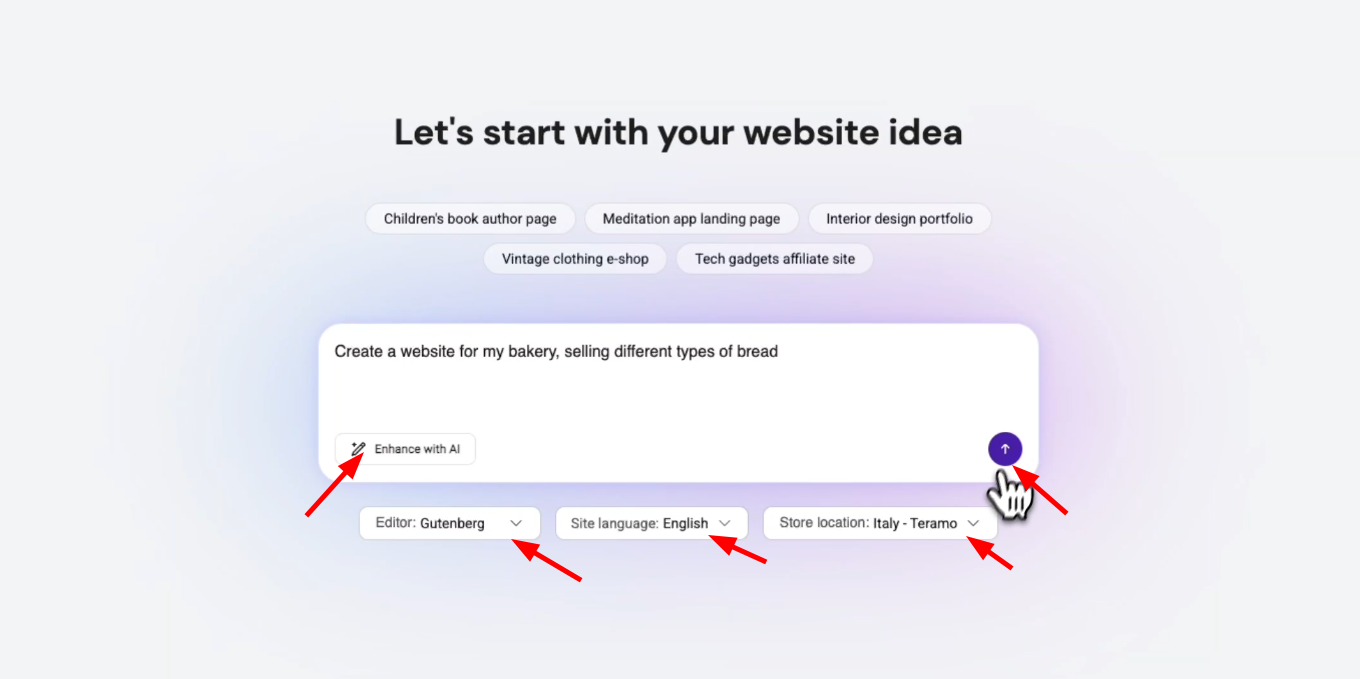
Step 2 — Provide Your Website Idea
Once the AI flow is active, you need to define the purpose of your site:
- Describe your idea: Enter a description of what you want your website to be (e.g., “A bakery website selling different types of bread”).
- Enhance with AI (Optional): Click the Enhance with AI button to automatically expand your prompt into a more detailed description for higher-quality results.
- Choose your Editor: Select Gutenberg or Elementor as your preferred page builder from the dropdown menu.
- Set Language and Location: Select your Site language and Store location (only needed if you’re creating an online store).
- Submit: Click the arrow icon to proceed.
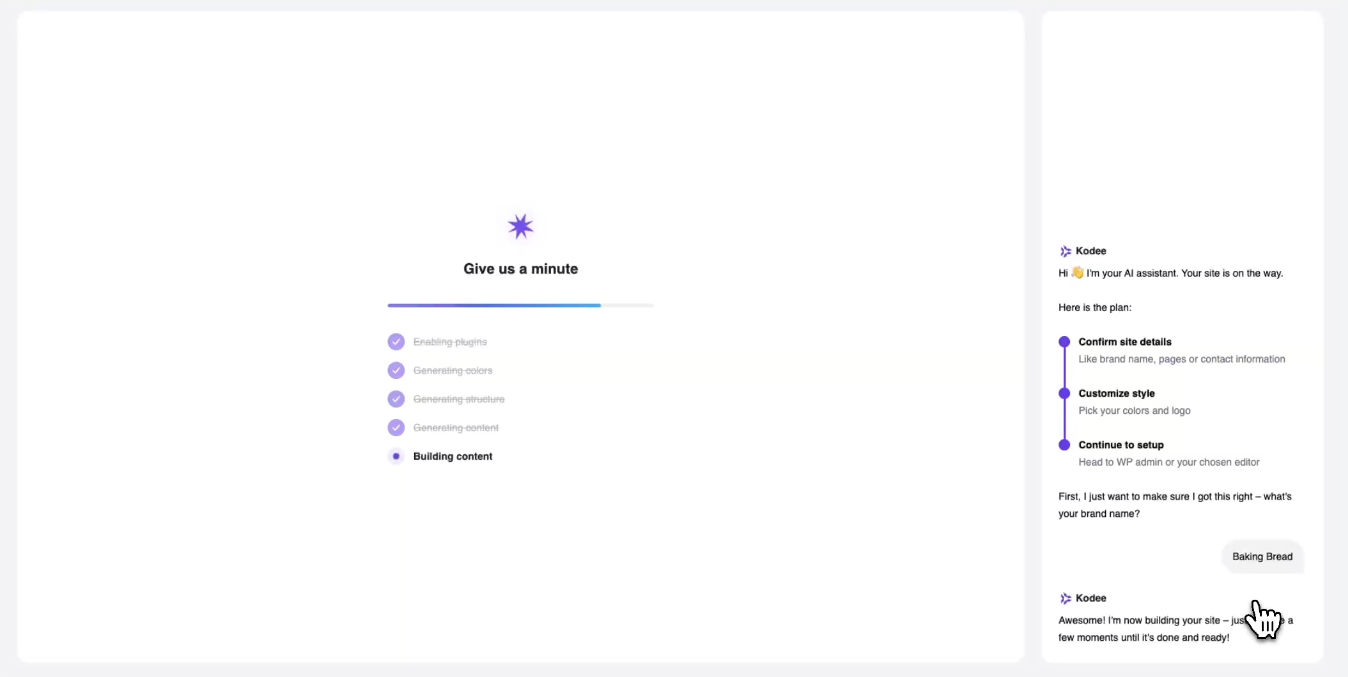
Step 3 — Chat with Kodee (AI Assistant)
A conversational interface will open to collect your brand requirements.
- Confirm Brand Name: Kodee will ask for your brand name. Type it in the chat box and send.
- Wait for Generation: The AI will begin enabling plugins and generating your site structure, colors, and content. You can track the progress on the “Give us a minute” screen.
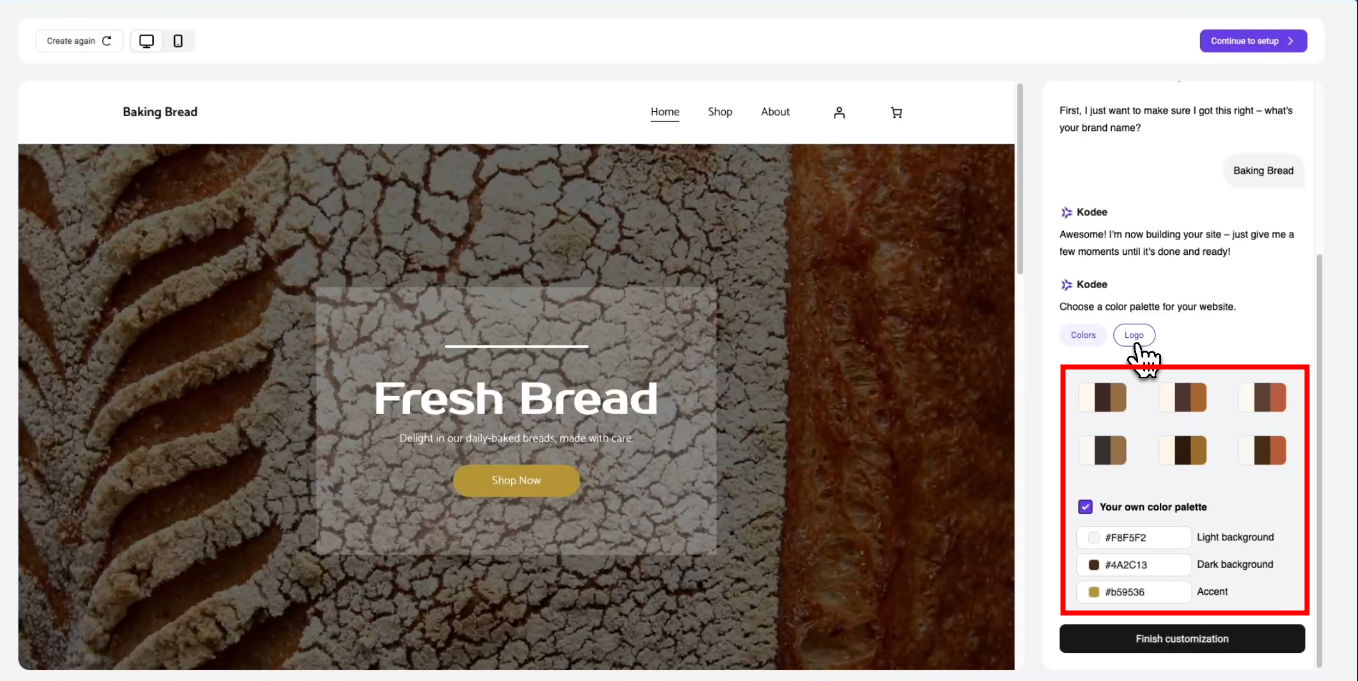
Step 4 — Customize Your Style
Once the initial site preview loads, you can fine-tune your visual identity:
- Color Palettes: Choose from several AI-generated color schemes. Selecting a palette applies it globally across your theme to ensure visual uniformity.
- Custom Colors: If you have specific brand colors, check the Your own color palette box to use a hex code color picker for light, dark, and accent colors.
- Logo Upload: Switch to the Logo tab in the customization panel to upload your brand logo (PNG, JPG, max 5MB). This is automatically injected into your WordPress site title and header.
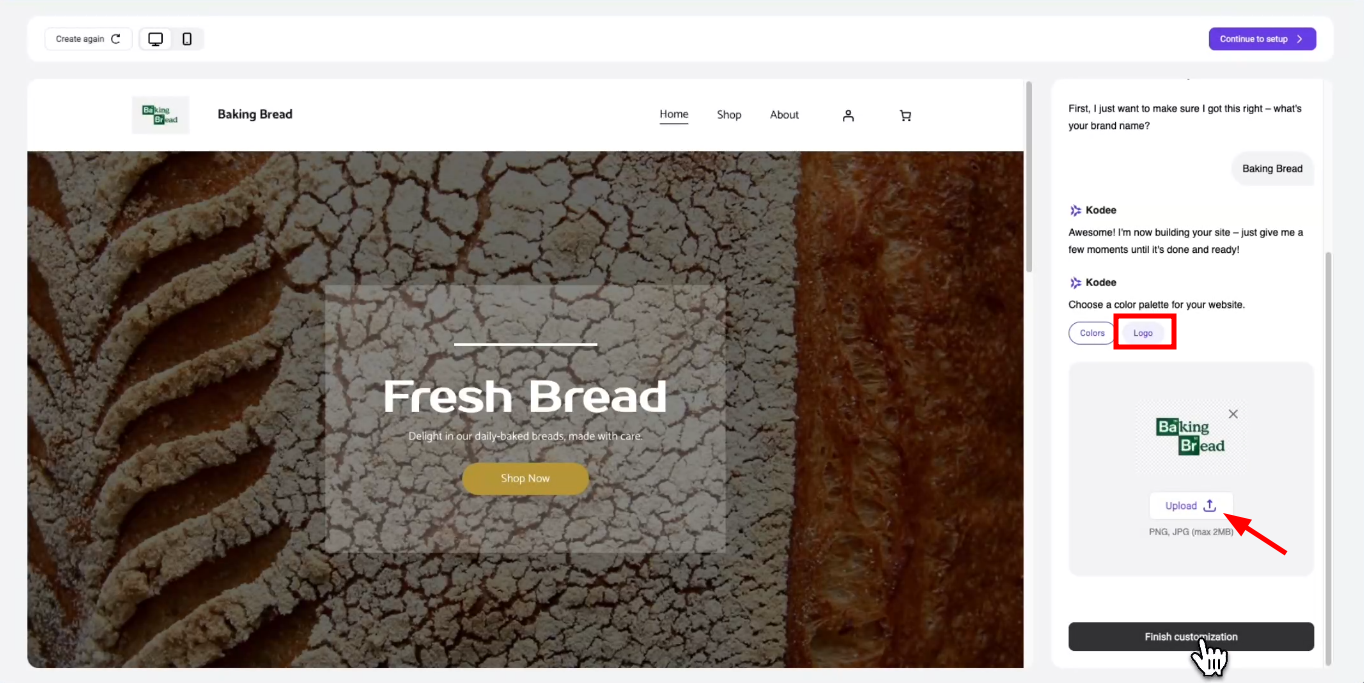
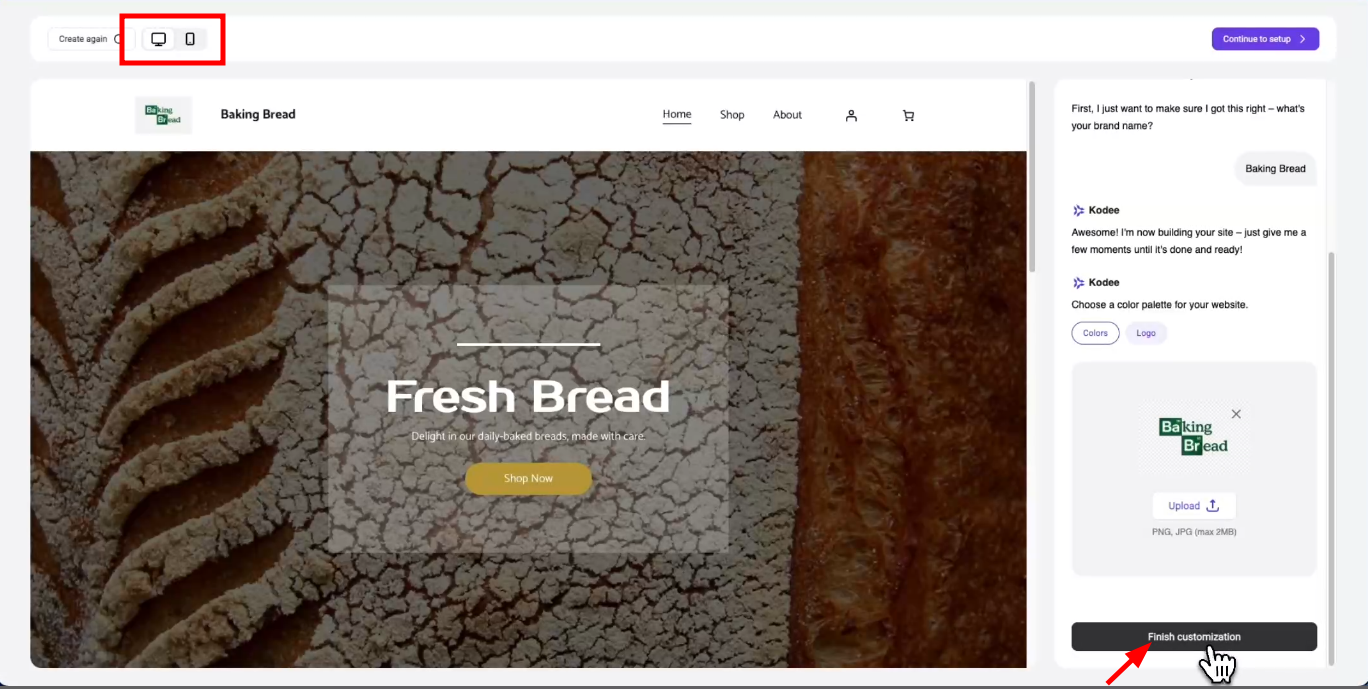
Step 5 — Preview and Finish
Before finalizing, ensure the site looks great on all screens:
- Mobile Toggle: Use the viewport icons at the top-left of the preview window to switch between Desktop and Mobile views.
- Finalize: If you are happy with the preview, click Finish customization.
- Setup WordPress: Click Setup in WP admin to be redirected to your WordPress dashboard, where your new site is ready for management.
Note: If you want to try a different approach, you can click Customize again to restart the AI generation process with new parameters. Existing content will be overwritten if you proceed with a new generation.