The Hostinger Reach WordPress plugin allows you to connect your WordPress site directly to Reach, enabling seamless contact collection and newsletter management. This guide will help you set up the plugin and start syncing contacts from your site to Reach.
How to connect your WordPress site
1. For Hostinger sites
- Go to Reach → Connect Site→ WordPress.
- Select your site from the dropdown menu.
- If the plugin is not installed, it will be automatically installed.
- You’ll be redirected to the WordPress Admin dashboard to connect the plugin or create your forms.
2. For sites hosted elsewhere
- In Reach, click Connect site from another provider.
- Follow the instructions to download and install the plugin.
- Or, go to your WP Admin area, search for “Hostinger Reach Plugin”, and activate it.
- Connect your site and start creating forms.
Important notes
- One site at a time: Currently, Reach supports managing a single newsletter per account. You can connect only one WordPress site to Reach at a time.
- Form integration: You can choose between using Reach’s native forms or compatible third-party plugins.
- Easy setup: The plugin is designed for beginners and requires minimal configuration to start syncing contacts.
Next steps
Once your website is connected to Reach, you can start building and engaging with your audience through automated email campaigns and integrated signup forms.
Overview dashboard
Once installed, Hostinger Reach appears as a dedicated top-level menu in your WordPress sidebar for quick access — no need to navigate through plugin settings.
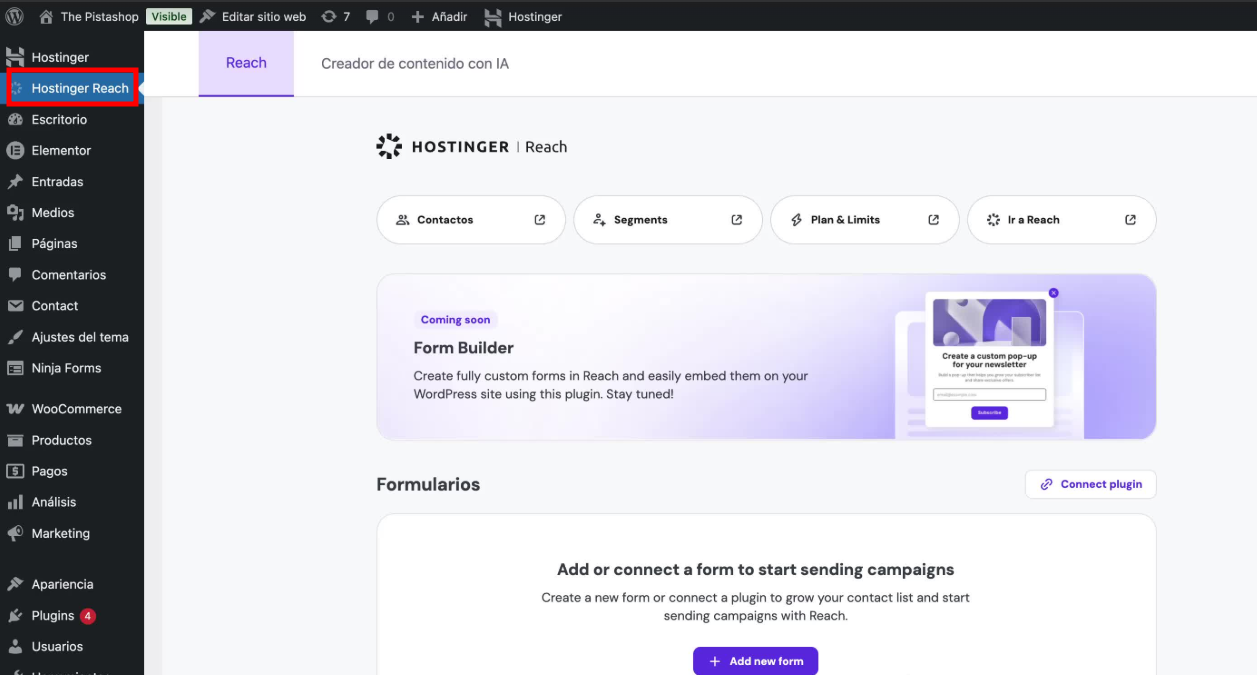
After connecting, the Hostinger Reach plugin overview gives you quick access to manage your Reach integration directly from WordPress. You can connect to Reach, add forms for syncing contacts, and manage your WooCommerce integration from here. To view email stats and campaign performance, go directly to your Reach dashboard.
You’ll also have access to quick actions that take you directly back to the Reach dashboard, allowing you to manage your email marketing efforts easily. The quick links at the top of the overview provide shortcuts to key sections in Reach, such as Contacts, Segments, and Plan & Limits, so you can jump straight to what you need without leaving your workflow.
In this section, you can also control your integration, such as syncing your contact forms with Reach to automatically collect new subscribers. You’ll also notice a Coming Soon banner in the overview, giving you a preview of upcoming features planned for Hostinger Reach.
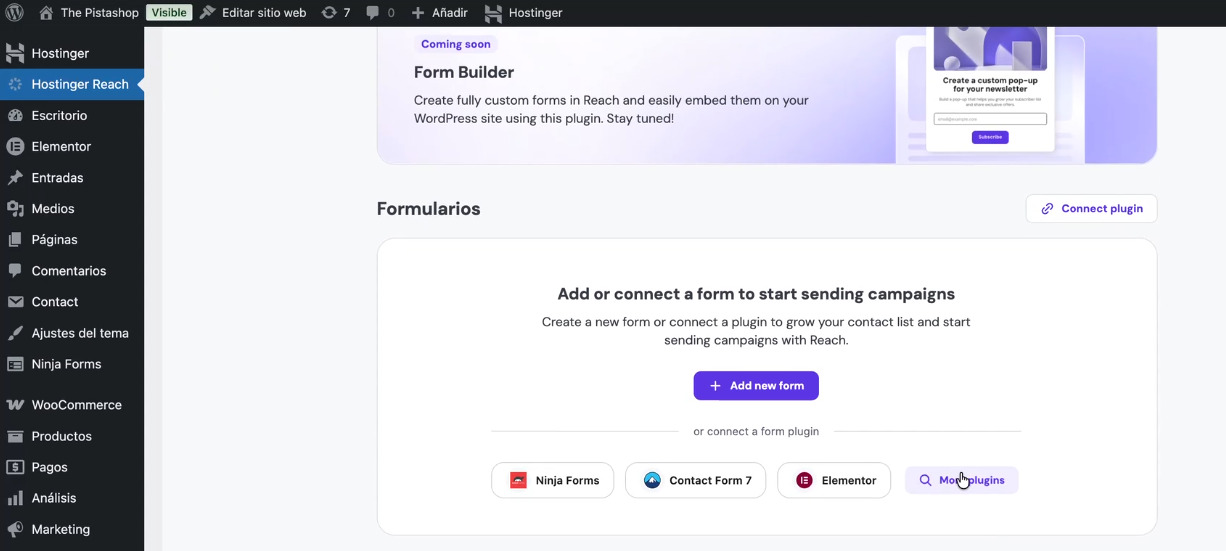
How to create a new form
You can add new signup forms directly from Reach or use one of the supported third-party plugins.
Option 1: Create a form using Reach
- In your Reach dashboard, click Add Form.
- Select Create Form to use the native Reach form block.
- Choose the page where you want to add your form and design it.
- Once created, the form will automatically connect to Reach.
- New submissions will begin syncing instantly, adding contacts to your audience.
Option 2: Use a third-party form plugin
If you prefer a different design or already use a plugin, you can integrate it with Reach. You can now connect popular WordPress plugins directly from the Hostinger Reach plugin overview page with a simplified, more intuitive interface.
Forms you create using that plugin will automatically sync new contacts to Reach.
If you already have a form on your site
- Check if the plugin you currently use is supported in Reach.
- If it’s supported, simply connect the plugin in your Reach dashboard.
- Your existing forms will automatically sync, and new submissions will start flowing into Reach.
Supported third-party contact form plugins
Reach currently supports the following popular plugins:
- Contact Form 7
- WPForms Lite
- Elementor
- Elementor Pro
- WooCommerce (checkout)
- Ninja forms
- Forminator
- Sure Forms
- WSForms
- Brave Popup Builder
- OptinMonster
- Thrive Leads
WooCommerce integration
If you use WooCommerce, you can manage your integration directly from the Hostinger Reach plugin overview. The WooCommerce section has been redesigned to make it easier to set up Automations (such as abandoned cart emails) and add a checkout subscription form to collect subscribers during purchase.
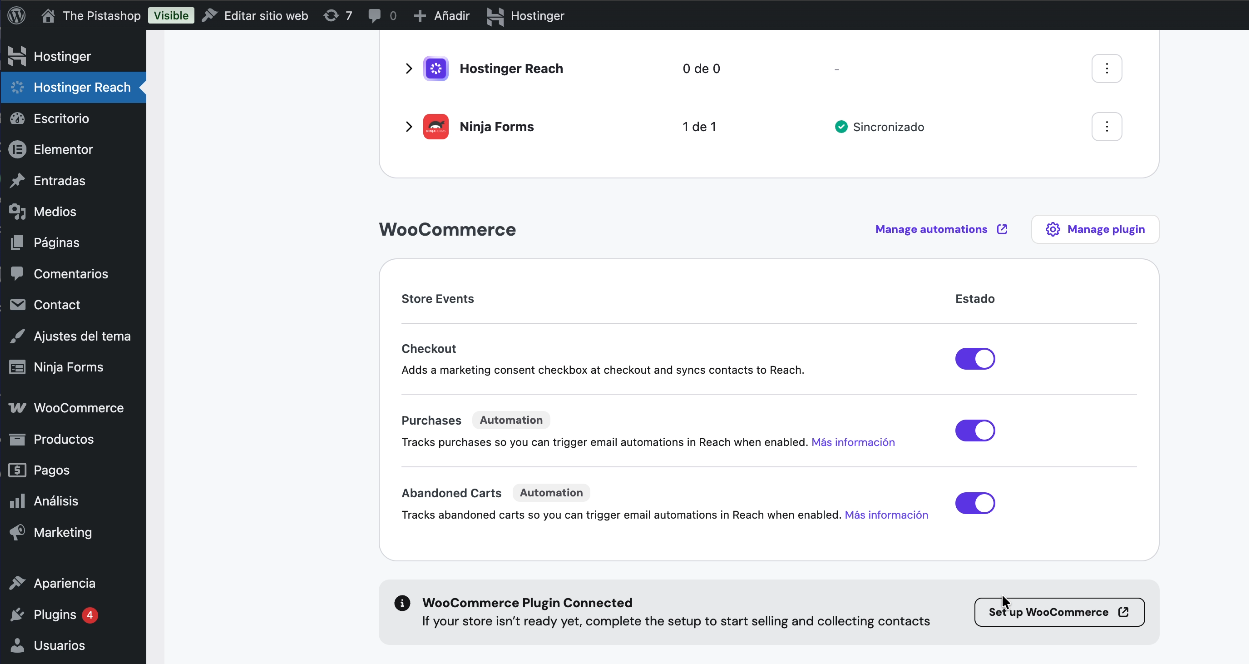
If your WooCommerce setup is incomplete, a notice will appear in the overview reminding you to finish the configuration before contacts can sync correctly.