After deploying a Node.js application on Hostinger, you can edit existing environment variables or add new ones at any time. Changes to environment variables require a redeployment to take effect.
You can access environment variable settings from two locations in the control panel:
-
Website Dashboard
-
Deployments section
Option 1 — Edit from the Website Dashboard
-
Open the Website Dashboard for your Node.js application.
-
Click Settings & Redeploy.

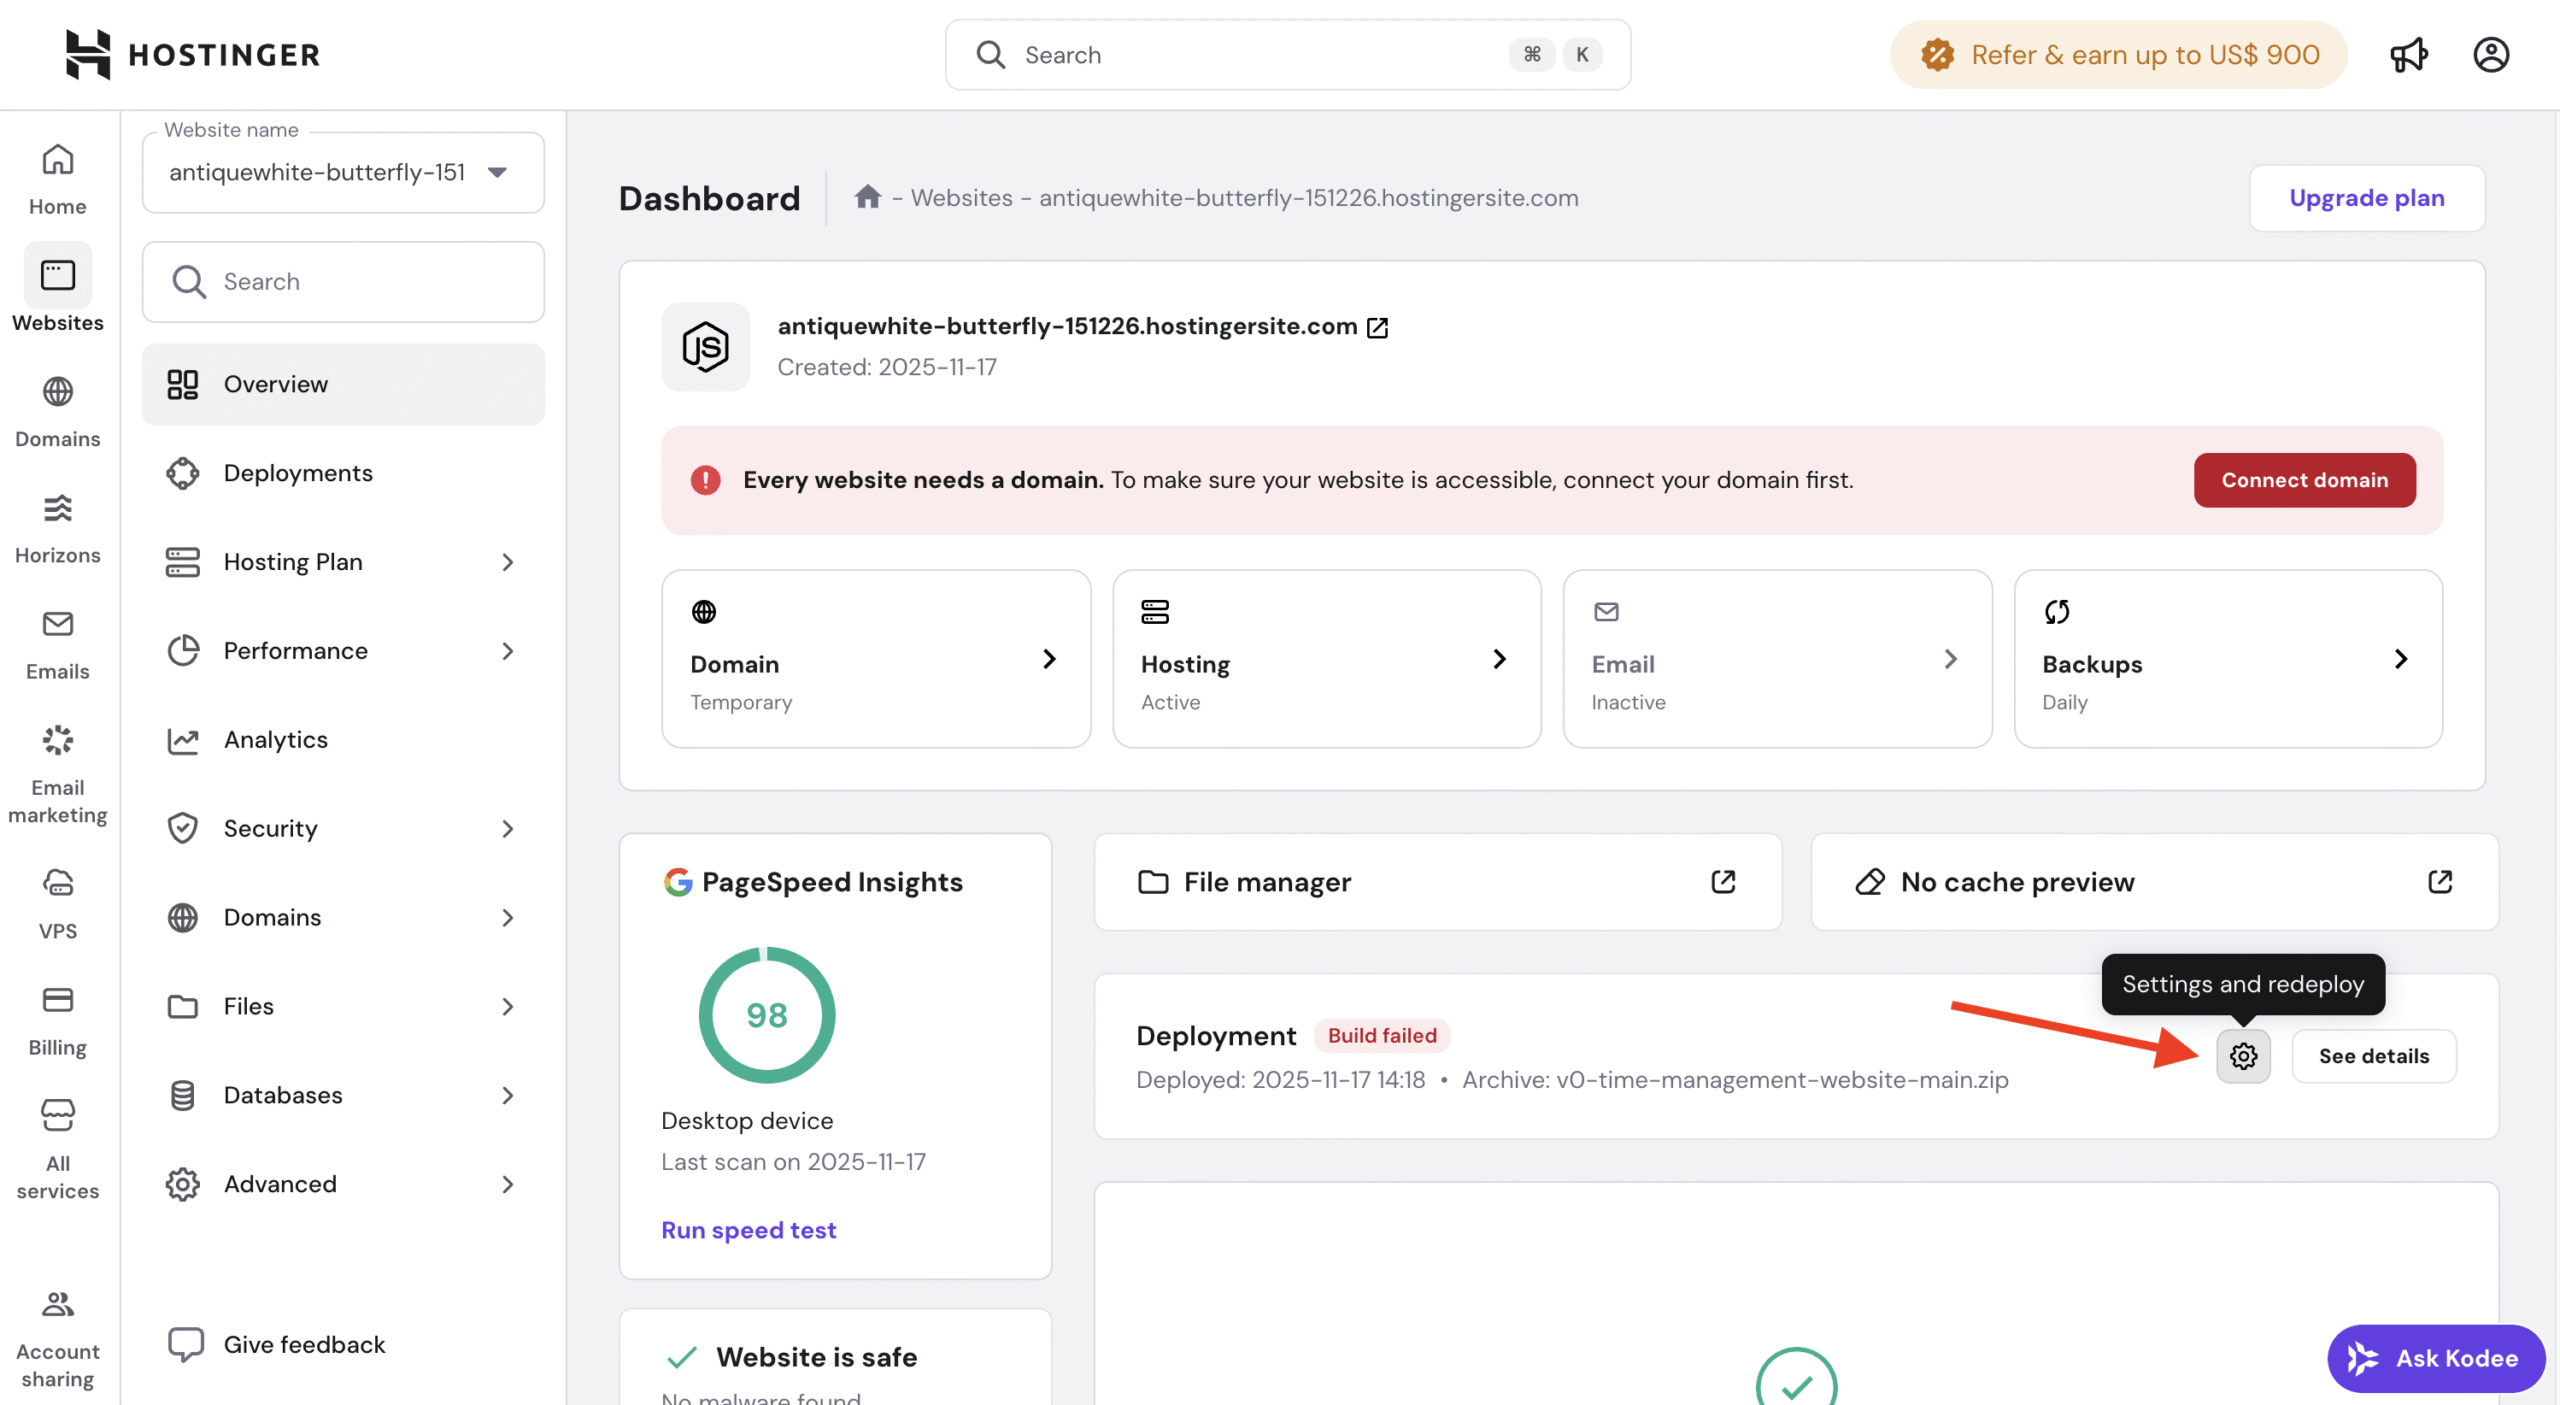
You will be redirected to the redeployment settings page.
Option 2 — Edit from the Deployments section
-
Open your Website Dashboard.
-
Navigate to the Deployments section.
-
Click Settings & Redeploy.

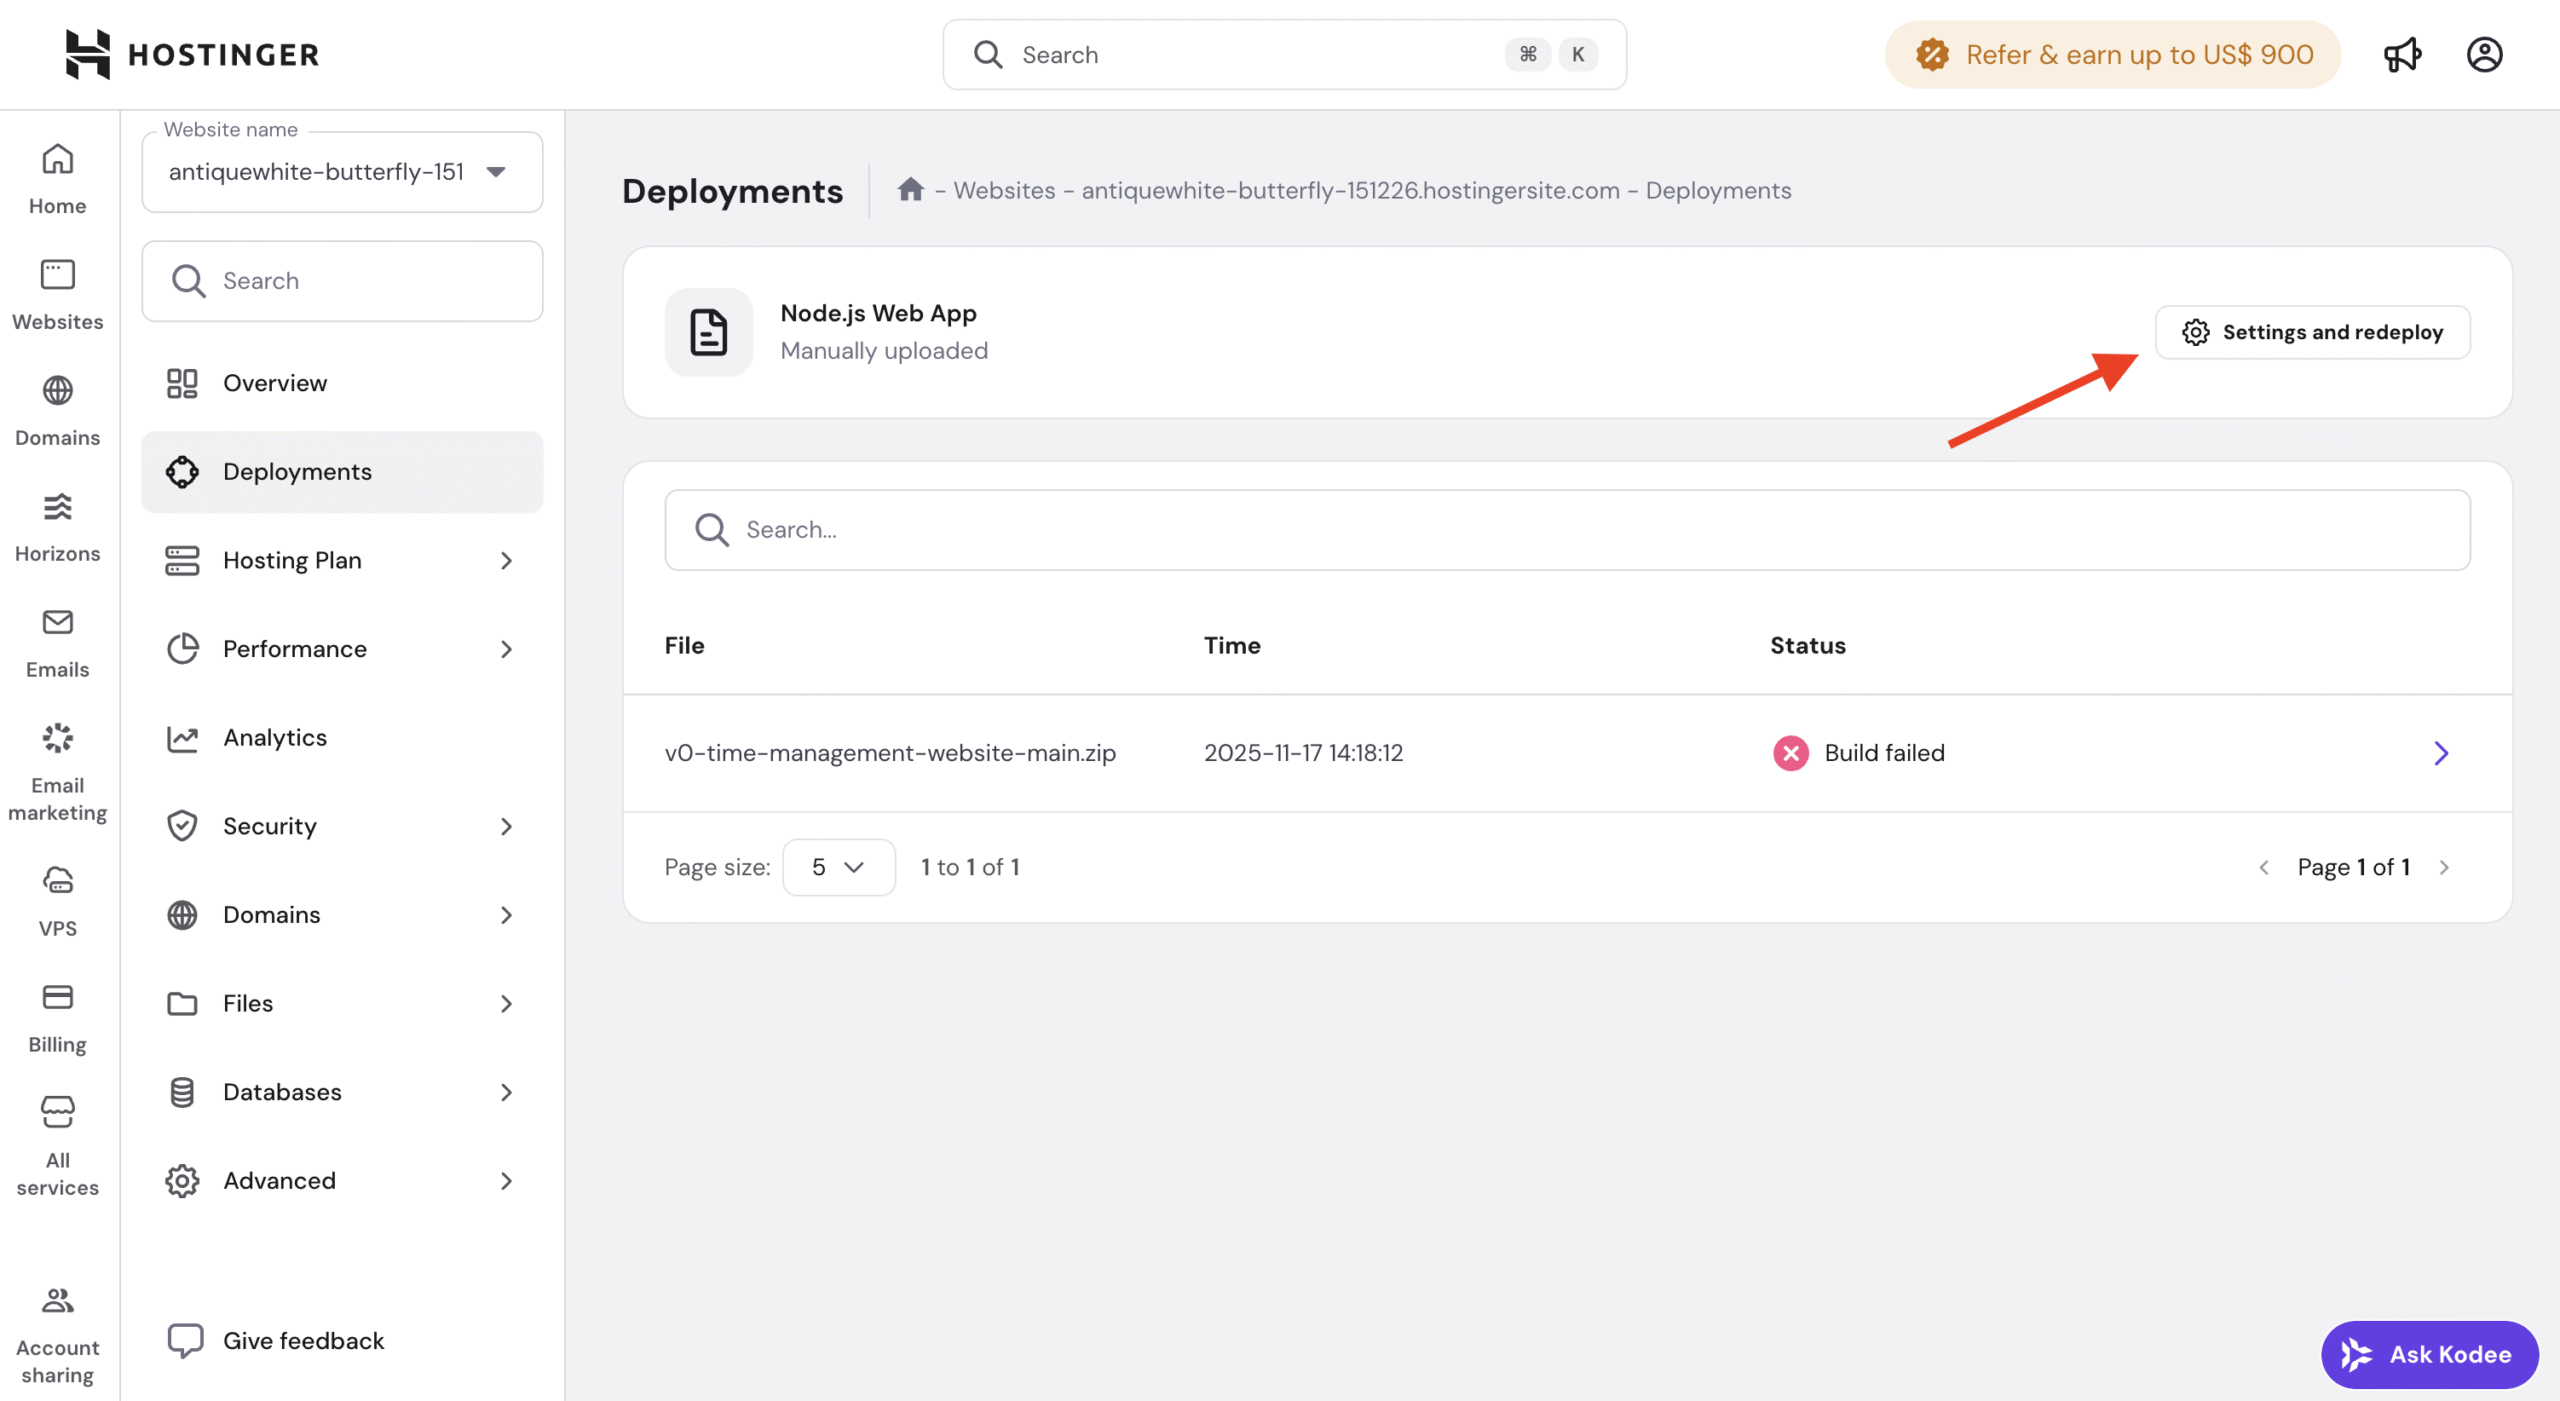
This will also open the redeployment settings page.
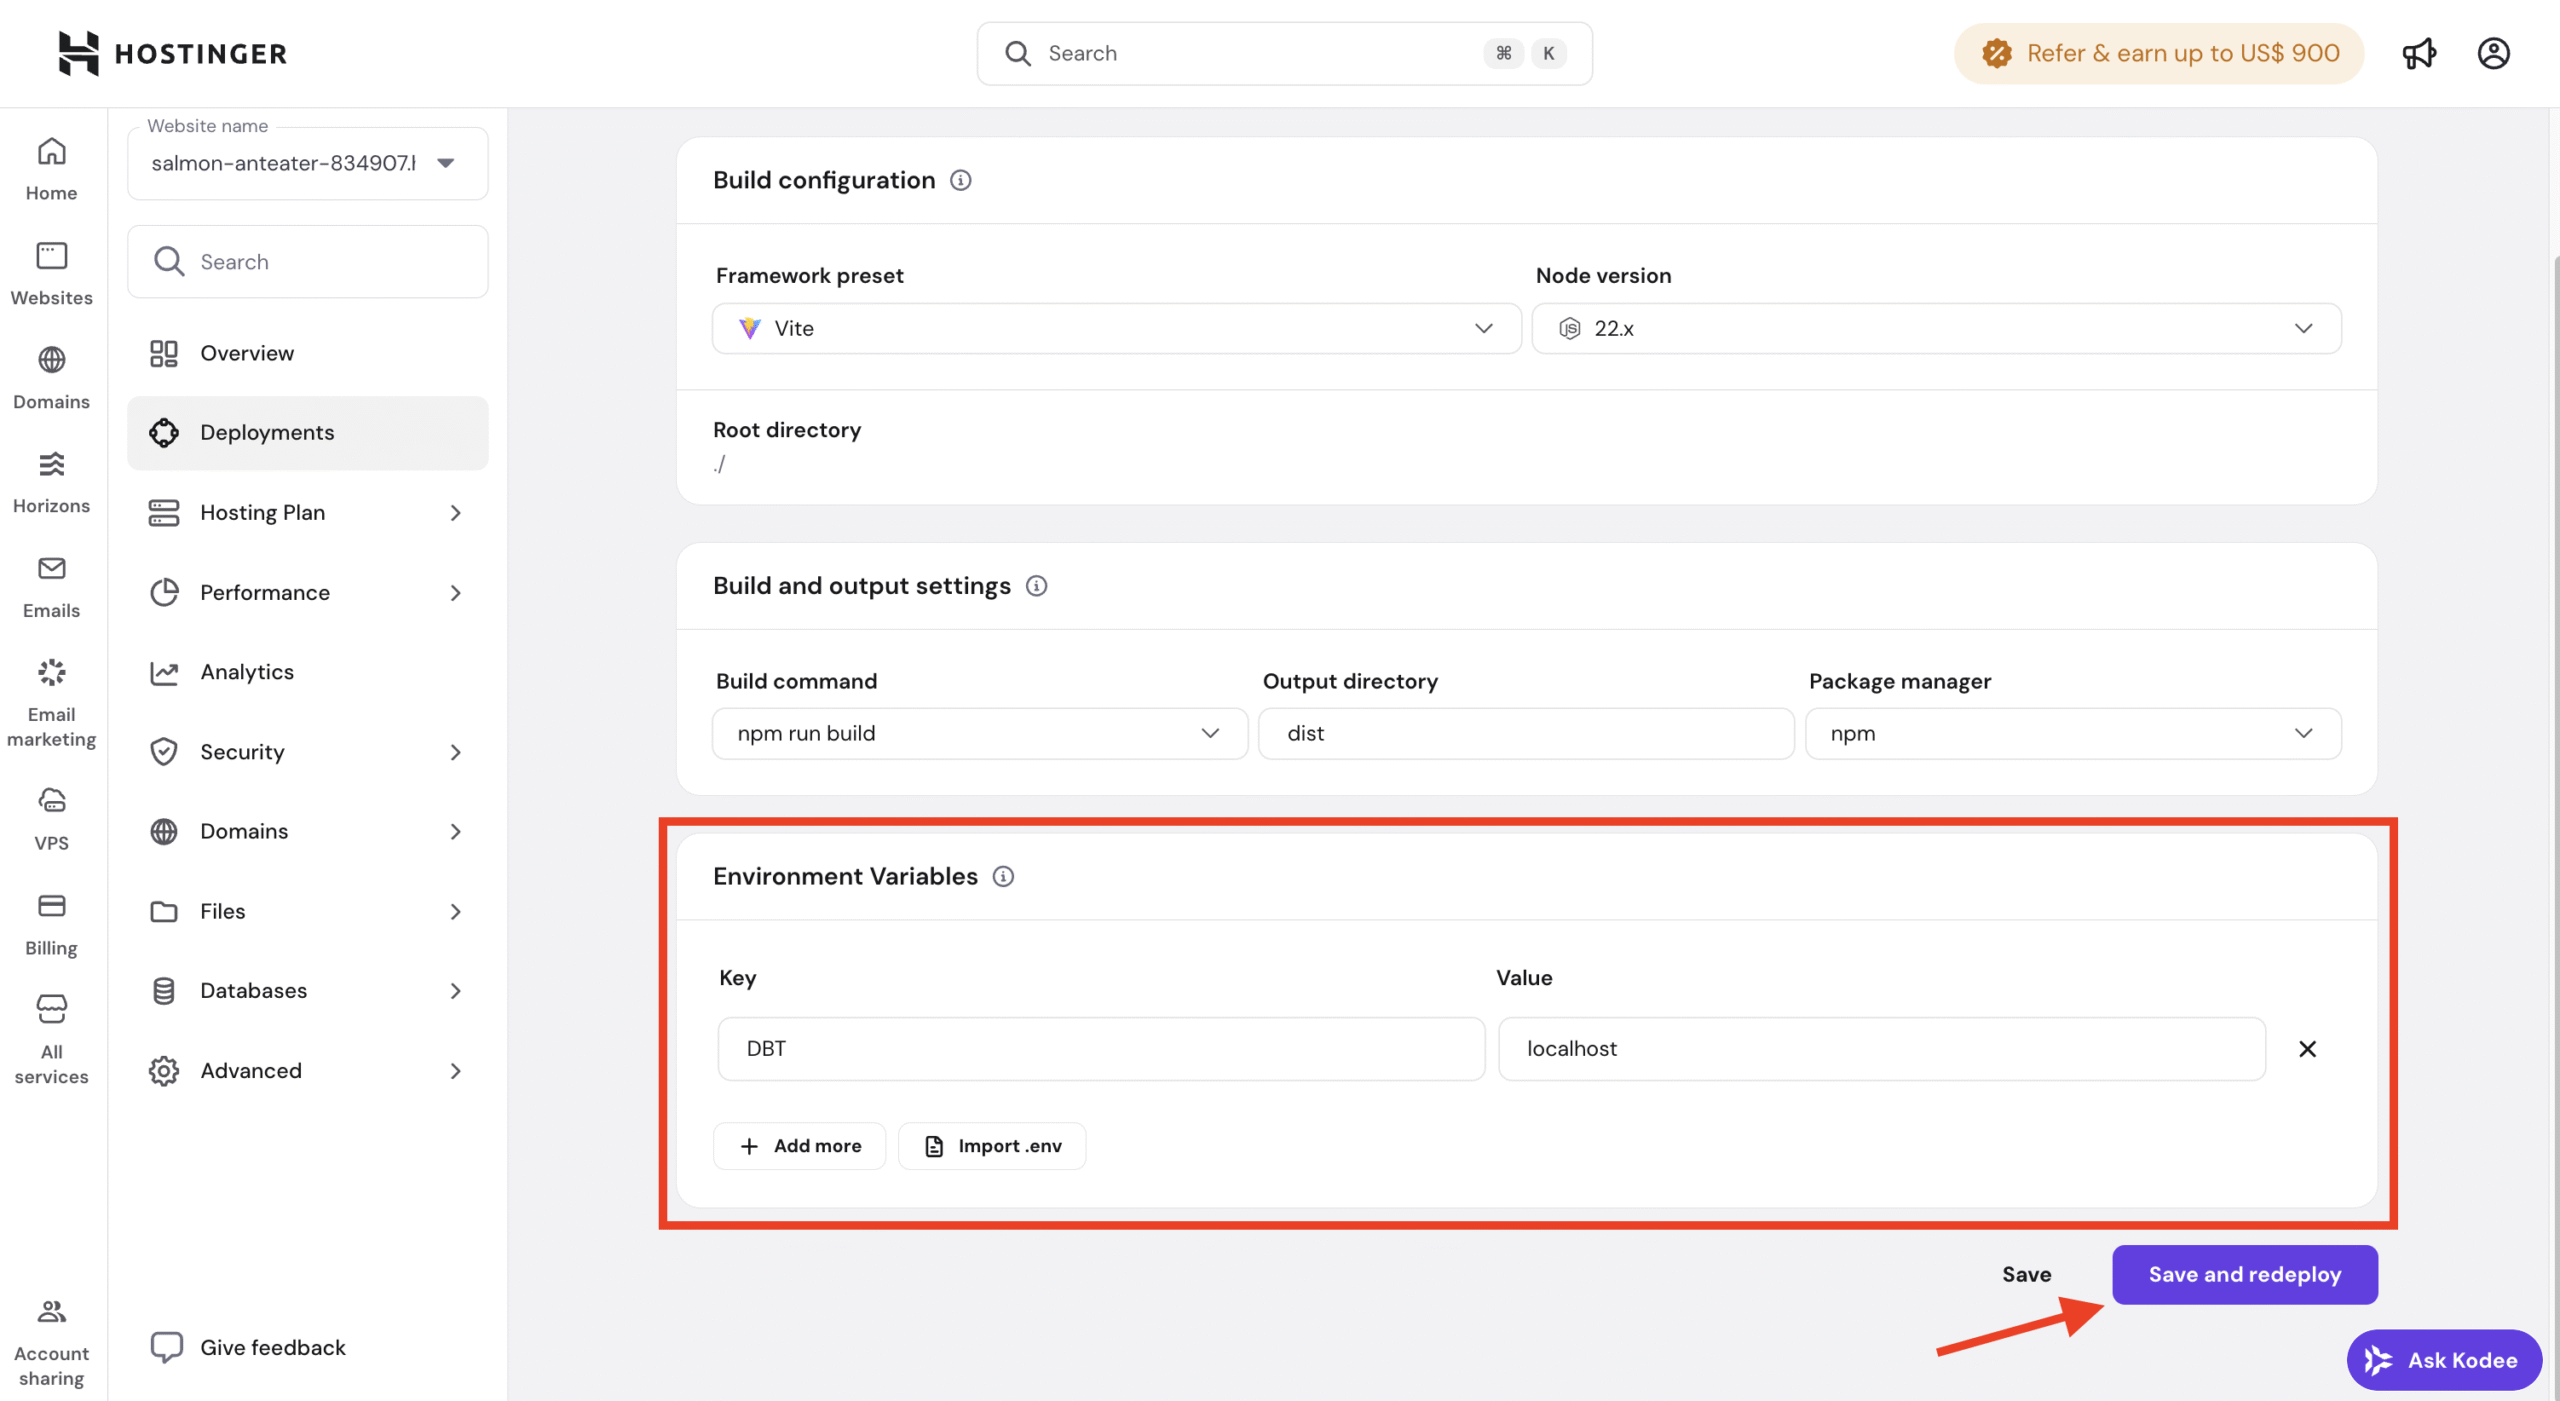
How to edit or add environment variables
Once you are in the Settings & Redeploy flow:
-
Navigate to the Environment variables section.
-
Edit existing variables or add new ones as needed.
Review all environment variables to ensure values are correct.
Rebuilding applications
After modifying environment variables:
-
Confirm the changes.
-
Proceed with rebuilding the application.
The application must be rebuilt for updated environment variables to be applied.
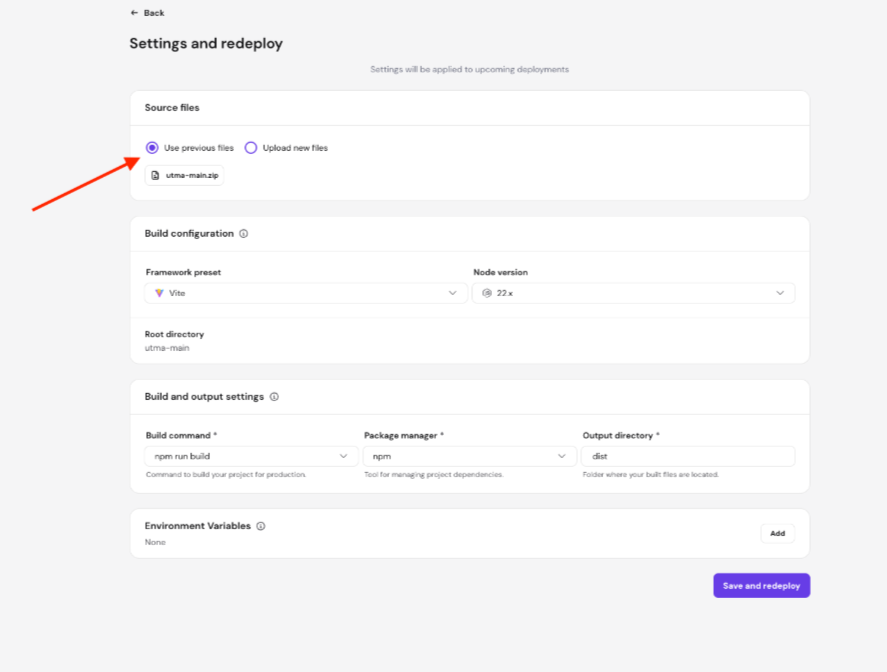
Important note about ZIP-based deployments
The redeployment process differs depending on how your application was originally deployed.
If your application was deployed using a ZIP file, your last uploaded file is automatically saved and pre-selected under Source files → Use previous files on the redeployment settings page.
When updating environment variables only — with no changes to your app’s code or content — you can proceed with the saved file without re-uploading. Select Upload new files only if you also need to deploy updated code at the same time.
When to update environment variables
You may need to update environment variables when:
- Adding new configuration values
- Updating database credentials
- Rotating API keys or secrets
- Changing environment-specific settings