You can migrate a WordPress website to Hostinger using a backup file – this is useful when your website is not accessible using the website URL and login credentials.
There are a few different plugins you can choose from to generate a backup.
Option 1 – Duplicator
-
Generate the backup
-
Install and activate the Duplicator plugin.
-
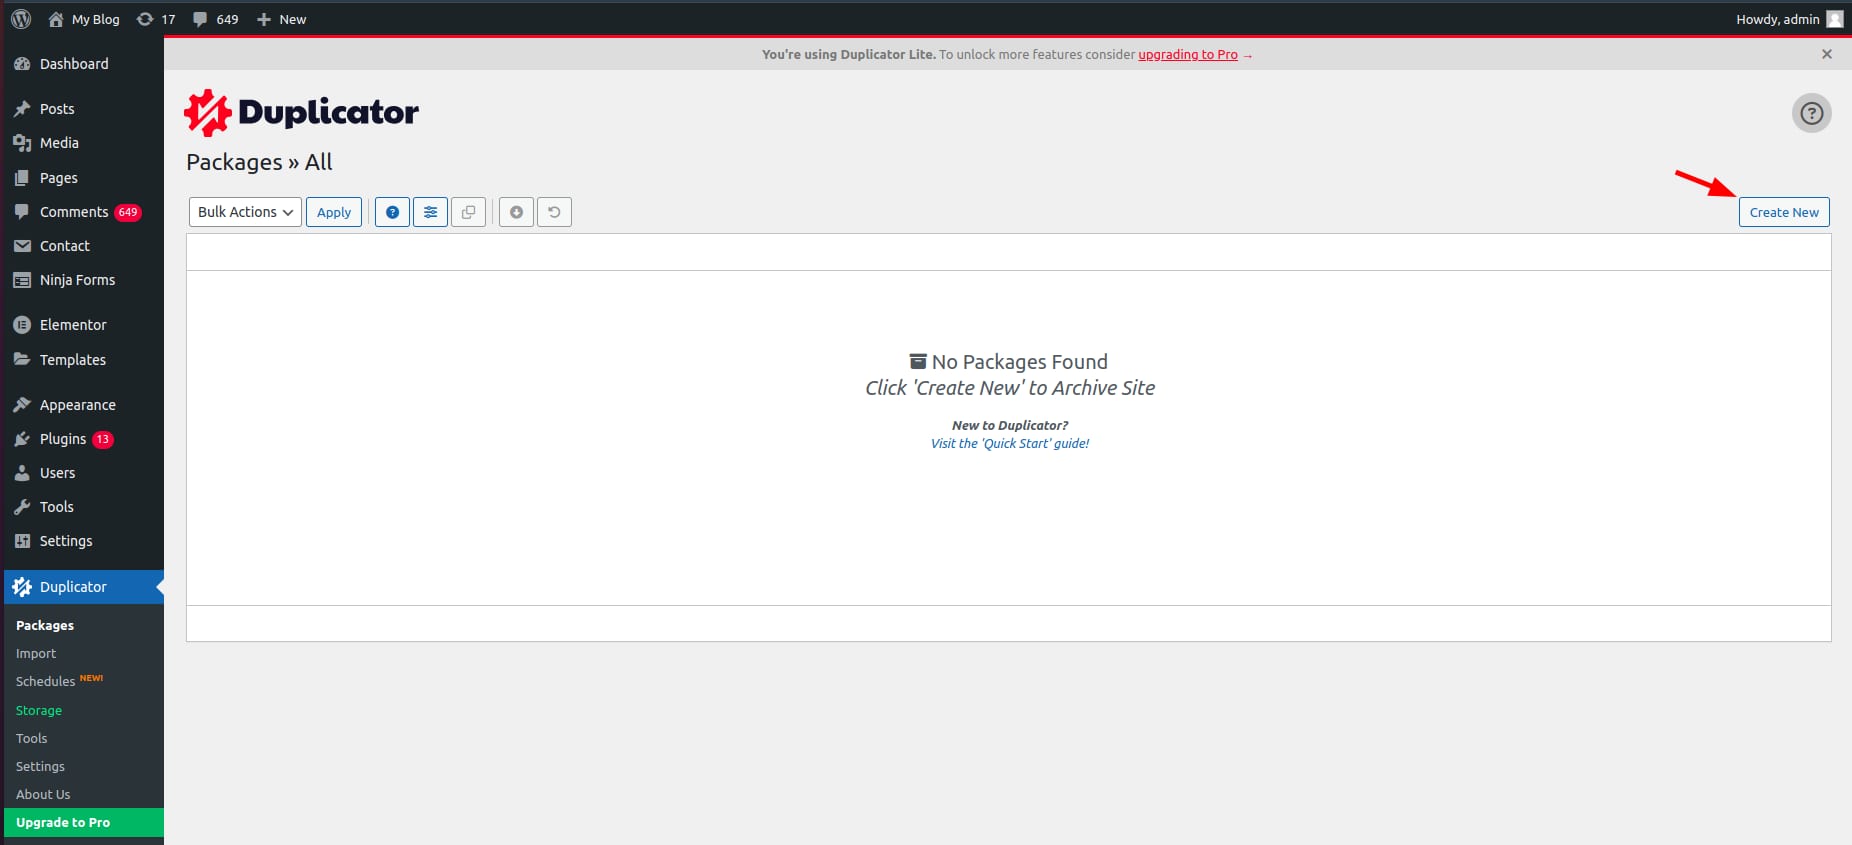
Navigate to Duplicator → Packages, and click on the Create New button:

-
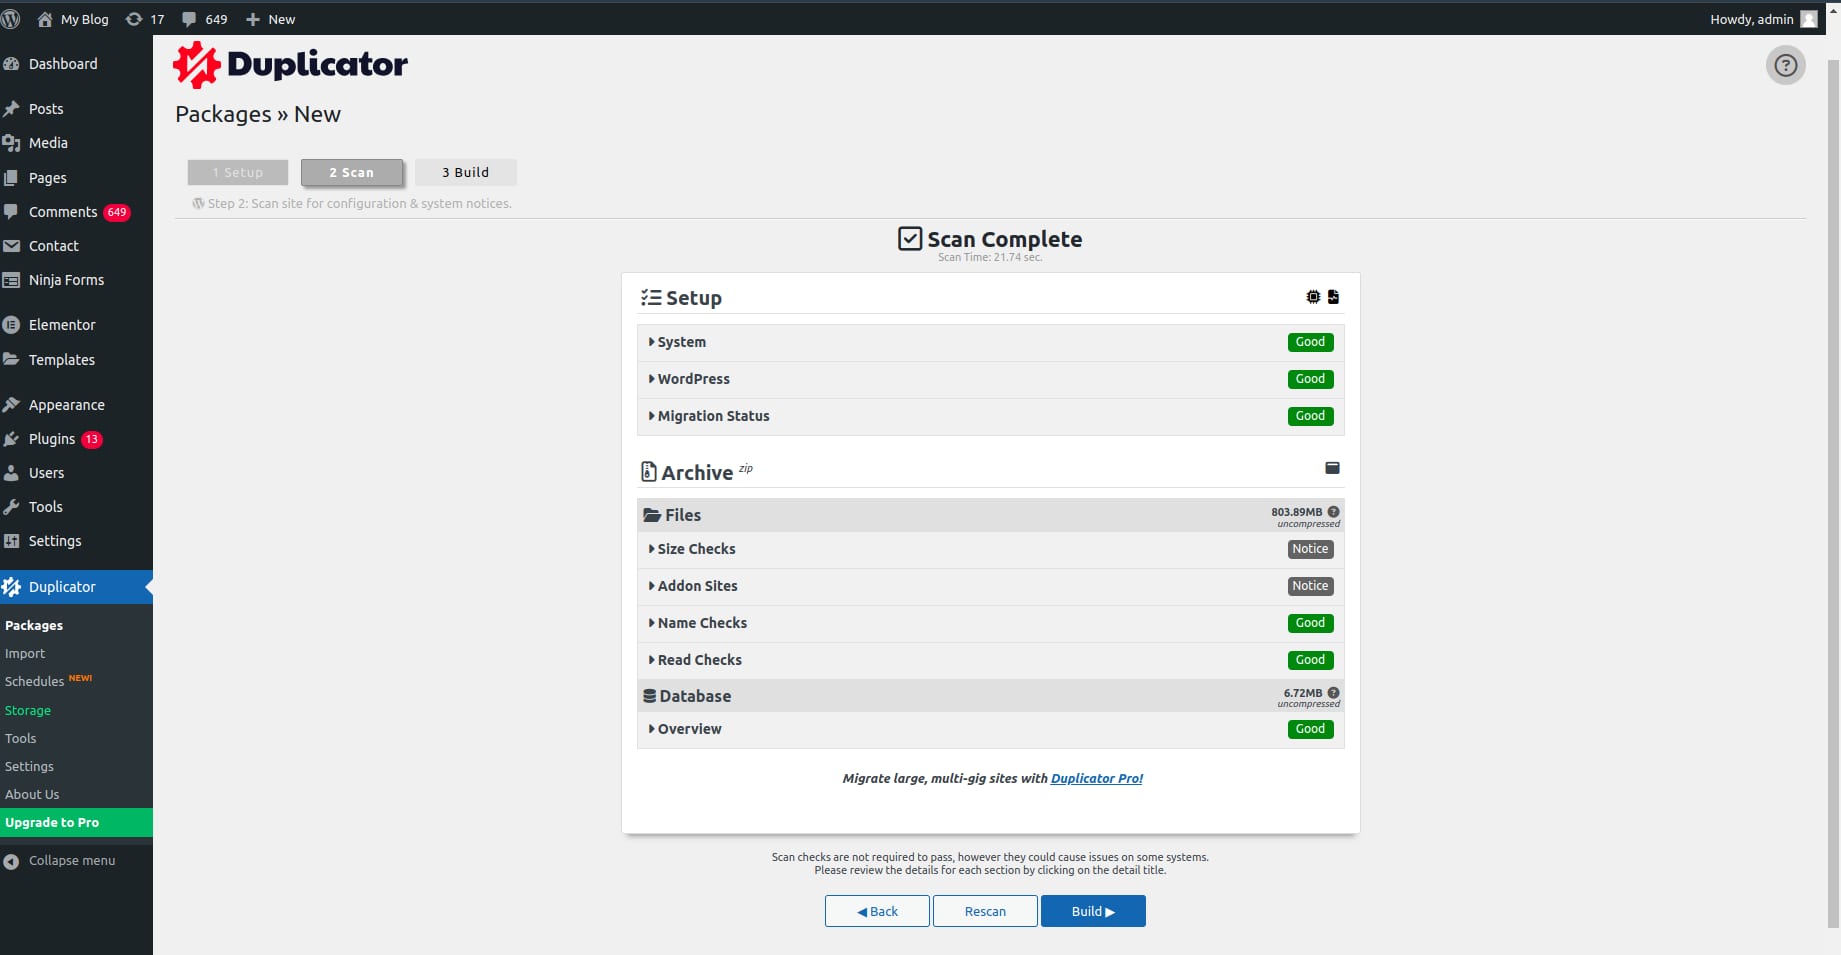
Setup your backup details then click Next. It will lead you to the second step, Scan.
-
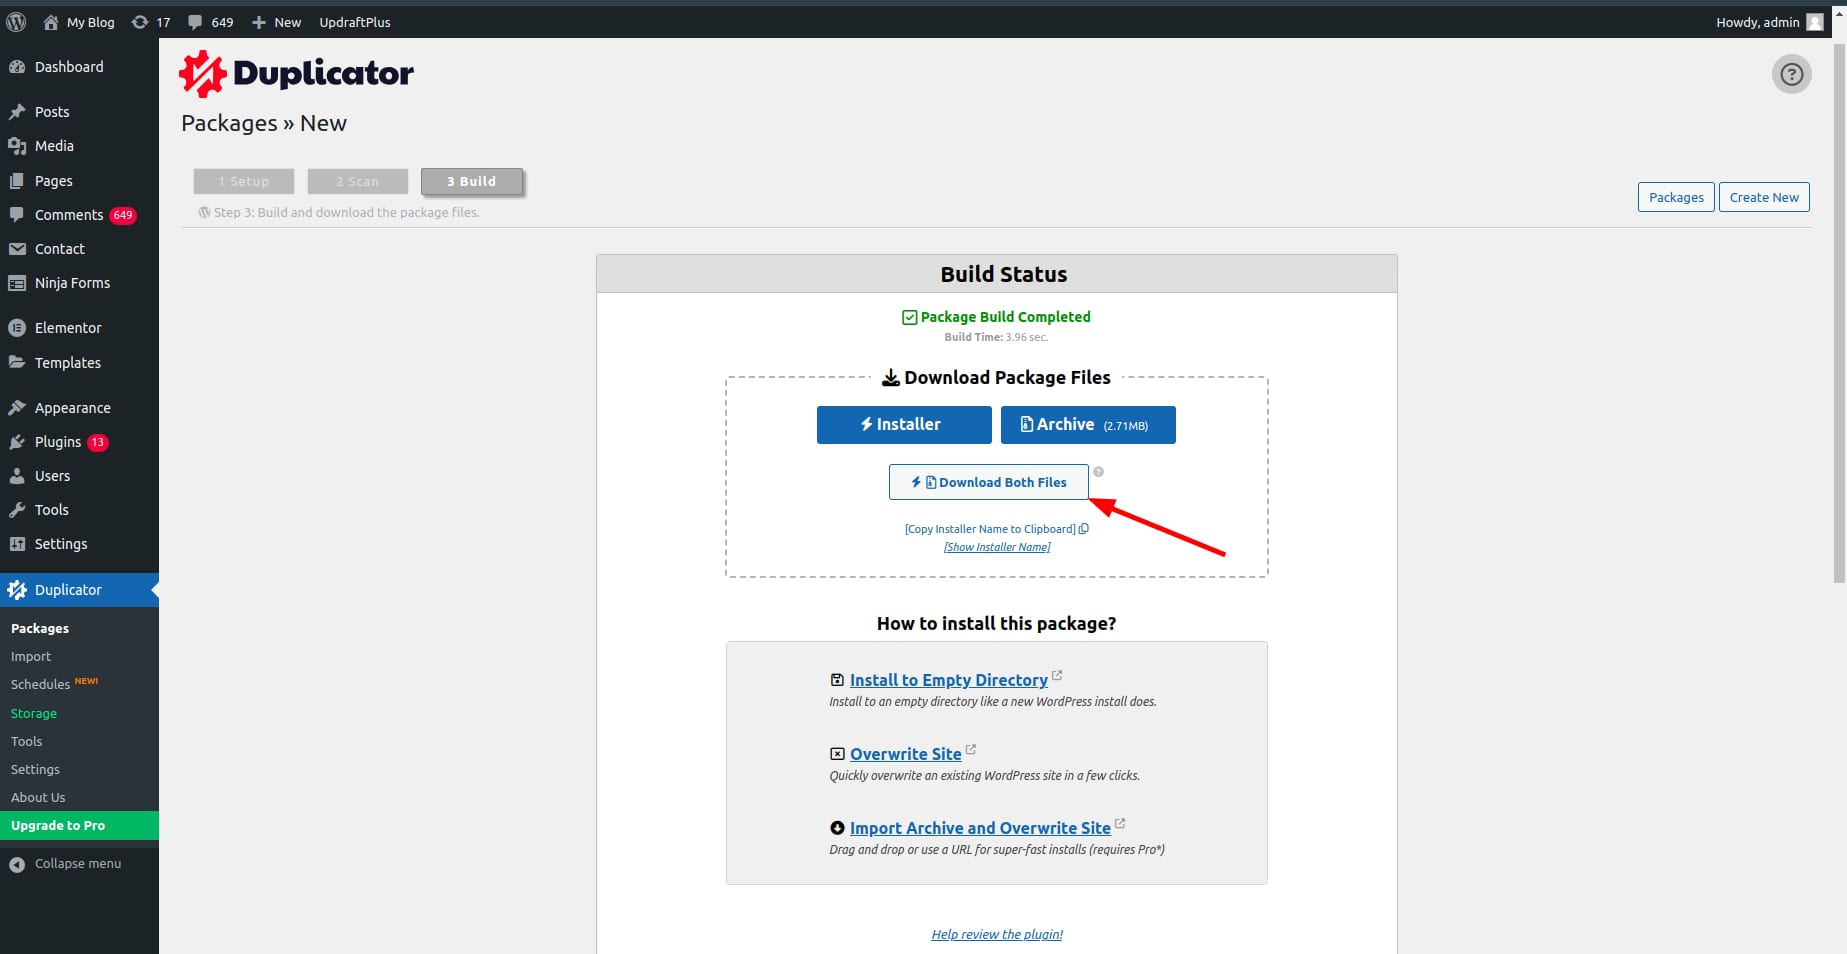
Once the scanning is completed,click Build to generate a backup:

-
-
Download the backup – Wait until the backup build is completed. You can download the .zip backup file directly from the Download both files button. The backup also can be located in the /wp-content/backups-dup-lite folder or other folder depending on your Duplicator storage setting:

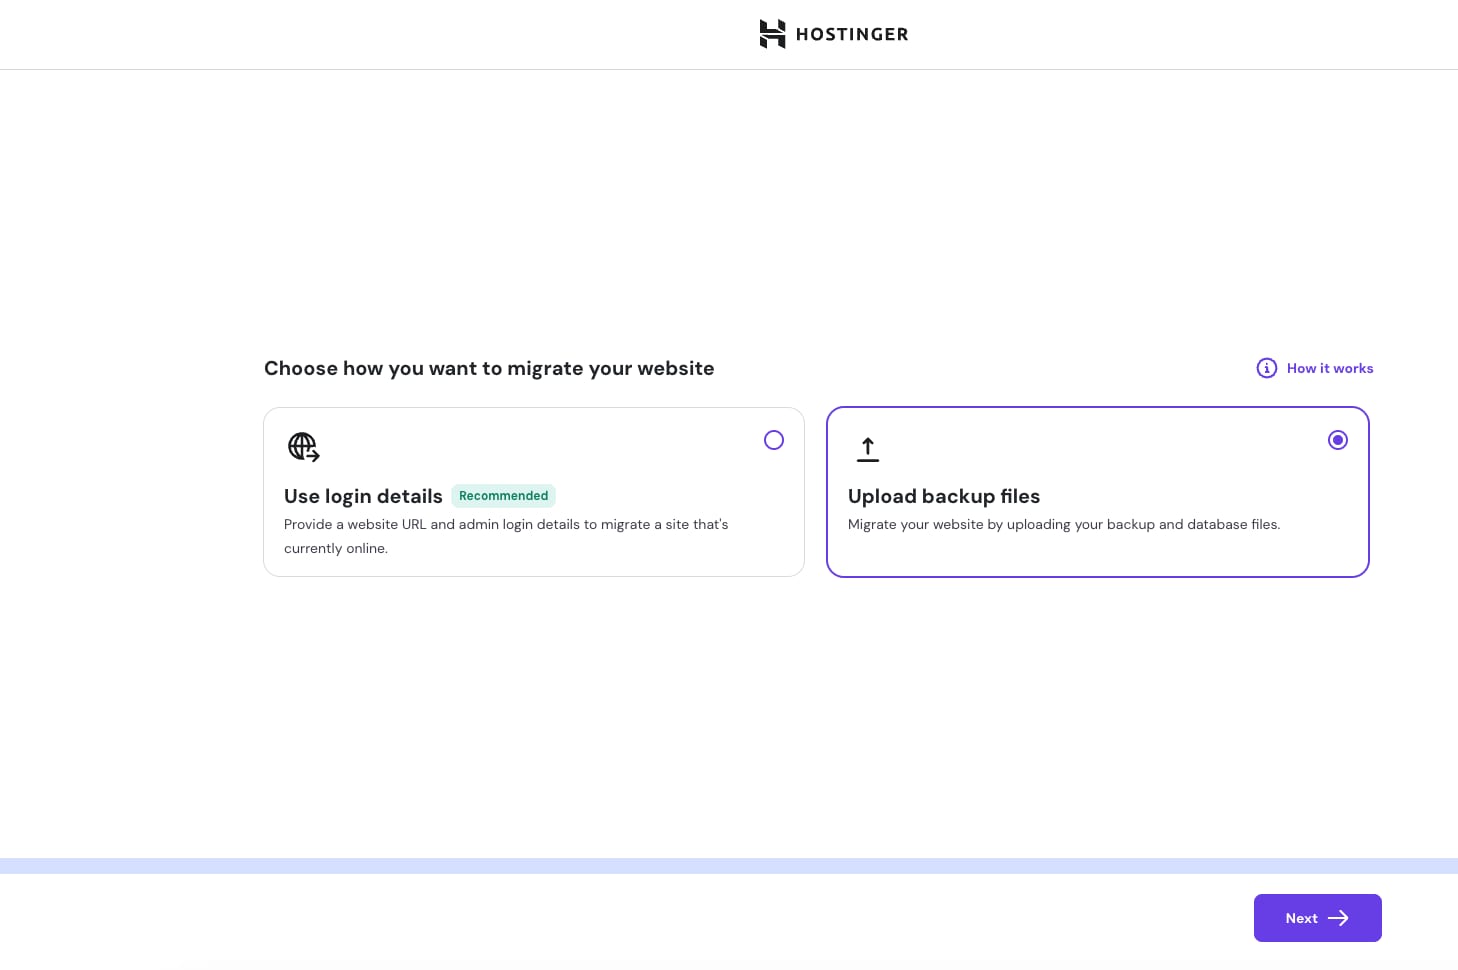
Upload the backup – Create a migration request on hPanel and select Upload Backup Files.
Option 2 – UpdraftPlus
-
Generate the backup
-
Install and activate UprdaftPlus plugin.
-
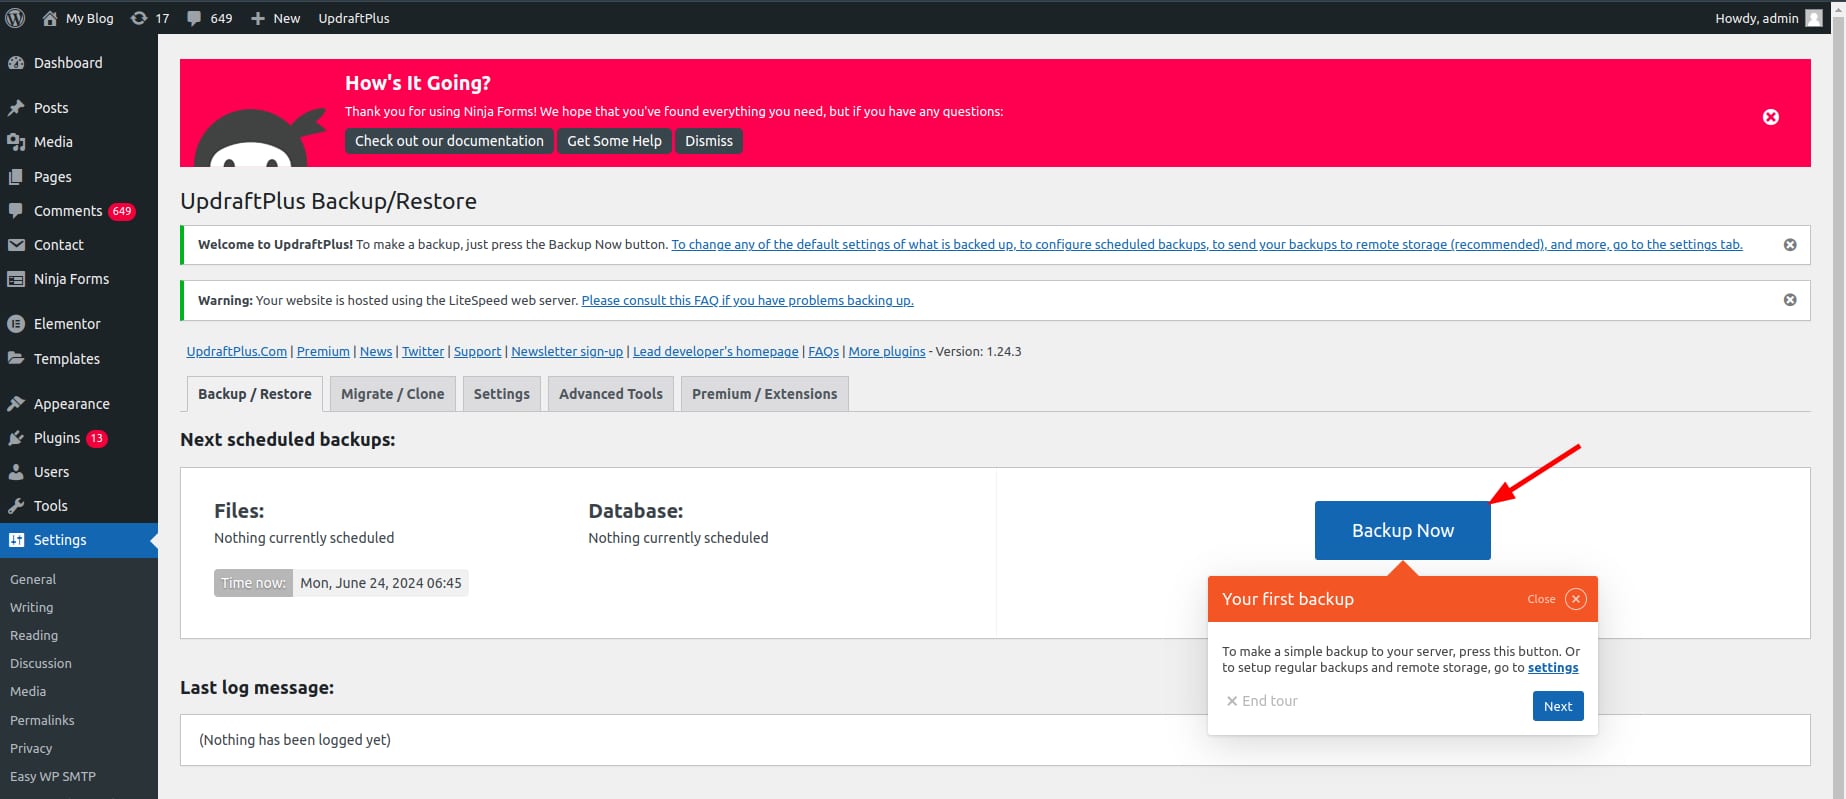
Navigate to Settings → UpdraftPlus Backups and click on Backup Now:

-
-
Download the backups – These backups are also stored in the /wp-content/updraft folder on your website’s file manager:

-
Compile all backups into one compressed file – Make sure to include all the plugins, themes, uploads, database, and other required files. You can use the following formats for the archive: .tar, .tar.gz, .zip or .rar
-
Upload the backup – Create a migration request on hPanel and select Upload Backup Files.


Option 3 – WP Vivid
-
Install and Activate WPvivid Plugin
-
Go to your WordPress dashboard.
-
Navigate to Plugins > Add New and search for WPvivid Backup Plugin.
-
Click Install Now, then activate the plugin.
-
-
Create a Backup with WPvivid
-
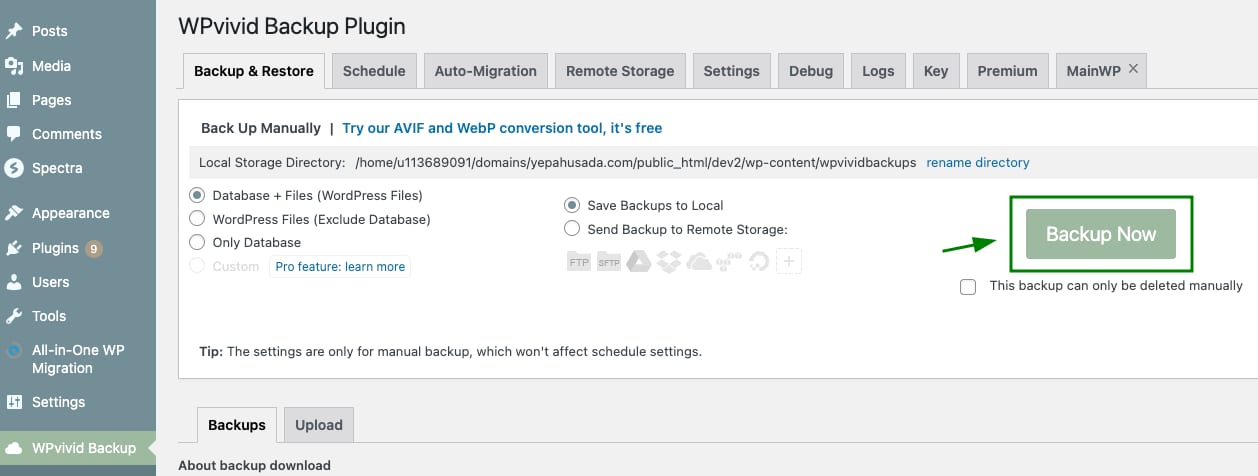
In your WordPress dashboard, go to WPvivid Backup > Backup & Restore.
-
Click the Backup Now button to start the backup process.

-
-
Download the Backup File
-
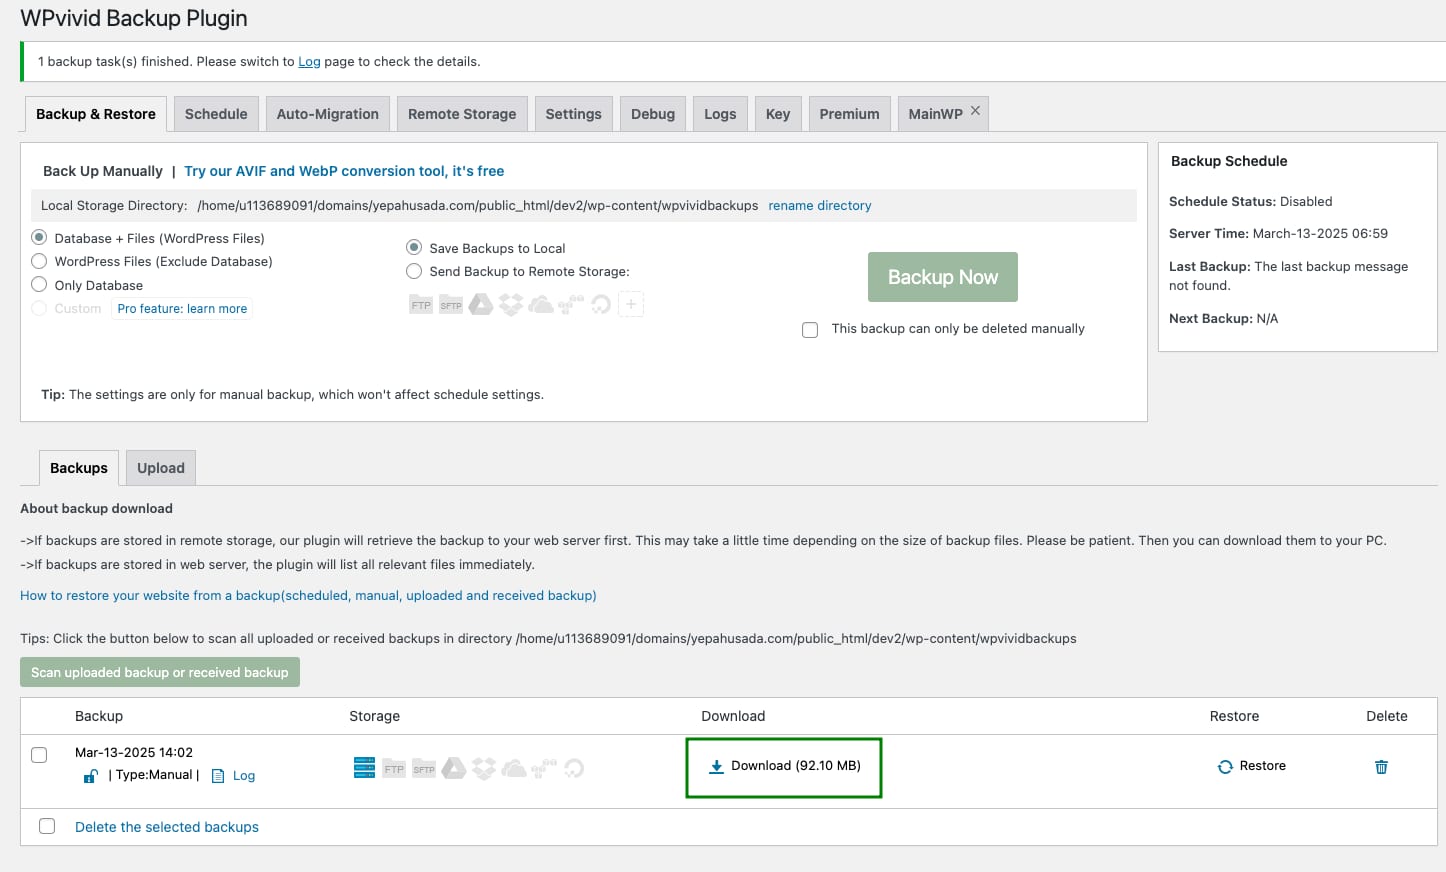
Once the backup process is complete, scroll down to the backup list.
-
Click Download to save the backup file to your computer.

-
-
Upload the Backup for Migration
-
Create a migration request on hPanel
-
Select Upload Backup Files and choose the backup file you downloaded from WPvivid.
-