At Hostinger, you can effortlessly add and manage clients, all within our hPanel’s user-friendly interface. In addition to adding new clients, you can pre-select a hosting plan for them to make their onboarding journey more efficient and time saving.
You have two alternatives for this process, and both can be accessed from the Home section of your hPanel 👇
Option 1 – Account Sharing
-
On the Home section of your hPanel, click on Account Sharing

-
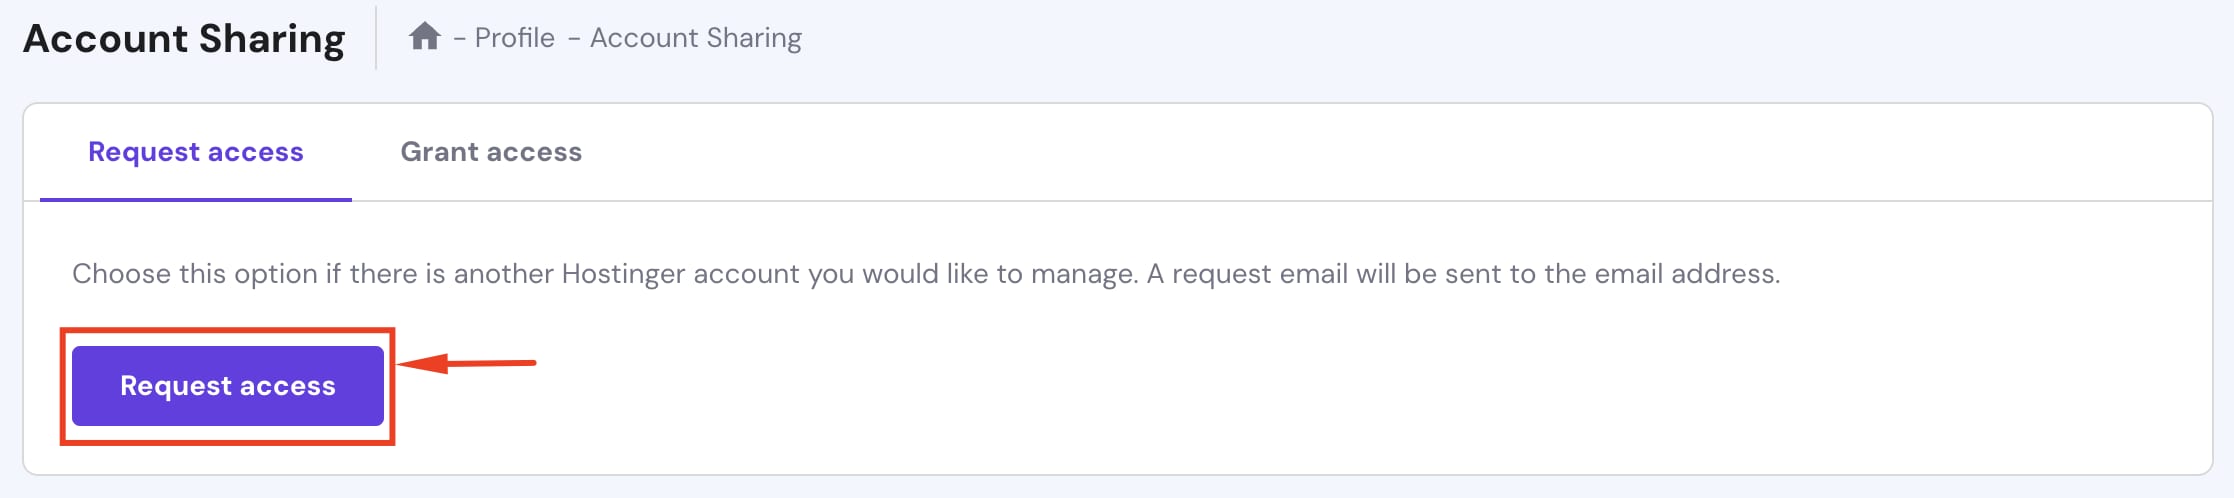
You will be redirected to the Account Sharing page. Click on Request access:

-
Enter the email address of the account you wish to request access to, and select the access level. Click on Add hosting plan:

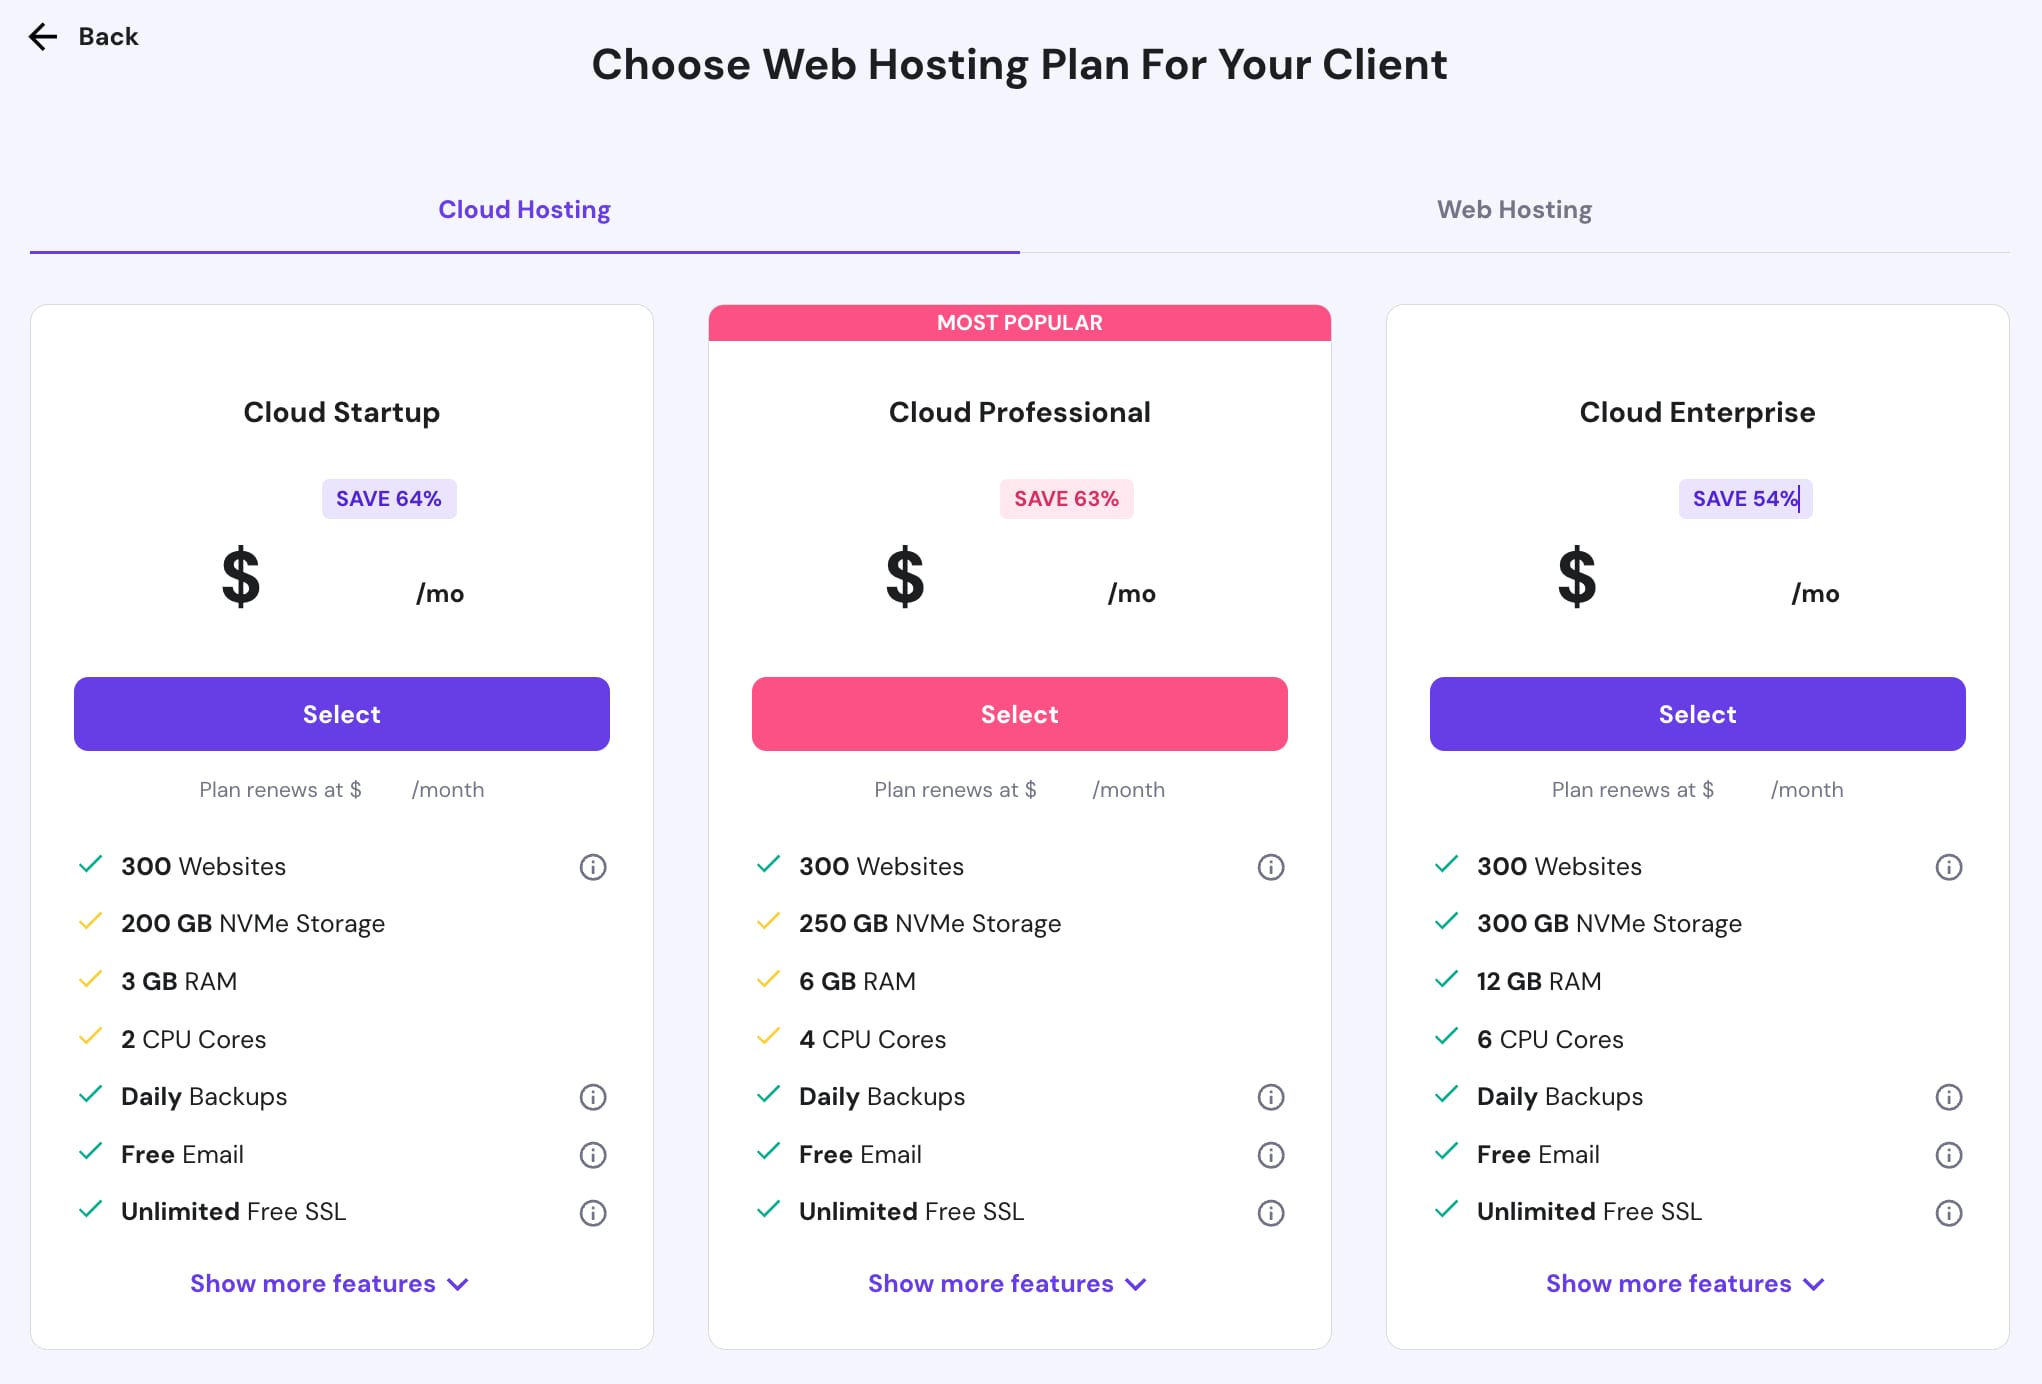
And choose the web hosting plan for your client:

-
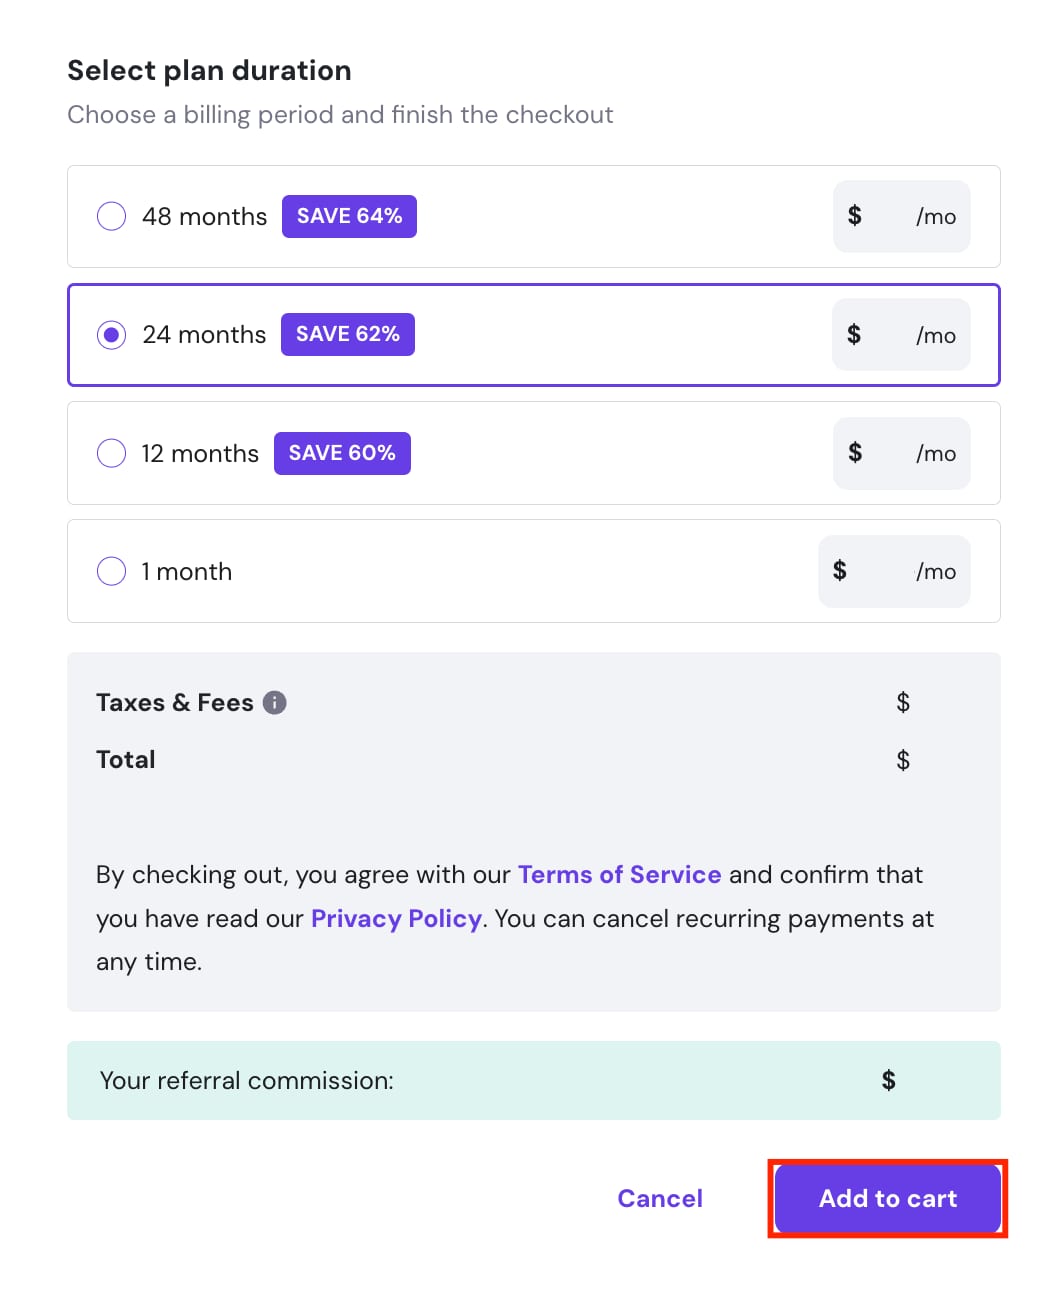
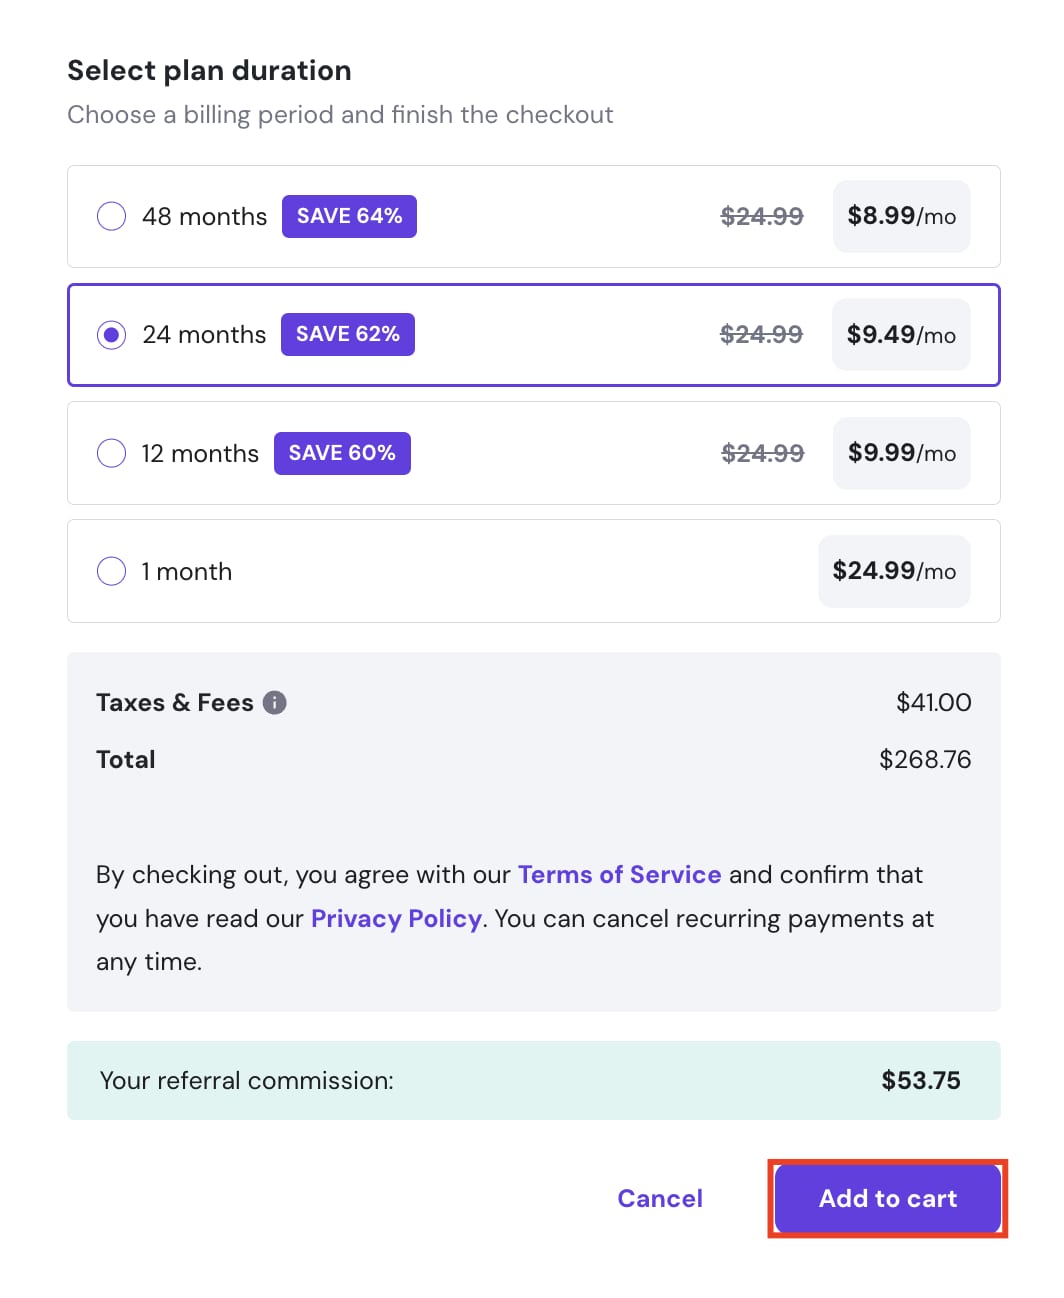
Select the plan duration and click on Add to cart:

-
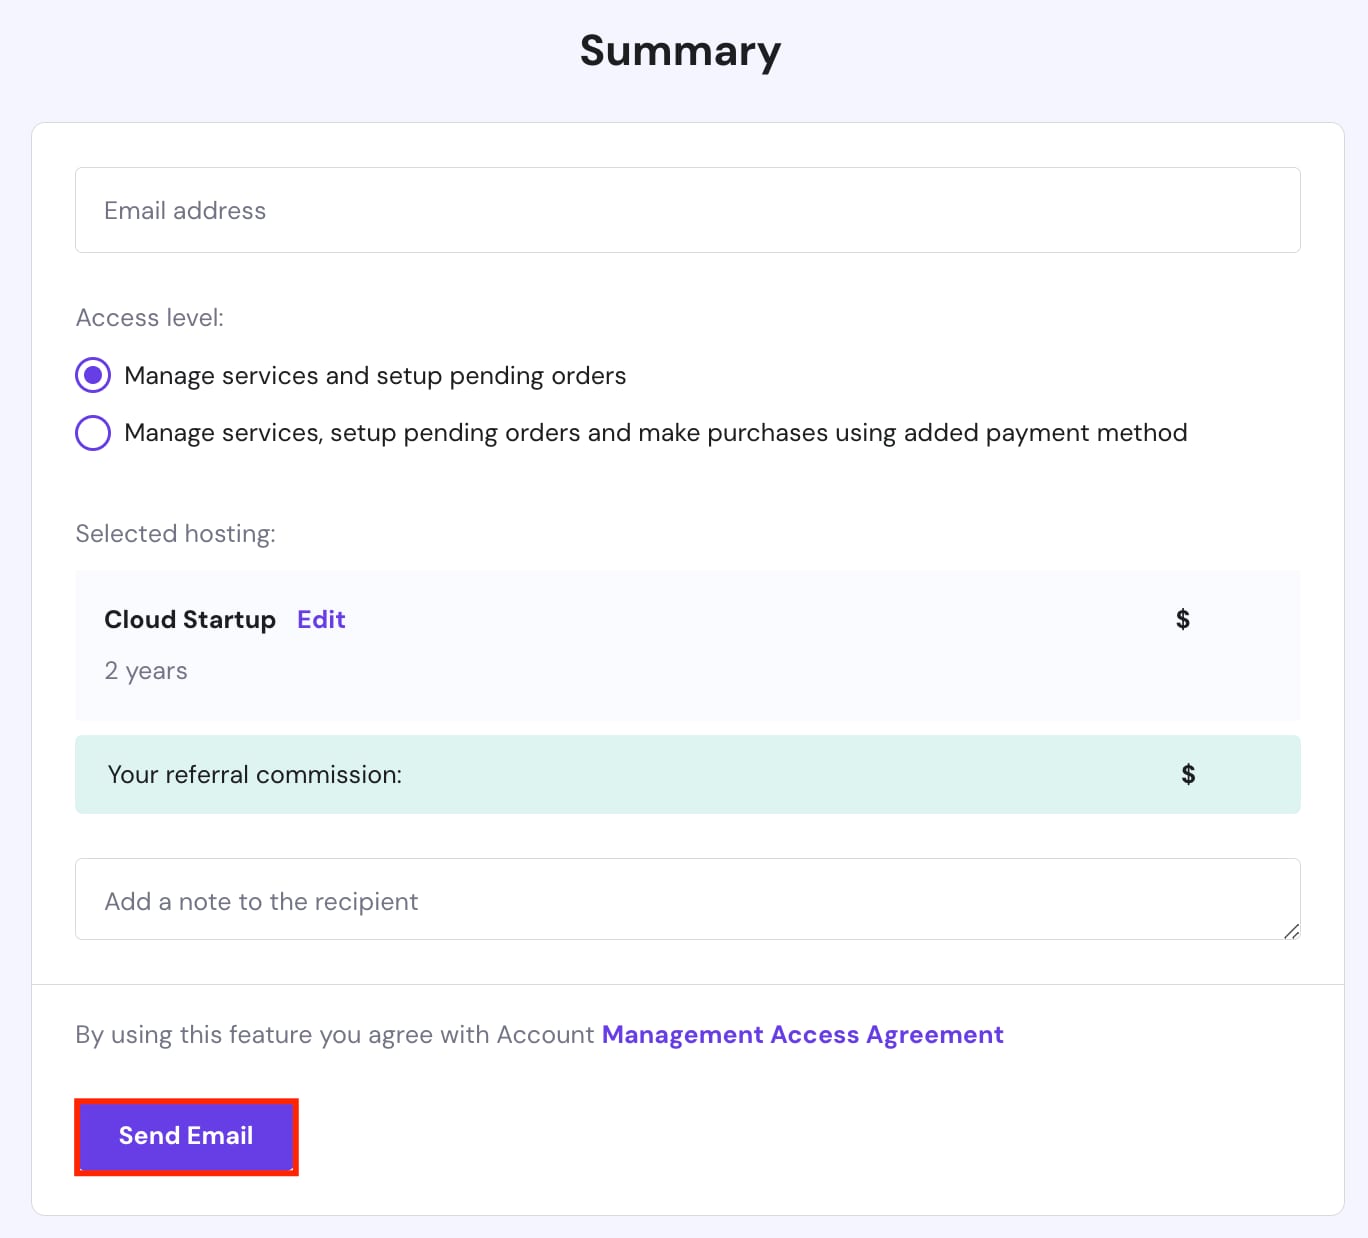
Confirm the request summary and click on Send Email:


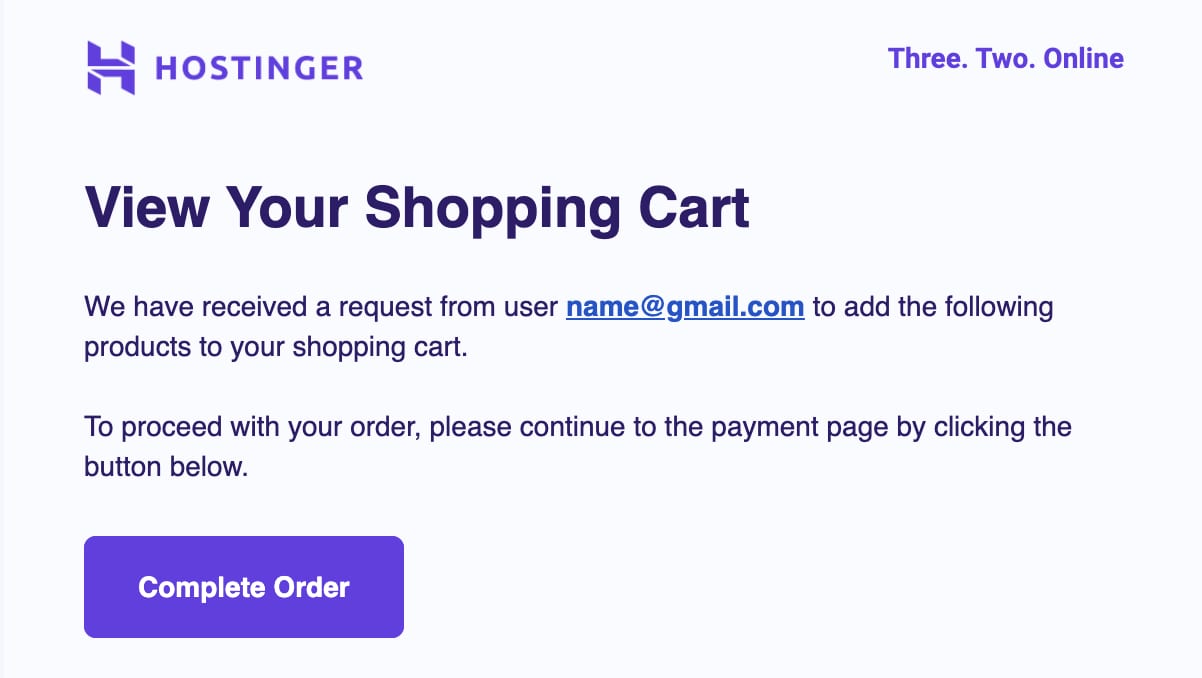
6. An email will be sent to the requested account to grant access and complete the order:
Option 2- Referrals
-
Click on Referrals in the Home section of hPanel:

-
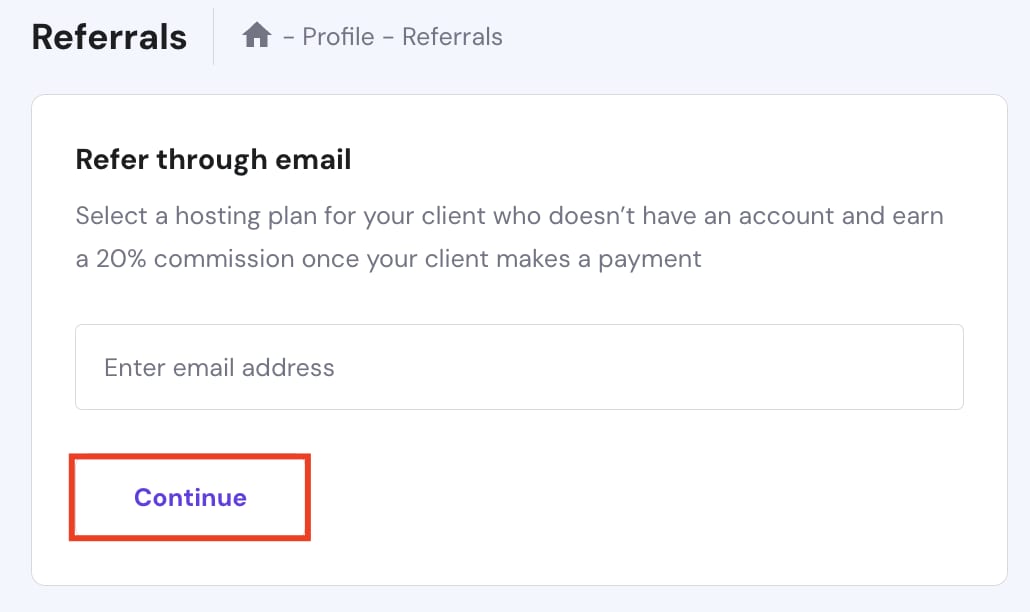
You will be redirected to the Referrals page. To invite your client, enter their email address and click on Continue:

-
Choose the web hosting plan for your client:
-
Select the plan duration and click on Add to cart:
-
Confirm the request summary and click on Send Email:
-
An email will be sent to the requested account to grant access and complete the order:


That’s it! By clicking on the Complete order button, your client will be able to make the purchase on their side.