You can set up a PrestaShop website with the Auto Installer from hPanel in just a few clicks by following the steps below.
Step 1 – Open Auto Installer
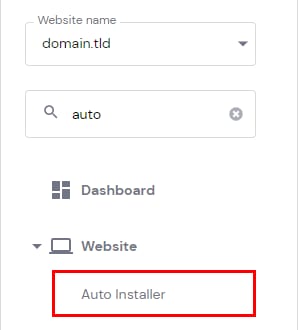
On your panel, go to Websites → Manage, search for Auto Installer on the left sidebar, and click on it:
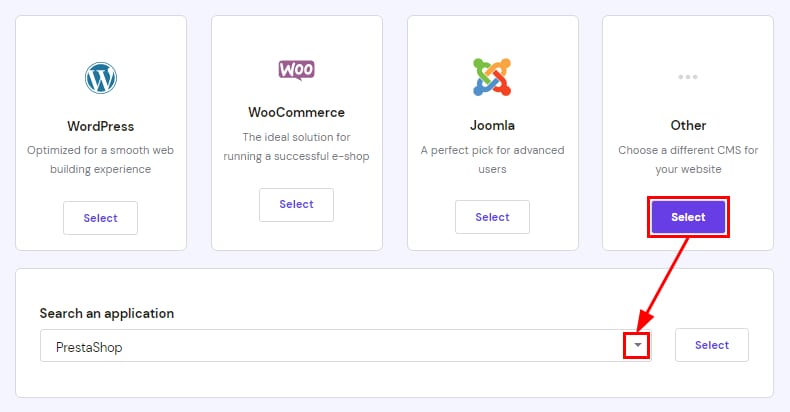
Once there, select Other, use the search bar to find PrestaShop, and click on Select:
Step 2 – Insert the installation details
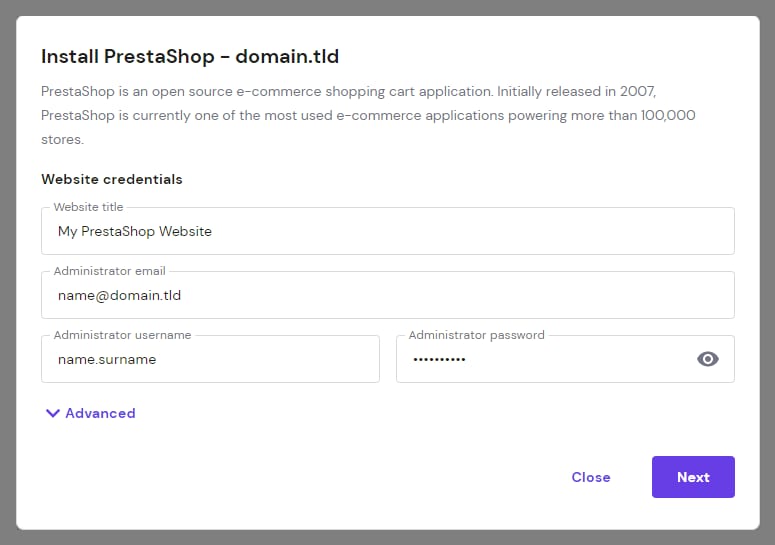
Fill in all the required details:
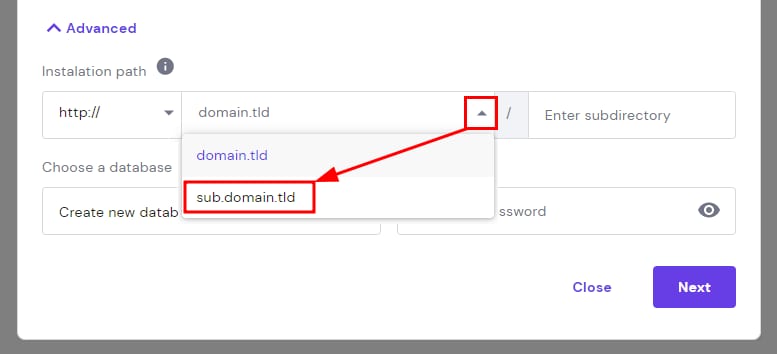
If you want to install PrestaShop on a custom subdirectory or use an existing database, choose Advanced and fill in the information:

There you can also choose to install on a subdomain:
Once that’s done, click on Next, select application version, update settings, and click on Install, and the application will be installed in a few minutes.
Step 3 – Access PrestaShop Admin Panel
To access your PrestaShop Administration Page, on the Auto Installer page, click on the options button (⋮) next to the application and select Manage:
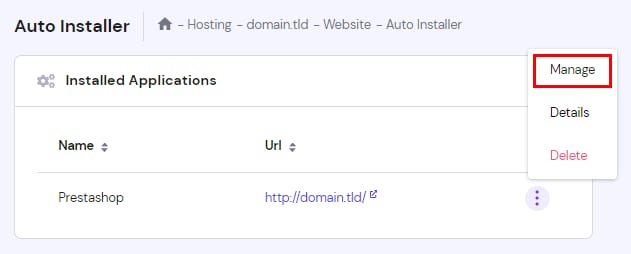
You will be redirected to the PrestaShop login page. Just enter the credentials you created during the installation process 😊
The Website Shows “Too Many Redirects”, What to Do?
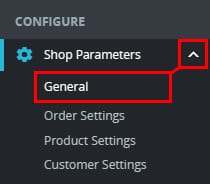
If you encounter an ERR_TOO_MANY_REDIRECTS message when opening your website, it is due to a mismatch in the SSL configuration. To fix it, open your PrestaShop Admin Panel and select Shop Parameters → General on the sidebar:
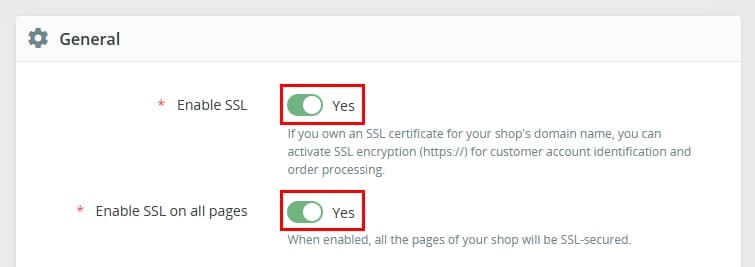
Activate Enable SSL by clicking on the toggle, scrolling down, and clicking on Save to apply the changes. Then, activate Enable SSL on all pages and save the changes once again. The end result should be for both to be set to Yes:
Once enabled, you can now visit your website on an incognito window to verify that it is working properly.
Additional resources:
-
Feel free to check our collection of Tutorials on PrestaShop