Learn how email notifications work in your online store created with Hostinger Website Builder and how to customize your transactional email domain.
When running an online store with Hostinger Website Builder, email notifications are automatically sent:
- To you — when a new order is submitted
- To your customers — for order confirmations and other transactional updates
You can customize the sender domain of these transactional emails to better represent your brand. Using your own domain helps you:
✅ Strengthens your brand identity
✅ Builds more trust with customers
✅ Improves email recognition and open rates
✅ Creates a more professional, store-focused experience
Make Sure Your Website Has a Connected Domain
Before setting up a custom sender domain, your website must have a connected domain. If no domain is connected, transactional emails will be sent from noreply@store.hostinger.com.
To connect a domain, follow this guide: How to connect a domain to Hostinger Website Builder.
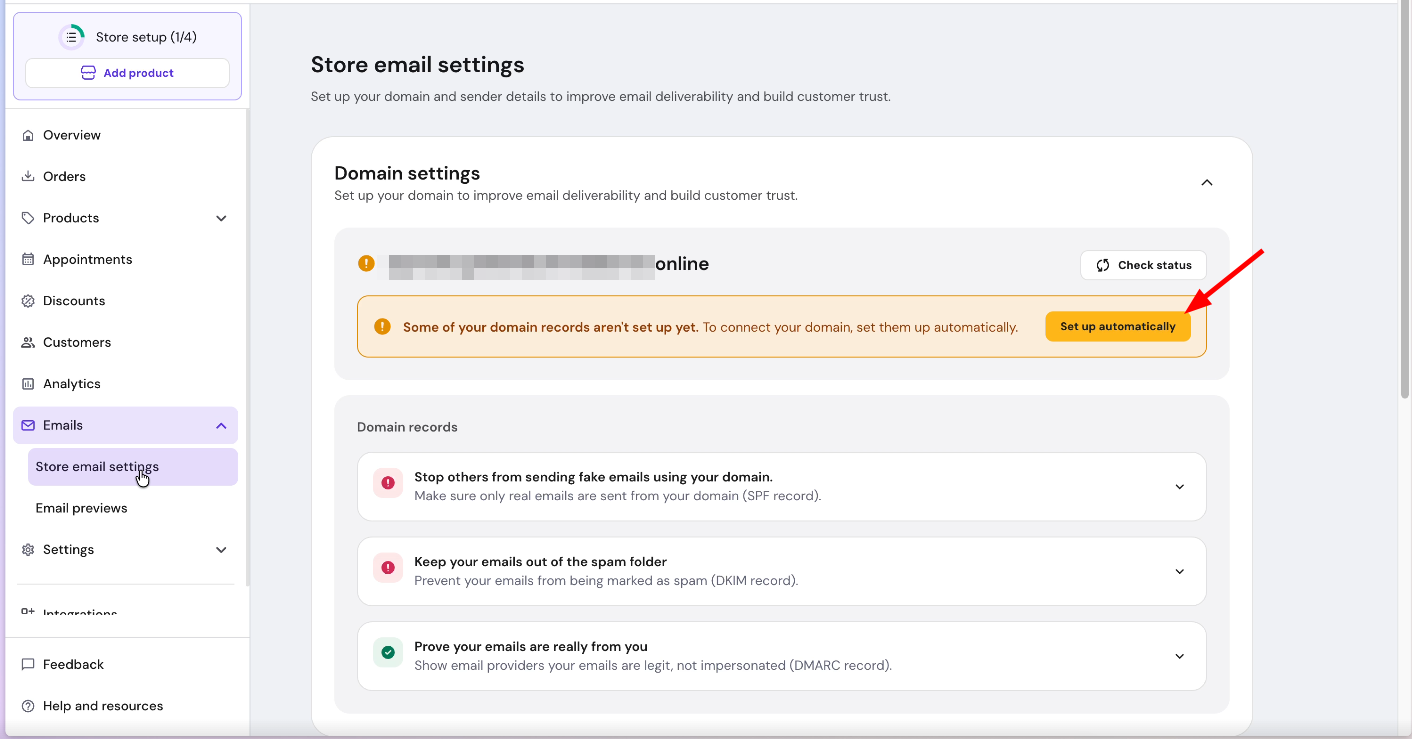
Go to Store settings → Emails to configure your sender domain. What you see depends on your domain setup:
- Hostinger domain — DNS records (SPF, DKIM, DMARC) can be applied automatically using the Auto-configure button.
- External domain — the required DNS records are displayed for you to add manually at your domain provider. The Auto-configure button is not available, but Check Status remains available to verify propagation.
Customise Sender Details
Step 1 — Set up sender details
To ensure clear brand recognition, adjust the name and email prefix customers see in their inbox:
-
Log in to your Store Manager and go to Store settings → Emails → Sender details.
-
Enter your Sender name. We recommend using your business name.
-
Enter the Sender email prefix you wish to use.
Step 2 — Configure domain requirements
Custom sender email configuration is available for both Hostinger-managed domains and external (non-Hostinger) domains for Website Builder and Horizons stores.
Hostinger domain
-
Go to Store Manager → Emails → Store email settings.
-
Click Auto-configure. The required DNS records (SPF, DKIM, and DMARC) are added automatically.
External (non-Hostinger) domain
-
Go to Store Manager → Emails → Store email settings.
-
Copy the displayed DNS records (SPF, DKIM, and DMARC).
-
Manually add these records at your external DNS provider.
-
Use the Check Status button in your Store Manager to verify the configuration.
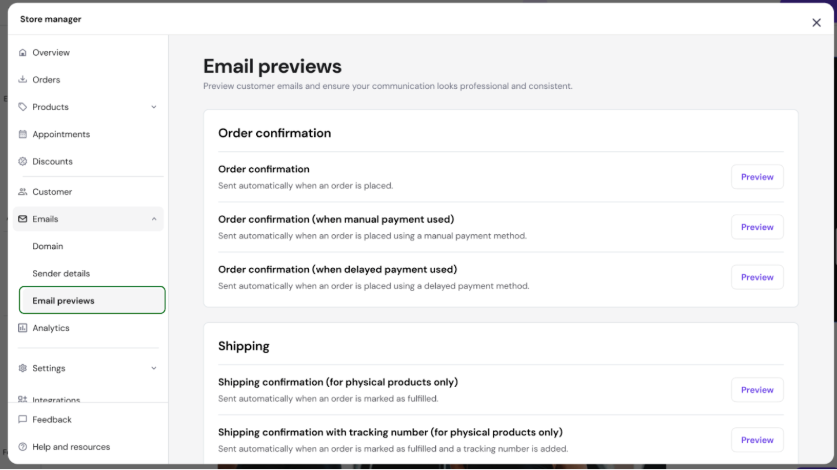
Step 3 — Preview emails
You can review the appearance of automated notifications by navigating to Store settings → Emails → Email previews.
To build trust and ensure clear brand recognition, you can adjust your sender details. Go to: Store settings → Emails → Sender details.
- Type in Sender name. We recommend using your website or business name.
- Type in Sender email.
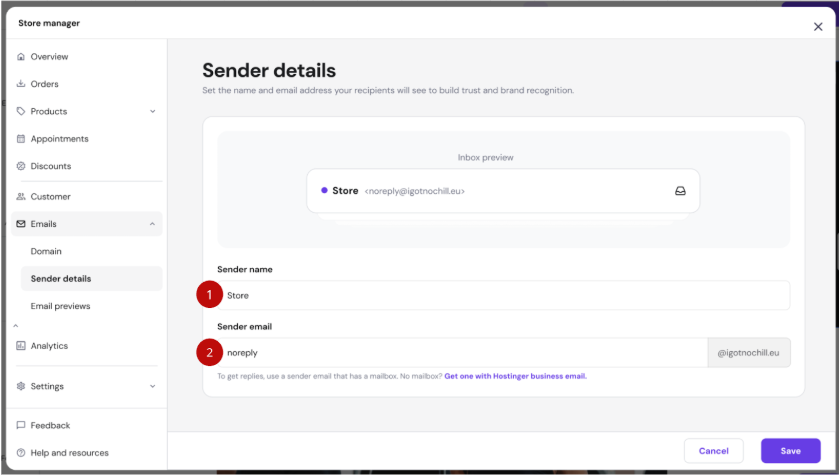
This email address will be used for all transactional emails sent from your store.
Preview Transactional Emails
You can preview all automatically sent email notifications in your store management area. Go to: Store settings → Emails → Email previews.
Email design and logo
All transactional emails sent from your store use a unified, modern design. This covers order confirmations, shipping updates, cancellations, digital product delivery, bookings, gift cards, invoices, product reviews, and low-stock alerts.
The Email previews page in Store settings → Emails shows the exact template your customers receive.
Store logo in transactional emails:
- New stores: the store logo is included in transactional emails by default.
- Existing stores: to add the logo, go to Store settings → Emails → Email settings and enable the logo option.

To set or update your store logo, go to Store settings → Company information.
Sending transactional emails from your own domain
Store owners can configure transactional emails (order confirmations, shipping updates, etc.) to be sent from a custom domain address instead of the default noreply@store.hostinger.com.
How to set it up:
1. Go to Emails → Store email settings in Store Manager.
2. Click Auto-configure — DNS records (SPF, DKIM, DMARC) are added automatically.
3. Set a custom sender name and email prefix (e.g., orders@yourdomain.com).

– Requires a connected Hostinger domain. Not available for Horizons stores or non-Hostinger domains.
– If the feature is not configured or a failure occurs, emails fall back to the default
store.hostinger.com sender.– DNS propagation may take up to 24 hours after setup.
Additional Information
- Emails are sent in the language specified in Checkout settings.
- Customers receive order confirmation emails immediately after submitting an order.
- Appointment confirmations and digital download emails are sent only after successful payment (once the order is marked as Paid).
- If a customer replies to a transactional email, the reply will be forwarded to the email address specified in: Store settings → Company information.