If you use Hostinger Website Builder and have the eCommerce platform enabled, you can easily sell physical and digital products, as well as accept appointments and donations.
Both Premium and Business plans allow you to add an online store page to a website and access the store management area, where you can create products, set up their shop, and manage orders. However, only the Business plan allows you to add a payment method, meaning if your plan is Premium, you can fully set up your store but won’t be able to accept actual sales until you upgrade. To sell subscription-type products, use Hostinger Horizons instead: How to sell subscriptions 👛
To enable the eCommerce platform on your website, open the builder, expand the Online store panel on the left, and click on Add store:
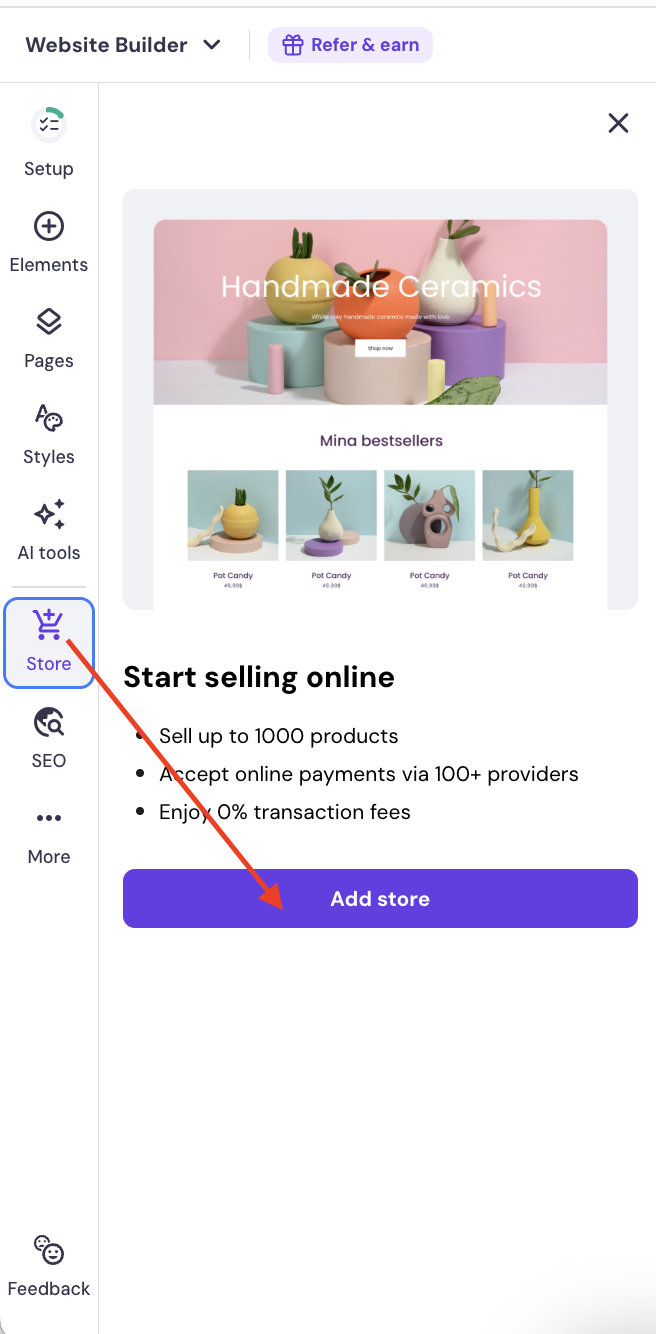
This way, a sample product list section is inserted into your page – you can customize it later. Now, again, expand the Online store panel on the left and click on Manage store:
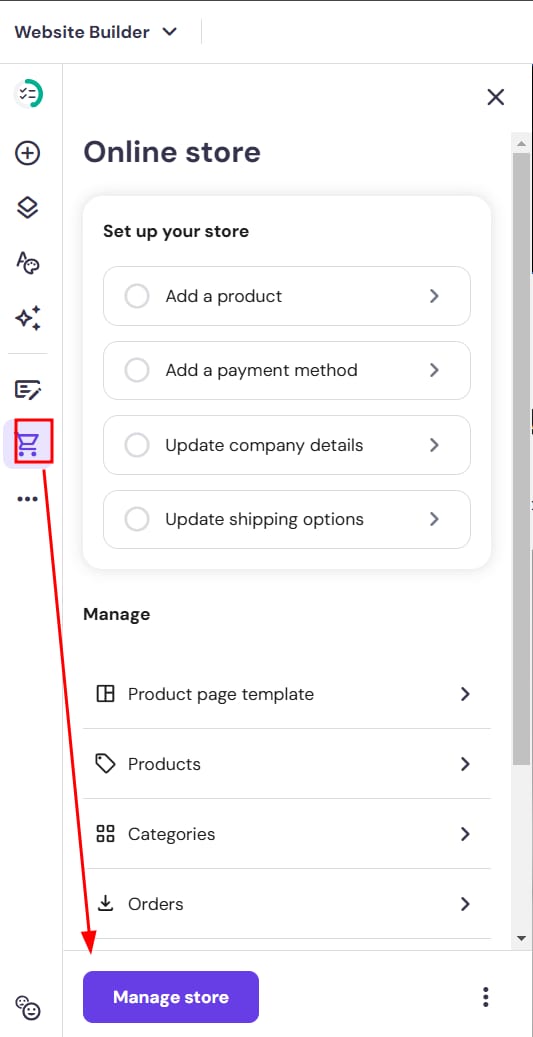
Start setting your online store up by completing these two simple steps:
-
Insert the title of your business and click on Continue
-
Select your country and the preferred currency for your store and click on Continue
After that, you’ll be redirected to your store management area. Here, you’ll find your products, orders, and all the store settings.
Learn more: How to Create an Online Store 🛍️