In this article, you will learn how to categorize blog posts and display them by category on separate pages with Hostinger Website Builder.
Create Blog Categories
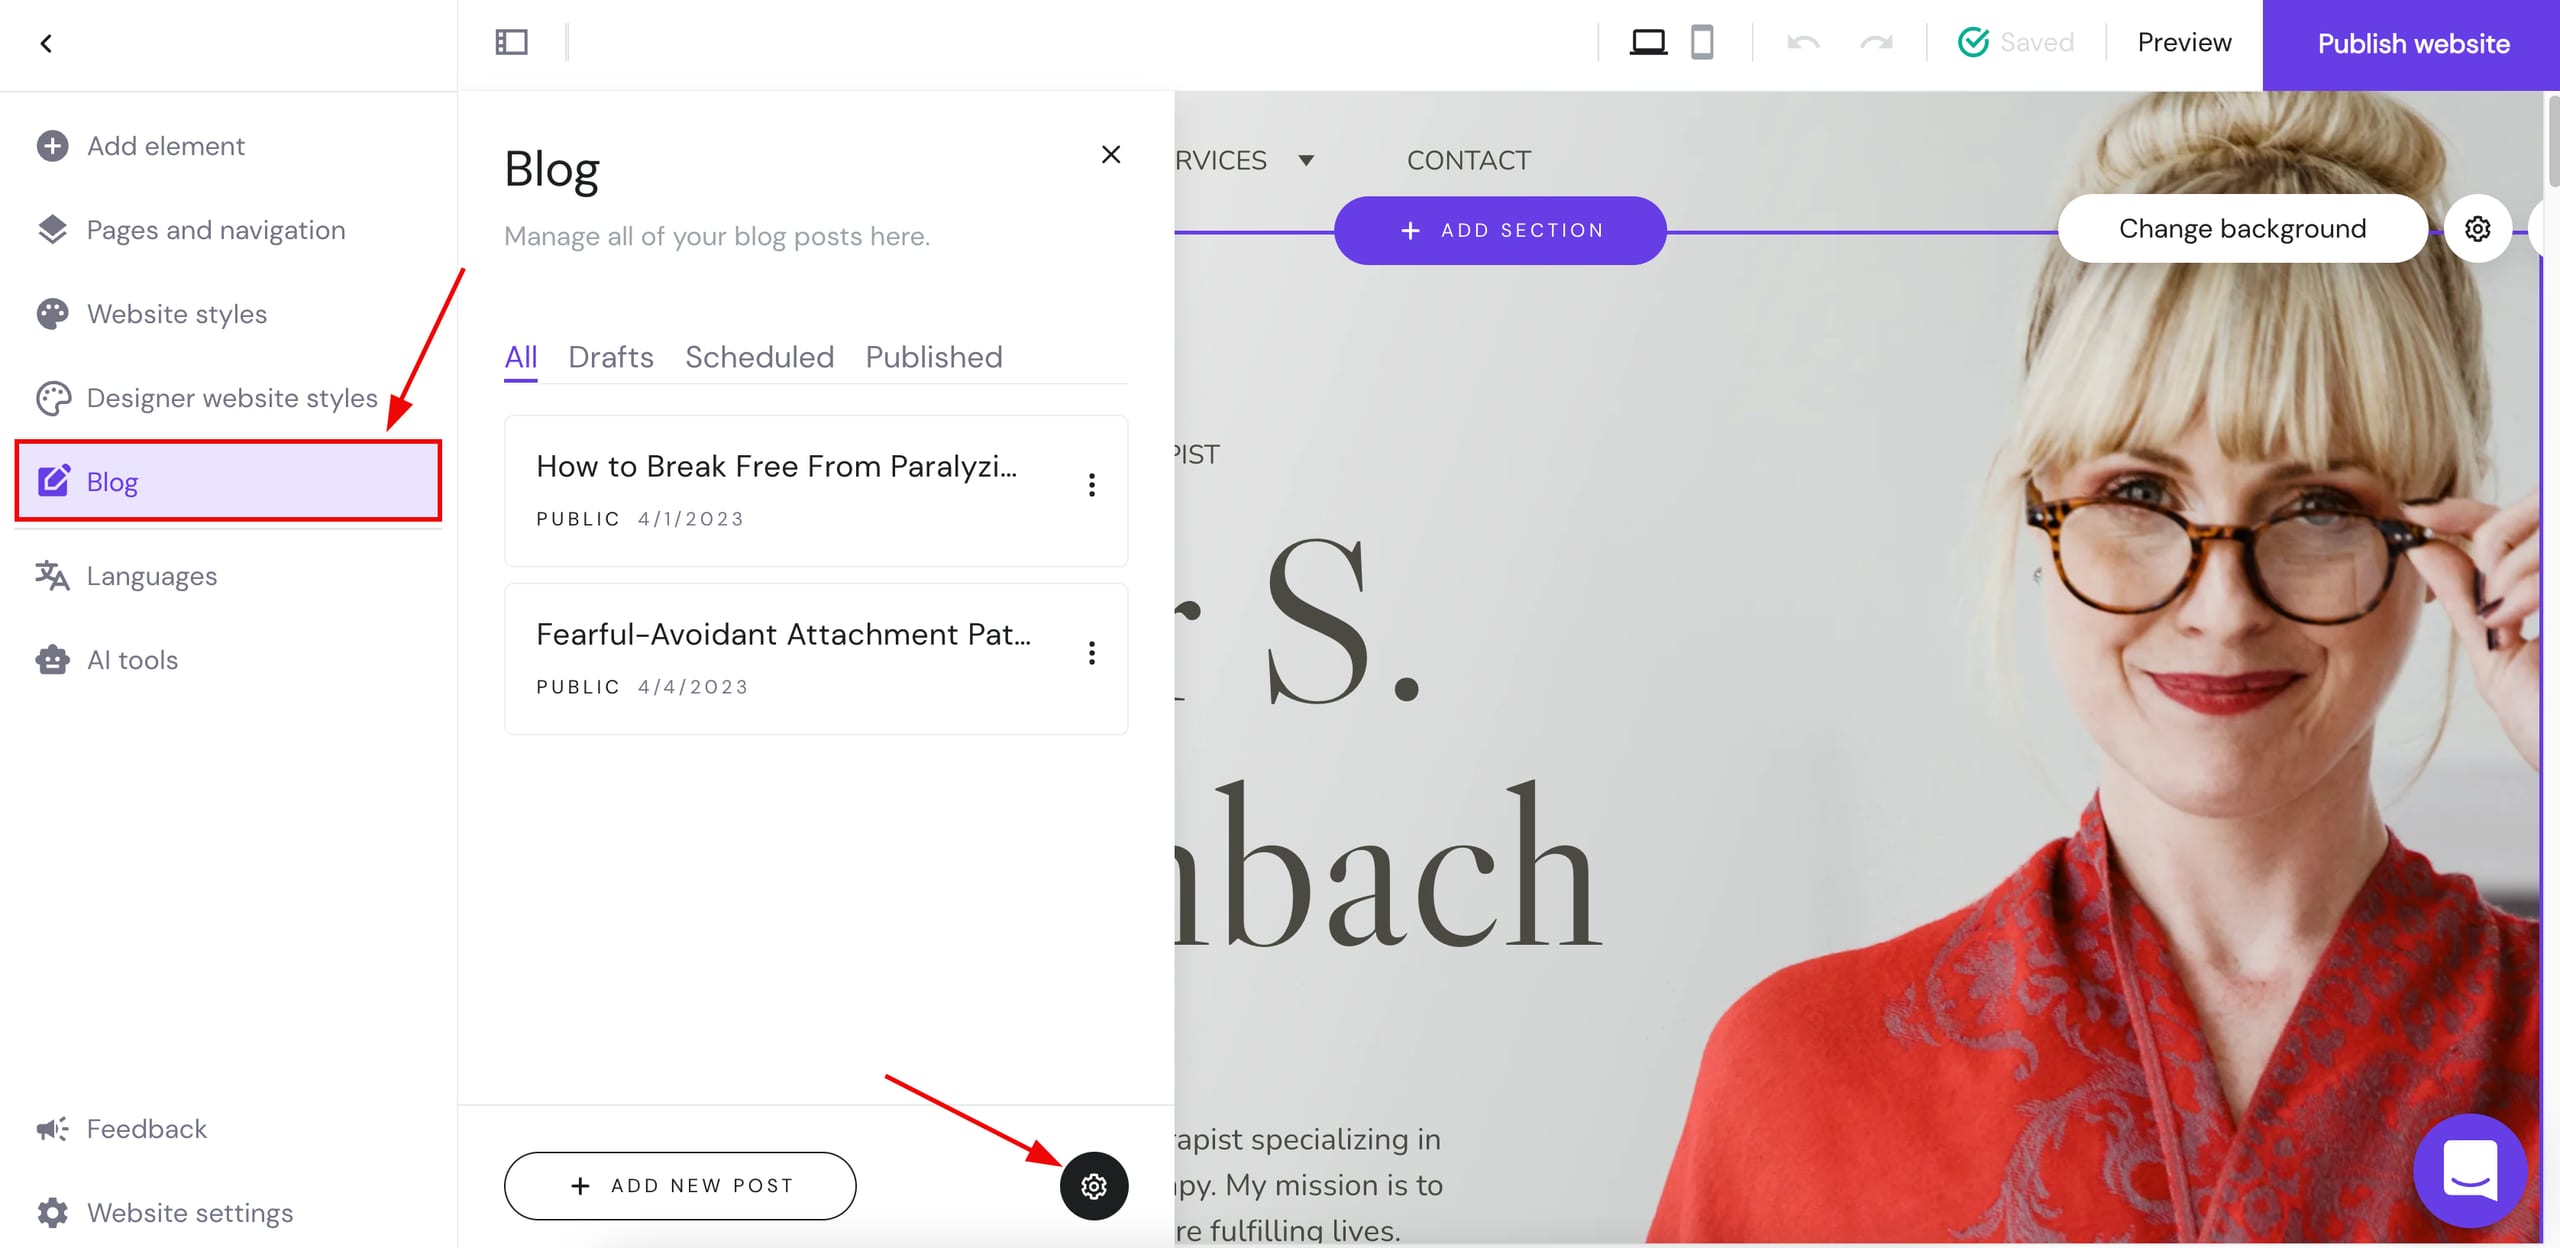
1. Within the editor, expand the blog management panel on the left and click on the settings wheel at the bottom:
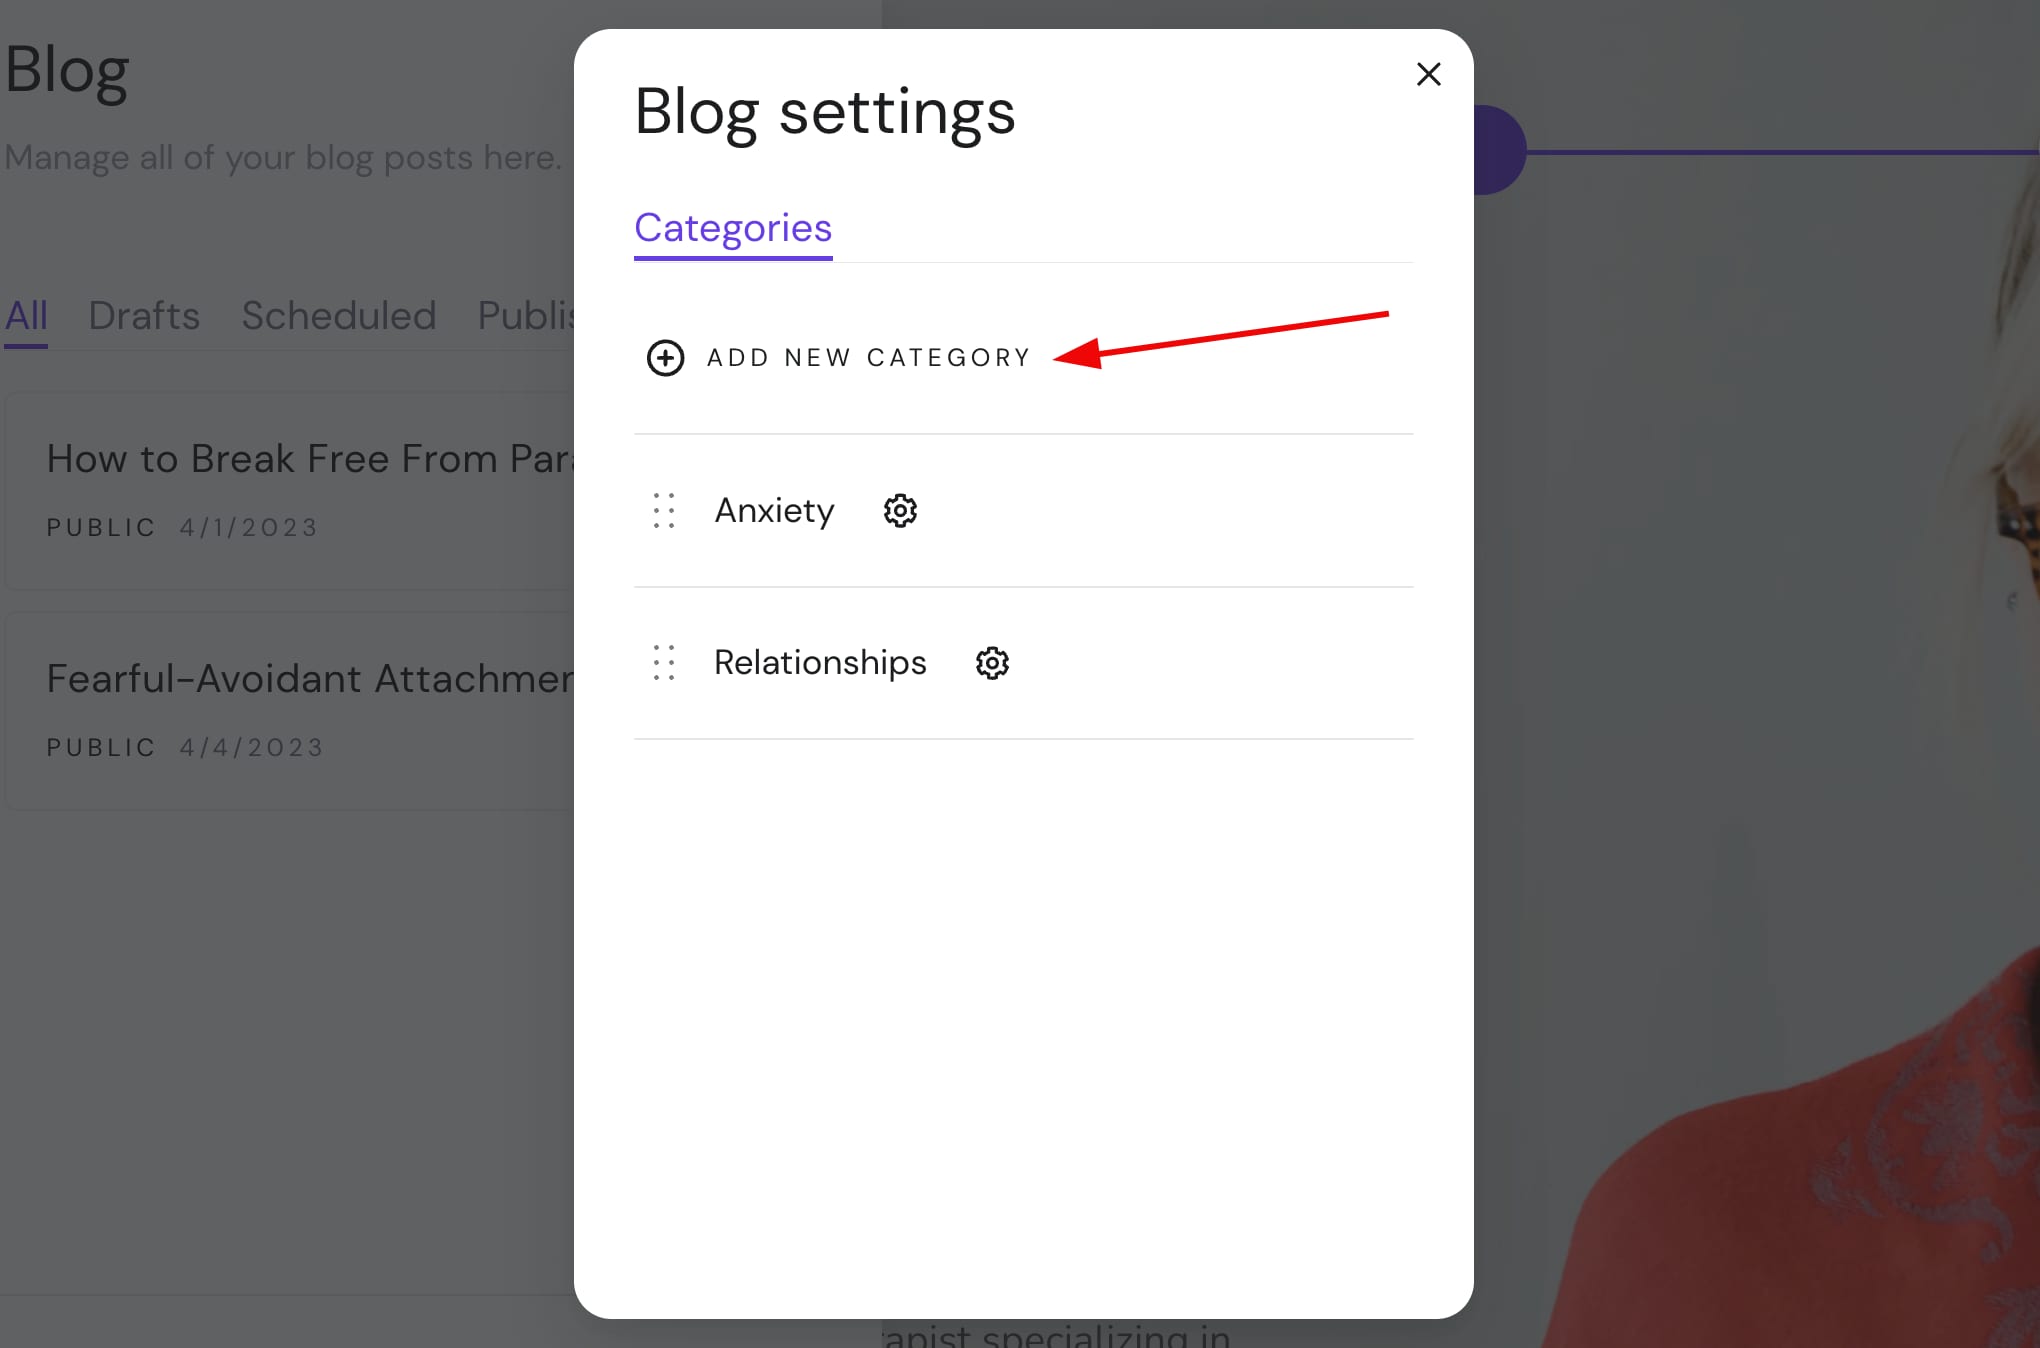
2. Click on Add new category:
3. Insert the title of the category and click on the tick to save it:
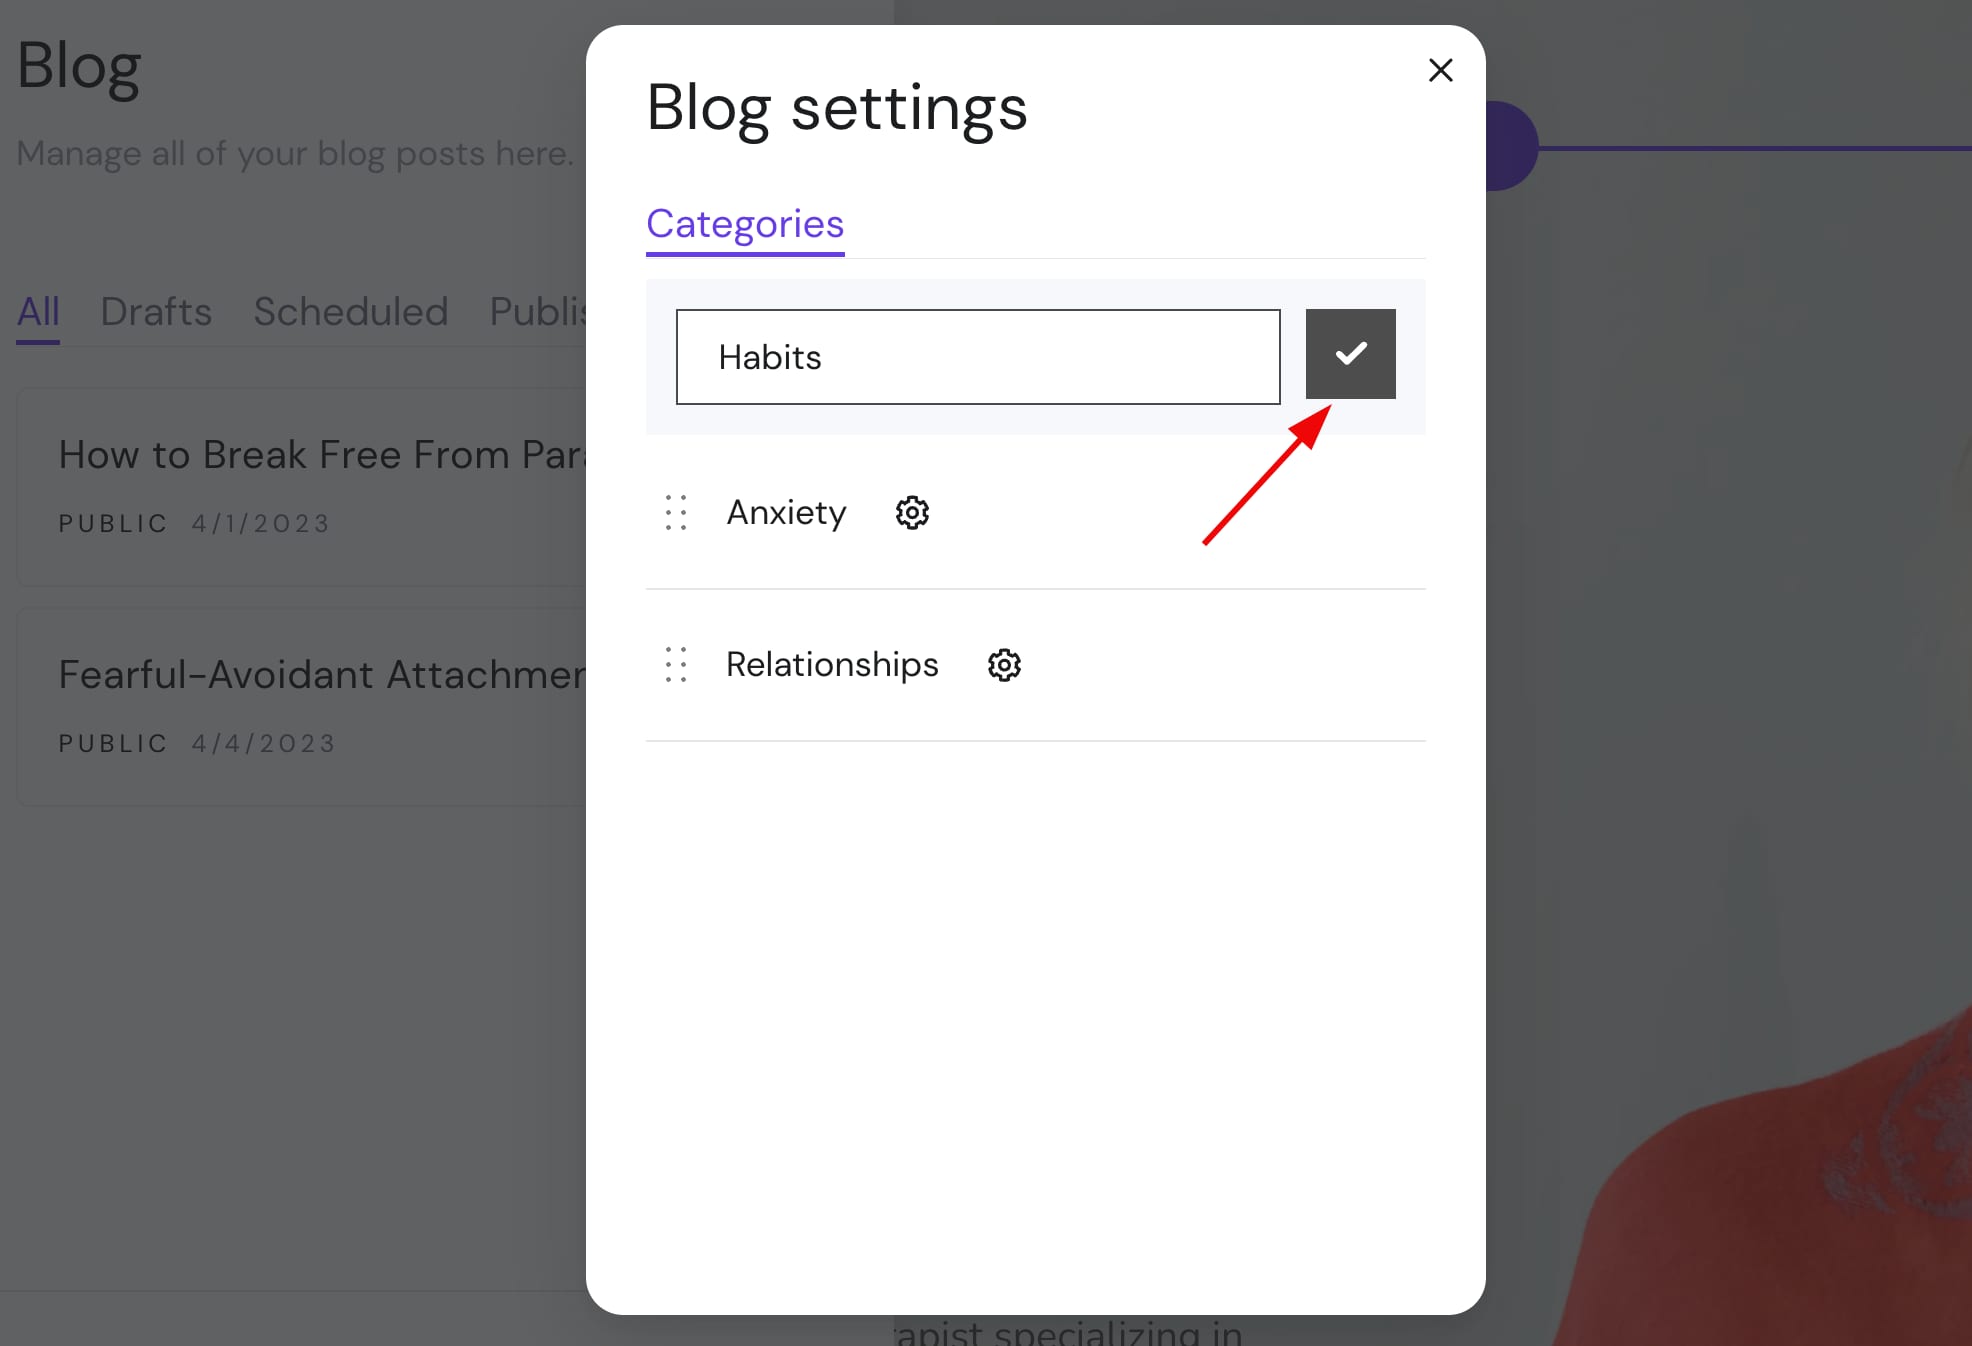
This way, you can create an unlimited number of categories.
Assign Blog Posts to Categories
One blog post can be assigned to multiple categories 💡
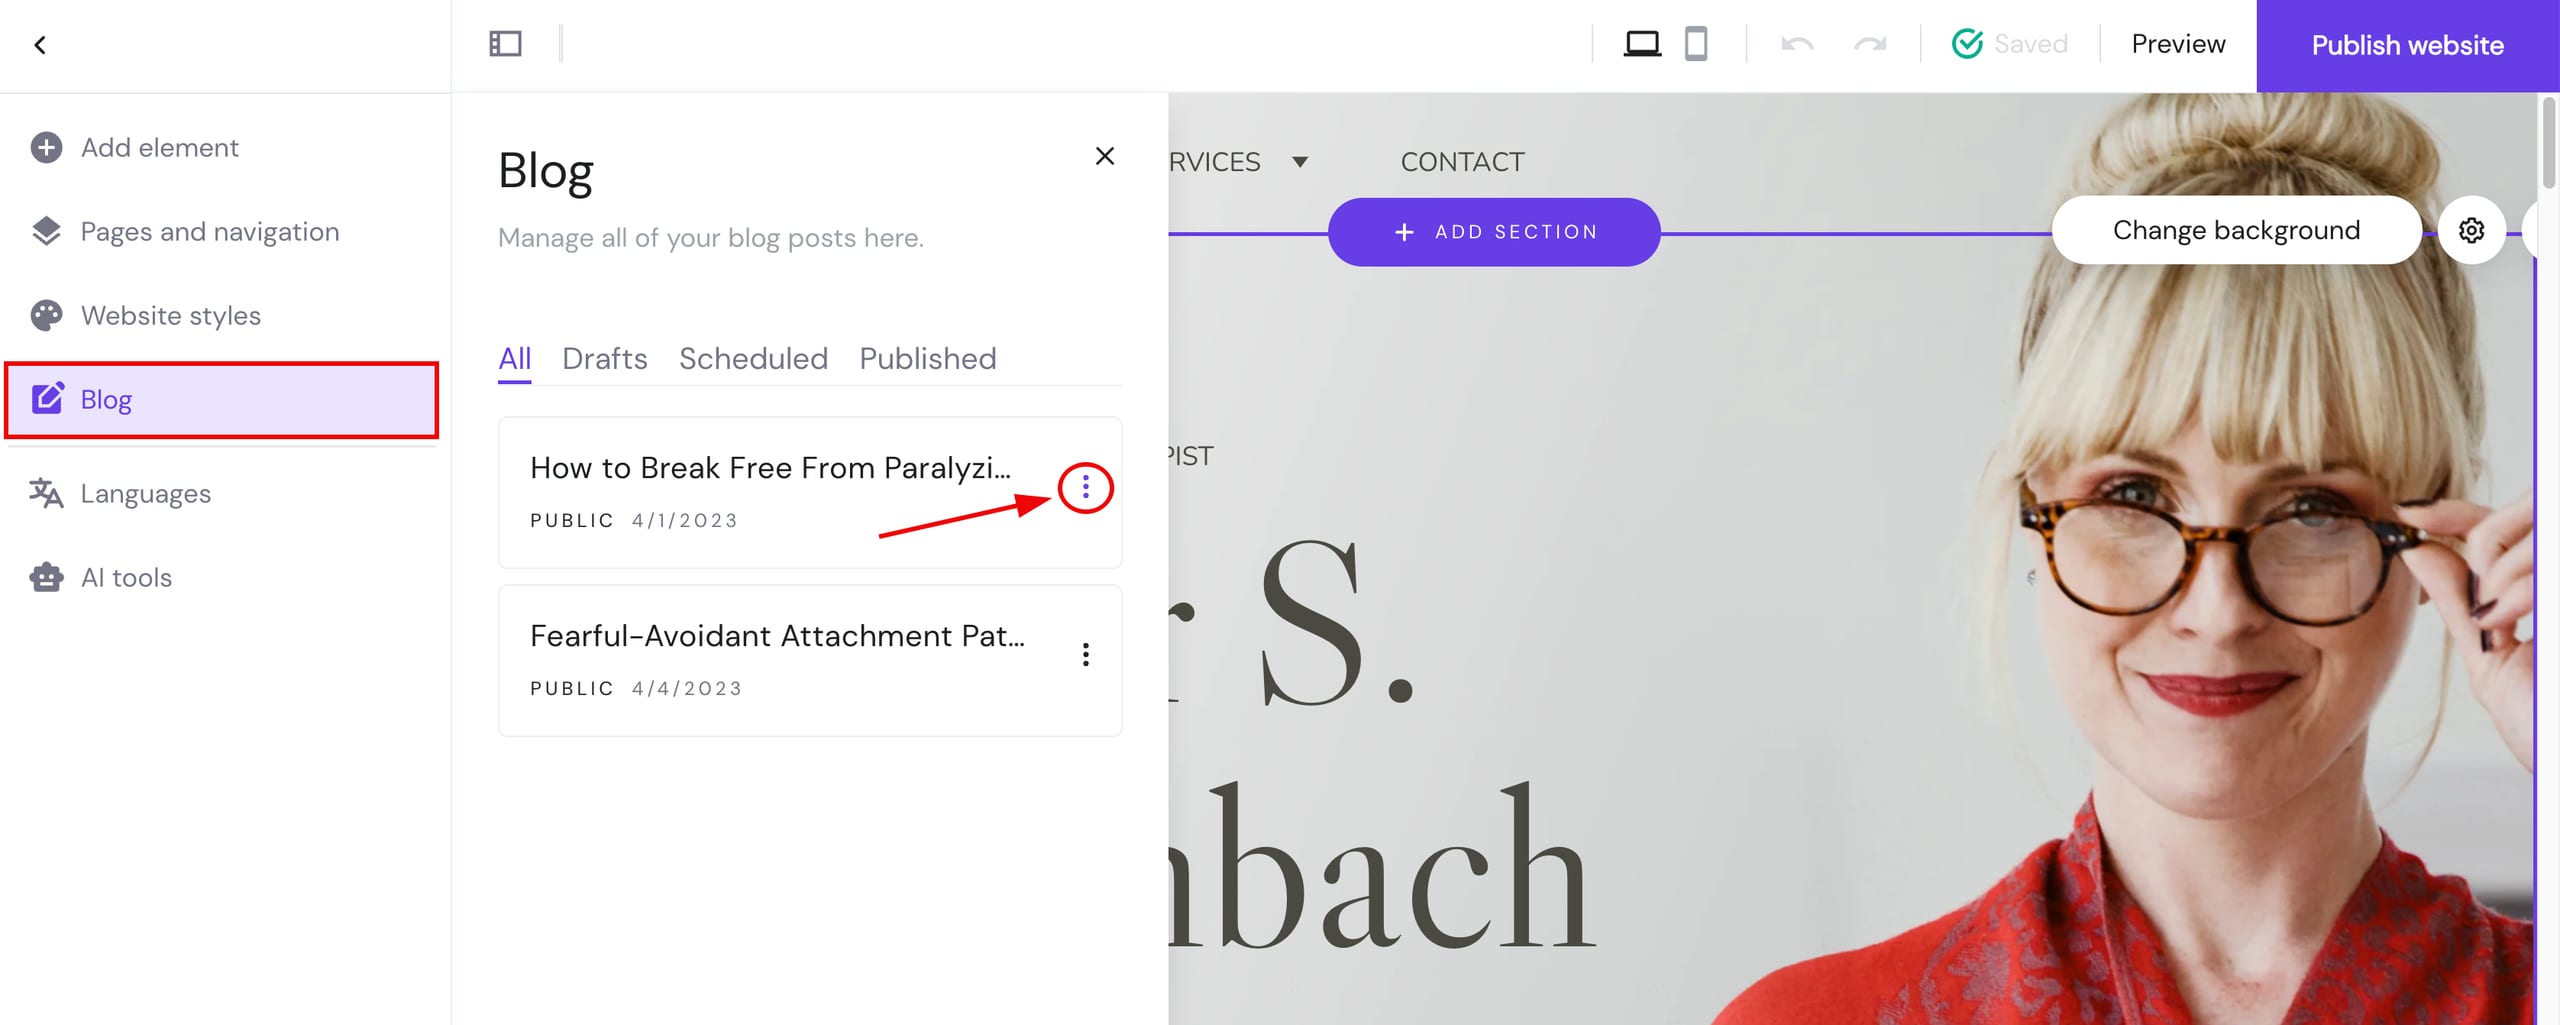
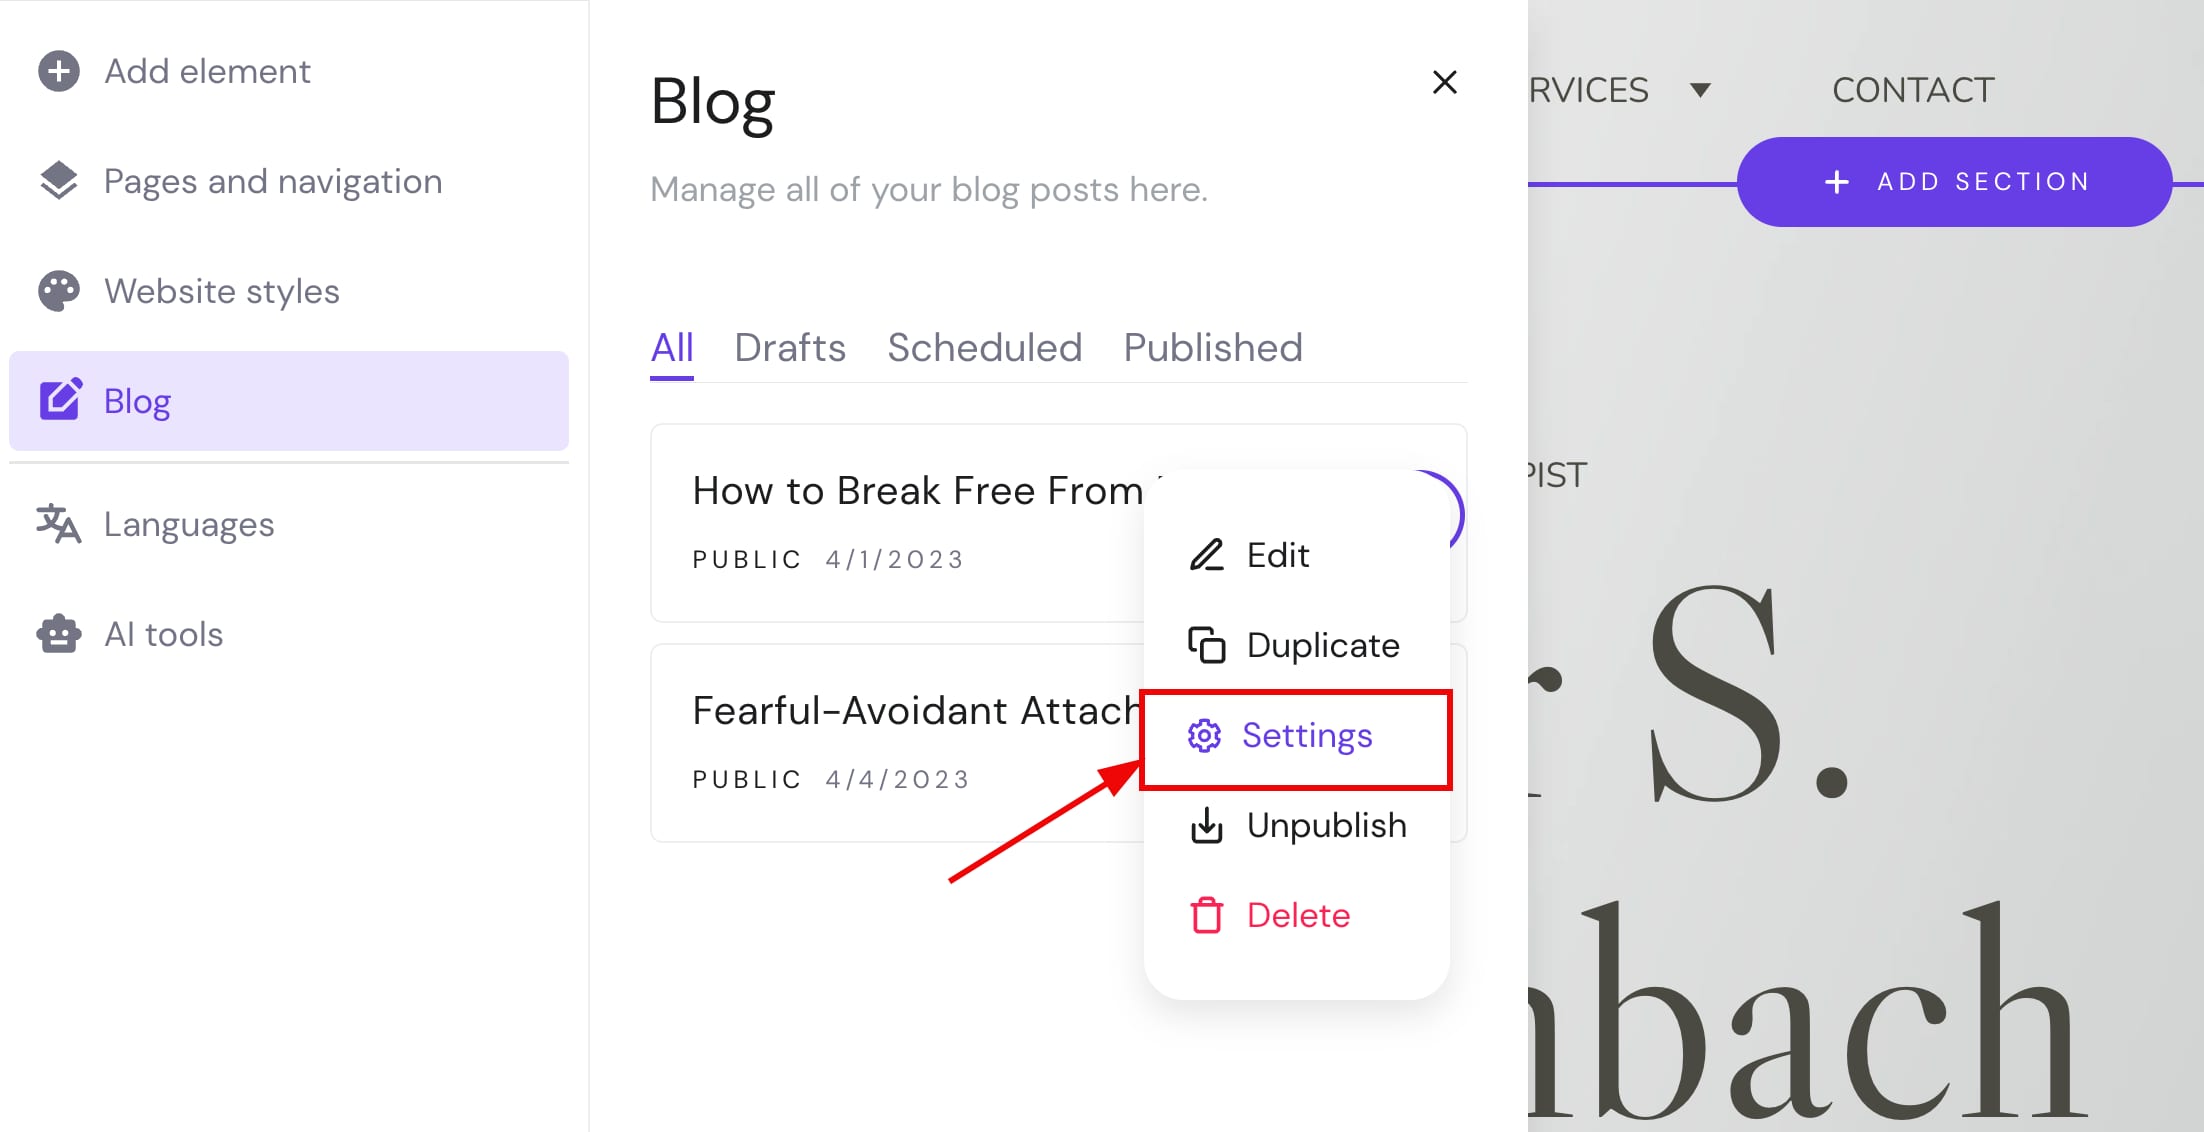
1. Within the editor, open the blog management panel on the left and find the post you want to assign to a particular category. Click on the ellipsis button ⋮ near the blog post title:
2. Click on Settings:
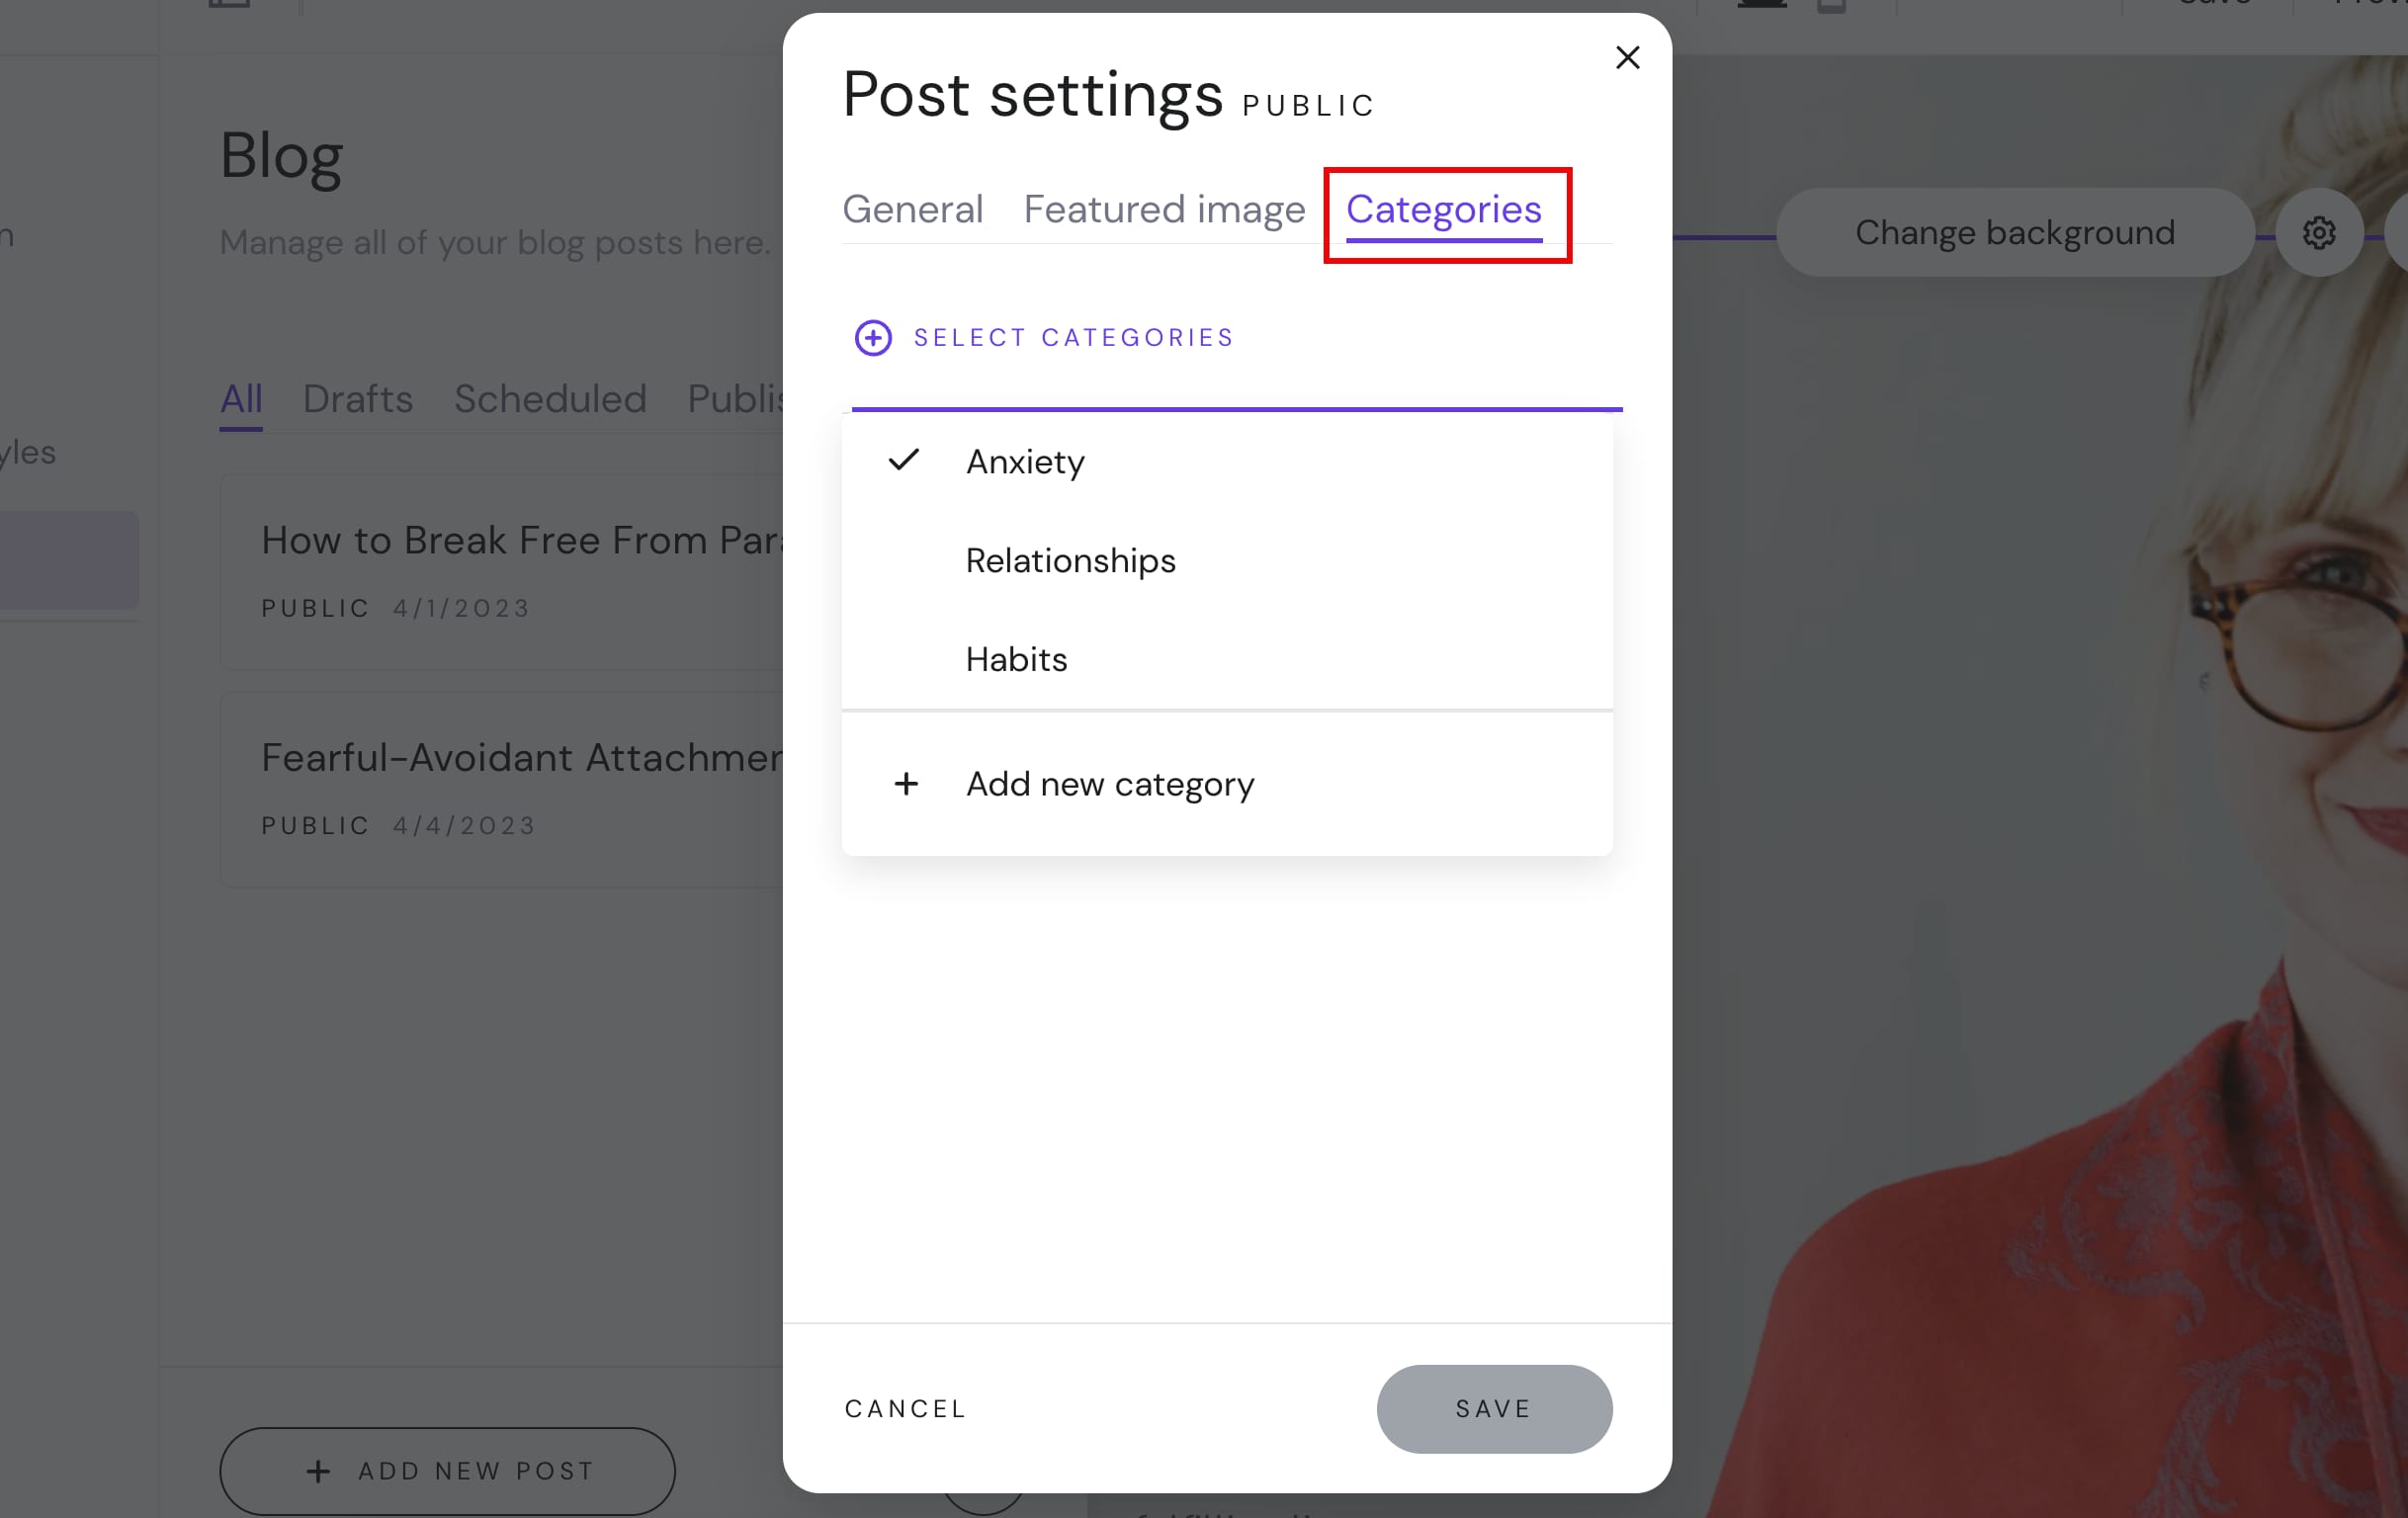
3. Open the Categories tab and click on Select categories. Choose the preferred ones, or click on Add new category to create new ones:
4. Finally, save the changes and update your website.
Display Different Blog Posts in Different Blog Sections or Pages
After categorizing your blog posts (see the instructions above), you can display them by category with the help of blog sections.
1. Insert multiple blog sections on the preferred website pages (you can create dedicated pages for each category).
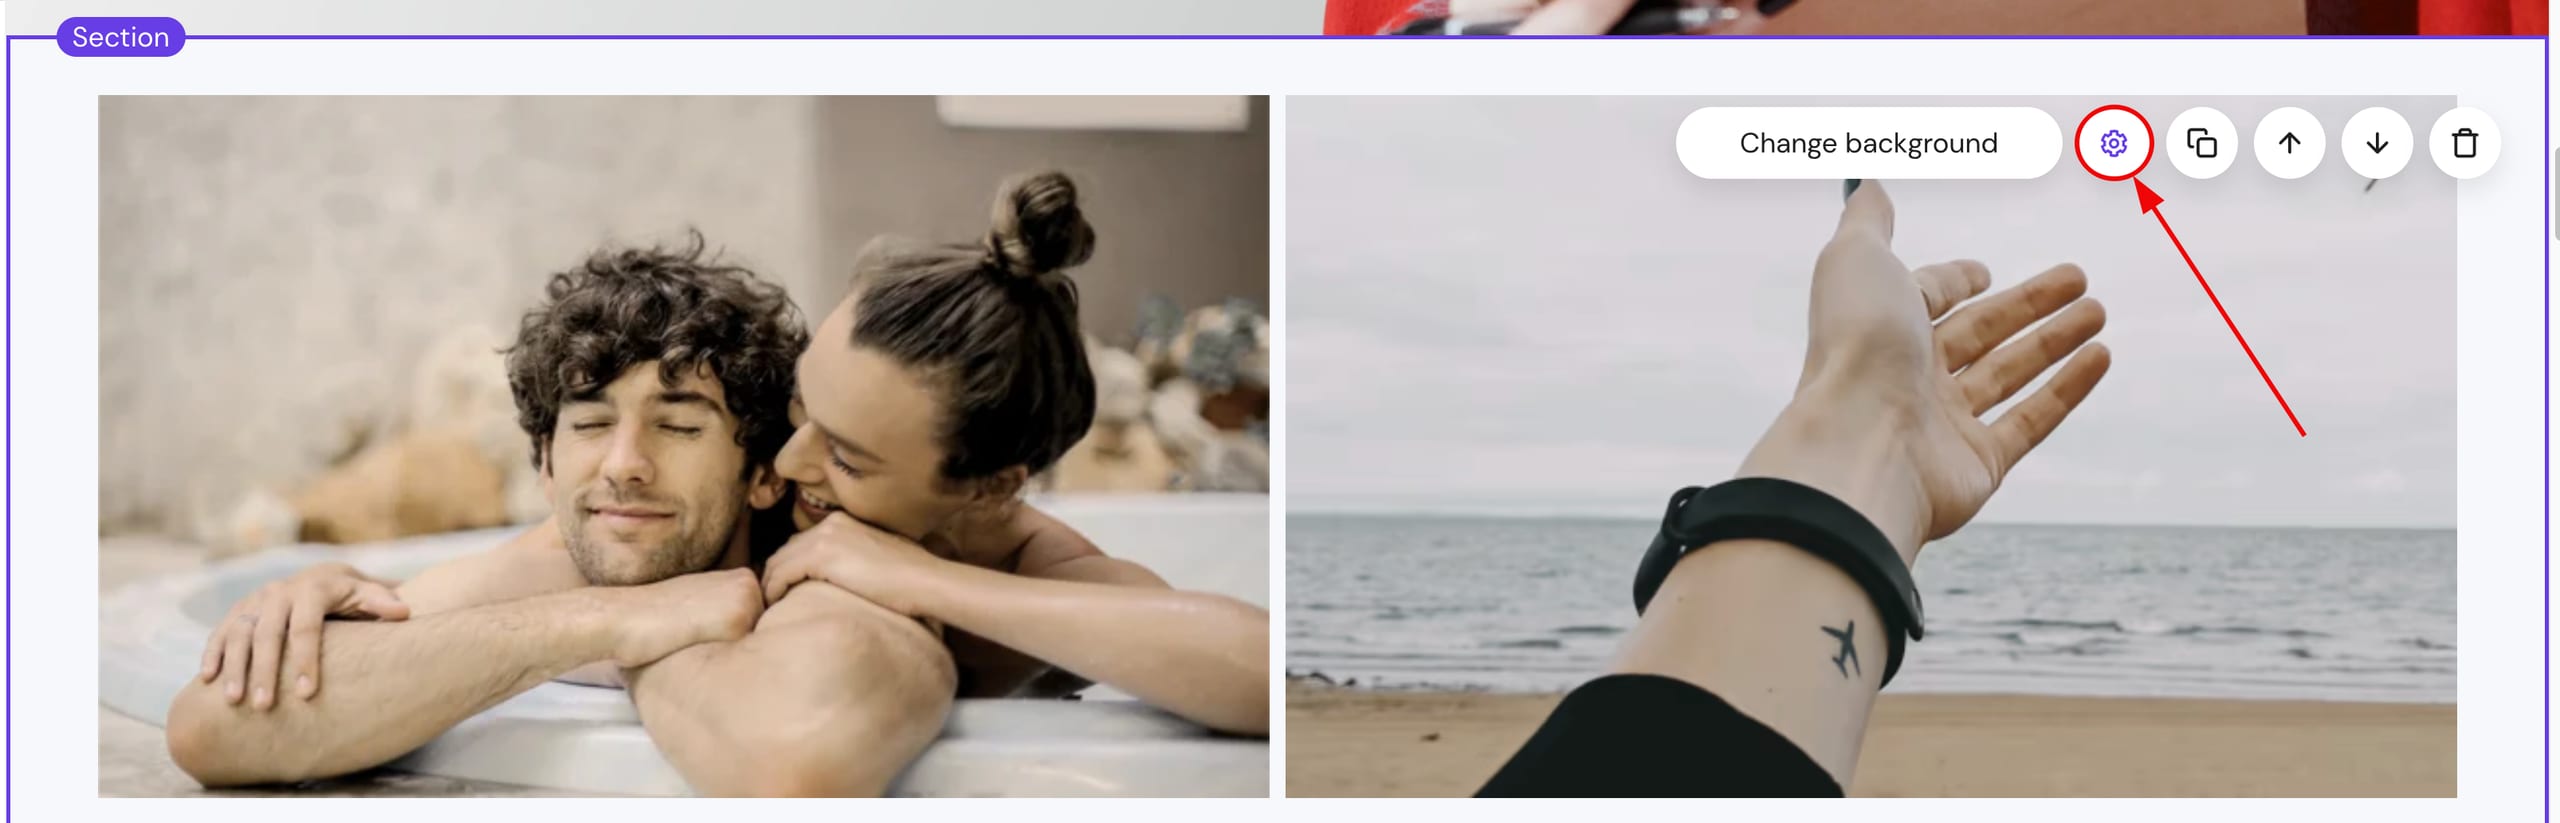
2. Click on a blog section and open its settings:
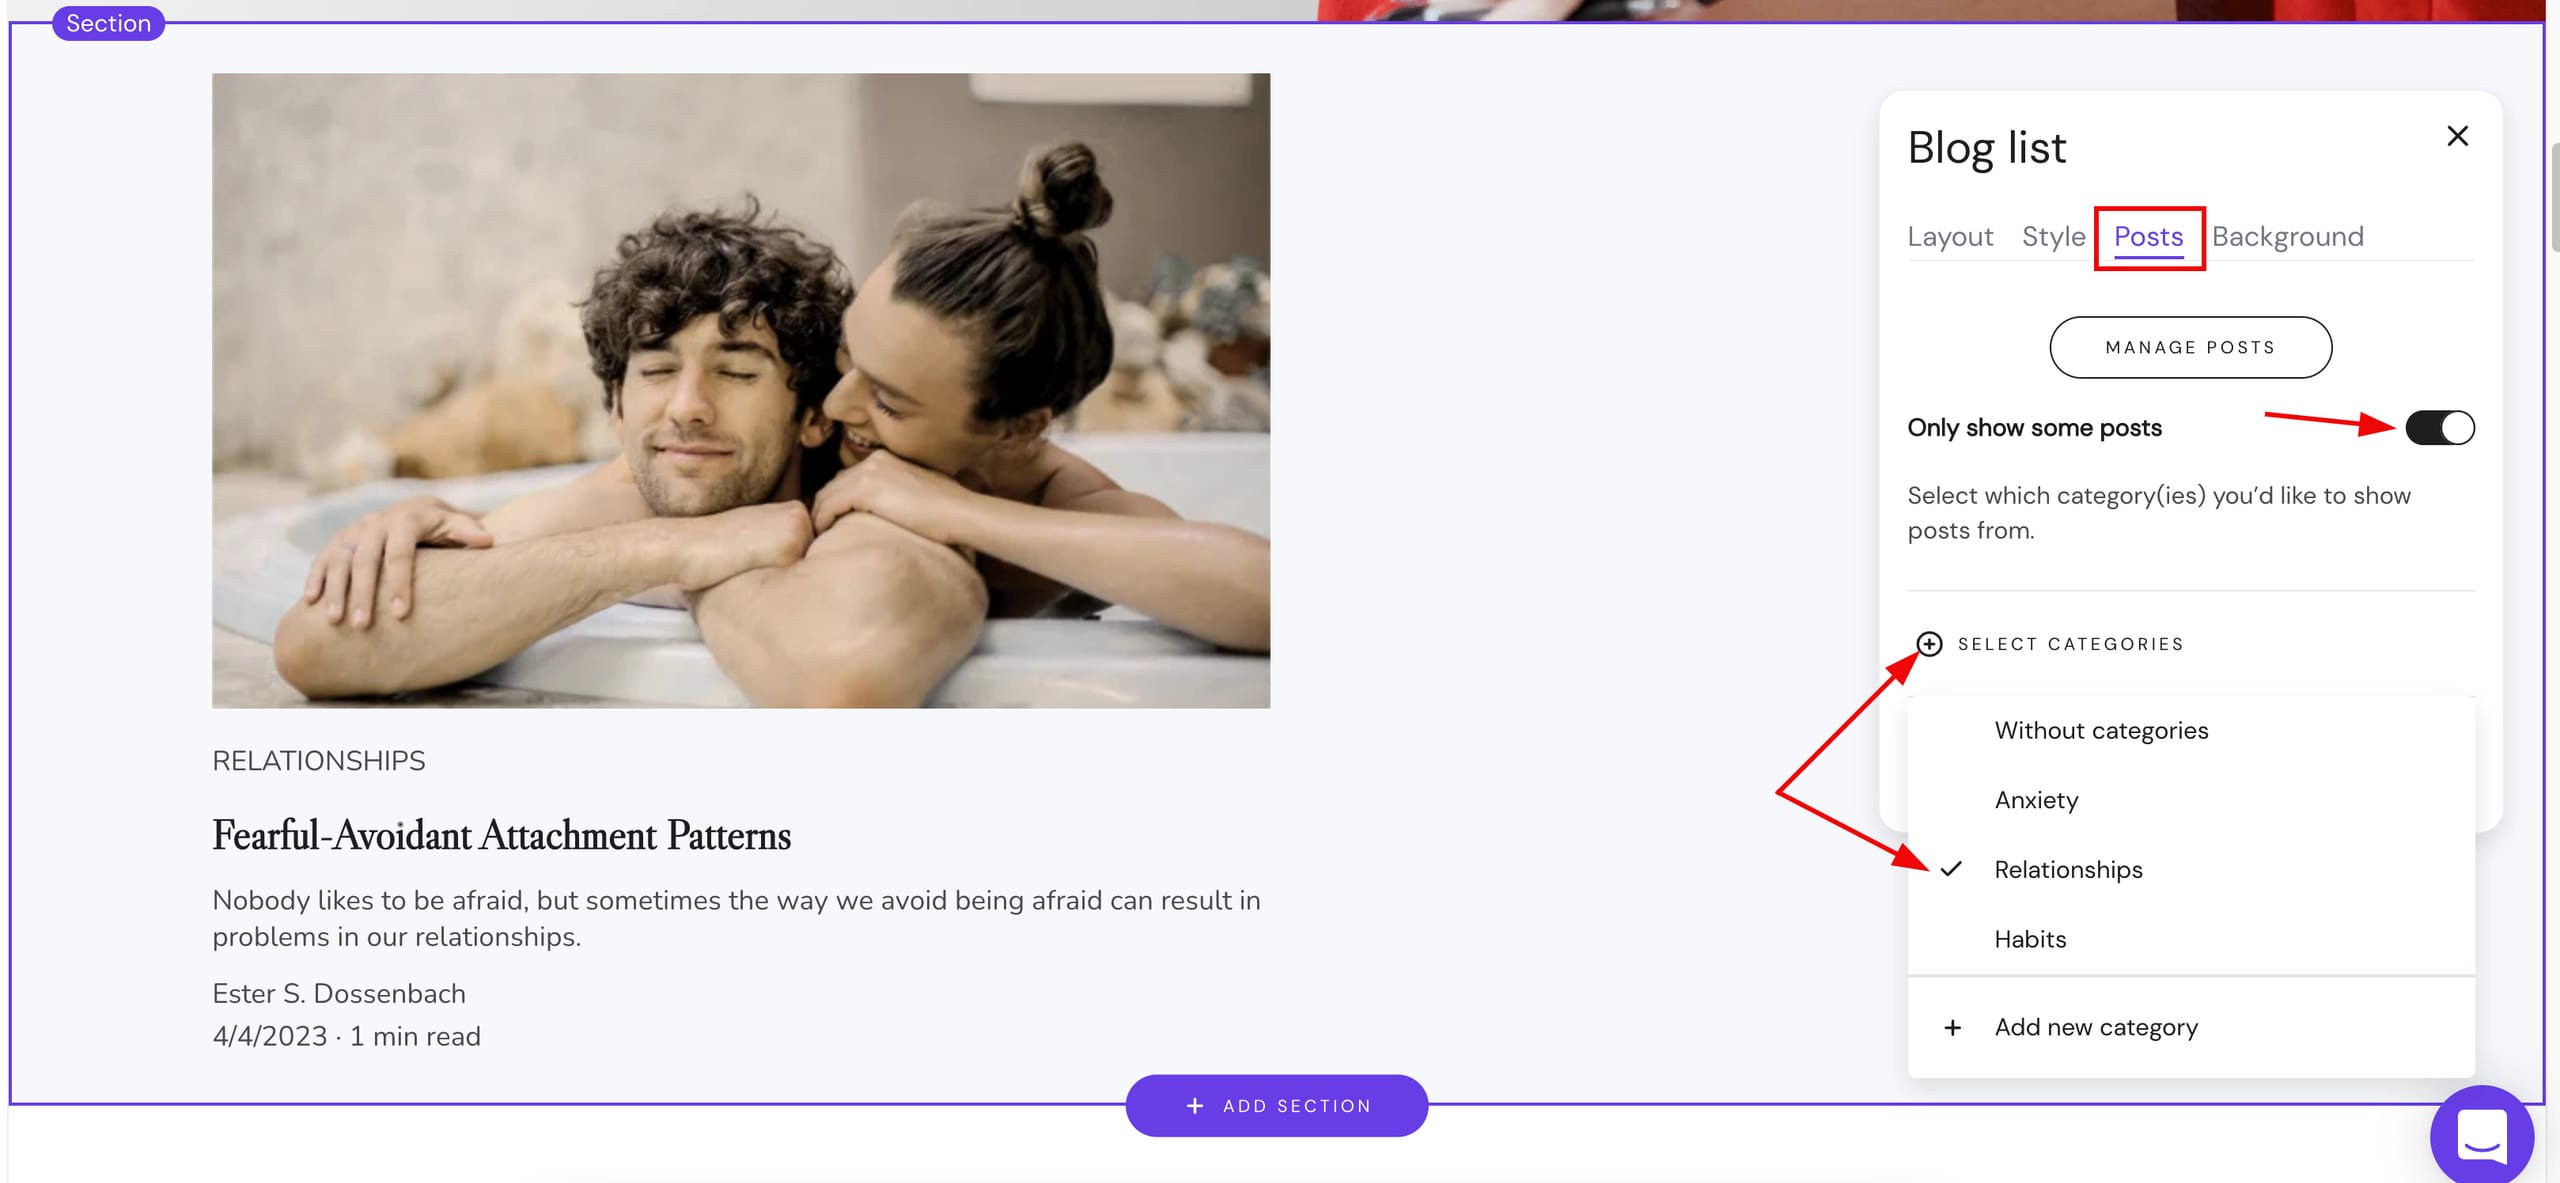
3. In the Posts tab, enable the Only show some posts option. Then, click on Select categories and choose which posts, by category, to display on a particular blog section:
4. Repeat steps 2-3 with the rest of your blog sections.
Once you’re done, remember to update your website for the changes to reflect online.