Meta Pixel integration helps with marketing. It collects data about the traffic and conversions that come from your website. This tool can be useful for improving your ads, creating more clearly defined target audiences, and retargeting users who have shown interest in your business before. If you’re just getting started with Meta Ads, our beginner’s video guide walks you through how it all works before diving into the setup below.
To create a Meta Pixel, you need a Meta page (a personal Meta profile is not enough). Before you begin, make sure that your website is published and your Meta page is public.
NOTE
-
For tracking scripts to work properly on your site created with Hostinger Website Builder, make sure that you have a cookie banner enabled
Creating a Dataset
Meta has disabled Pixel creation and replaced it with Dataset creation. To set up web events, create a dataset. Learn more: About Datasets in Meta Events Manager 💡
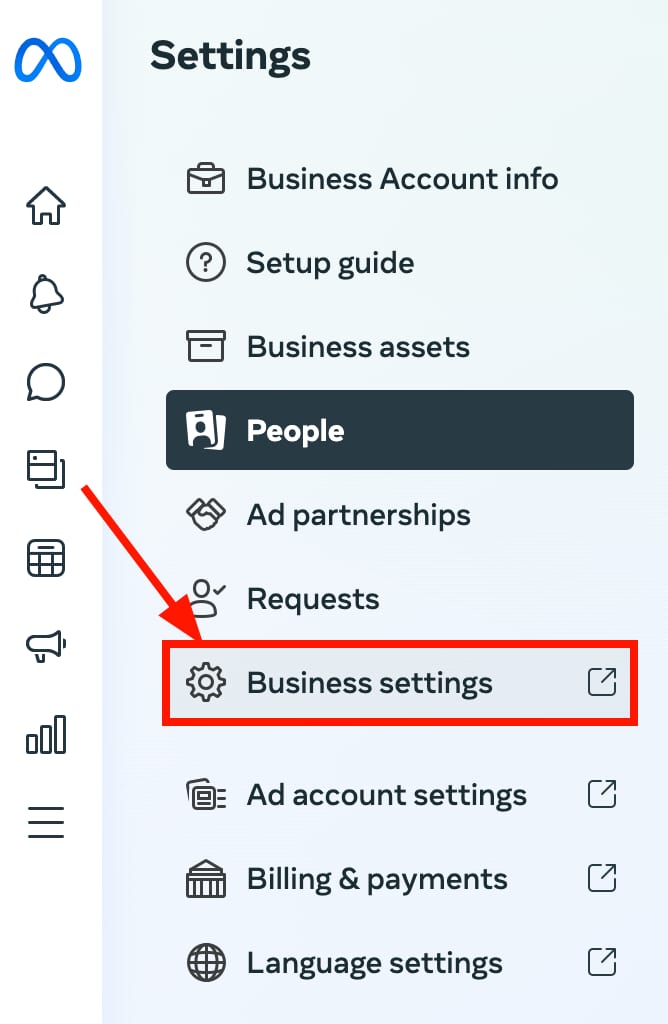
1. In your Meta Business Manager, click on Settings in the bottom left, and then click on Business settings:
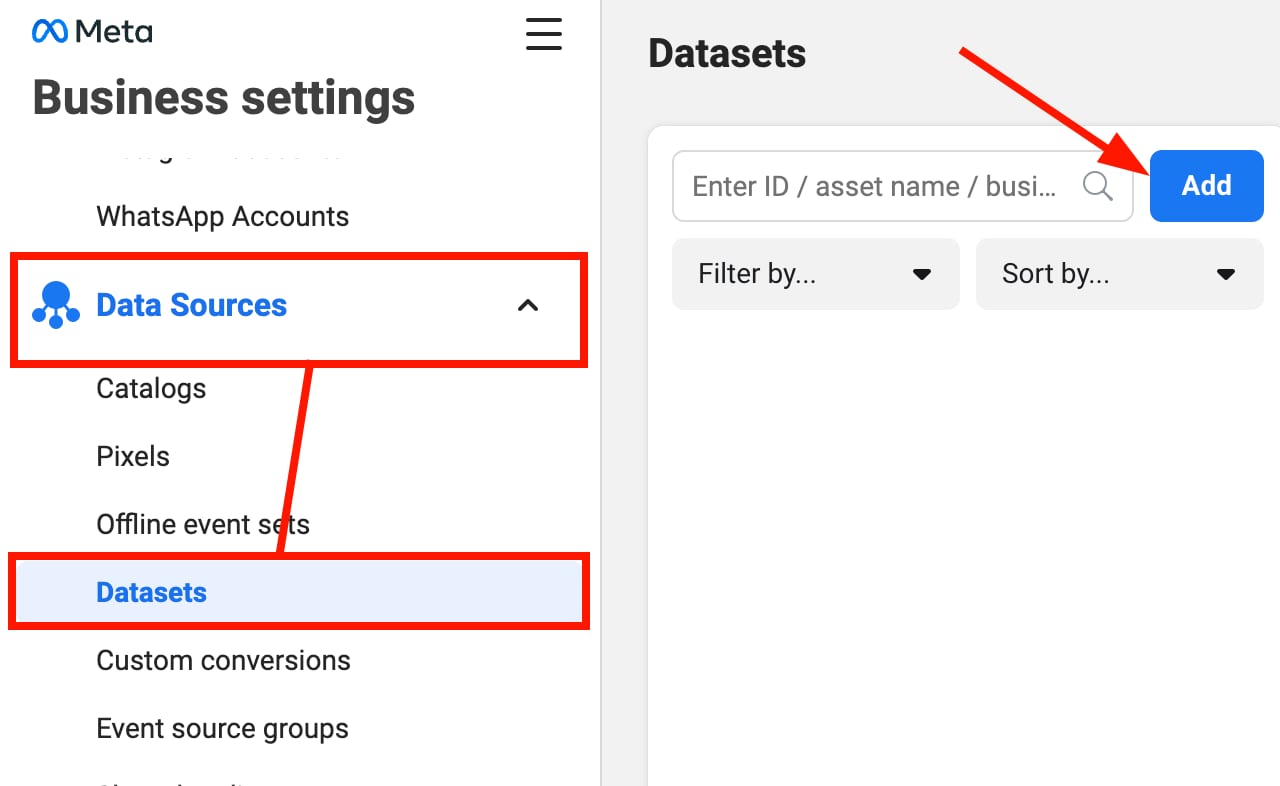
2. On the left sidebar, go to Data Sources → Datasets and click on Add:
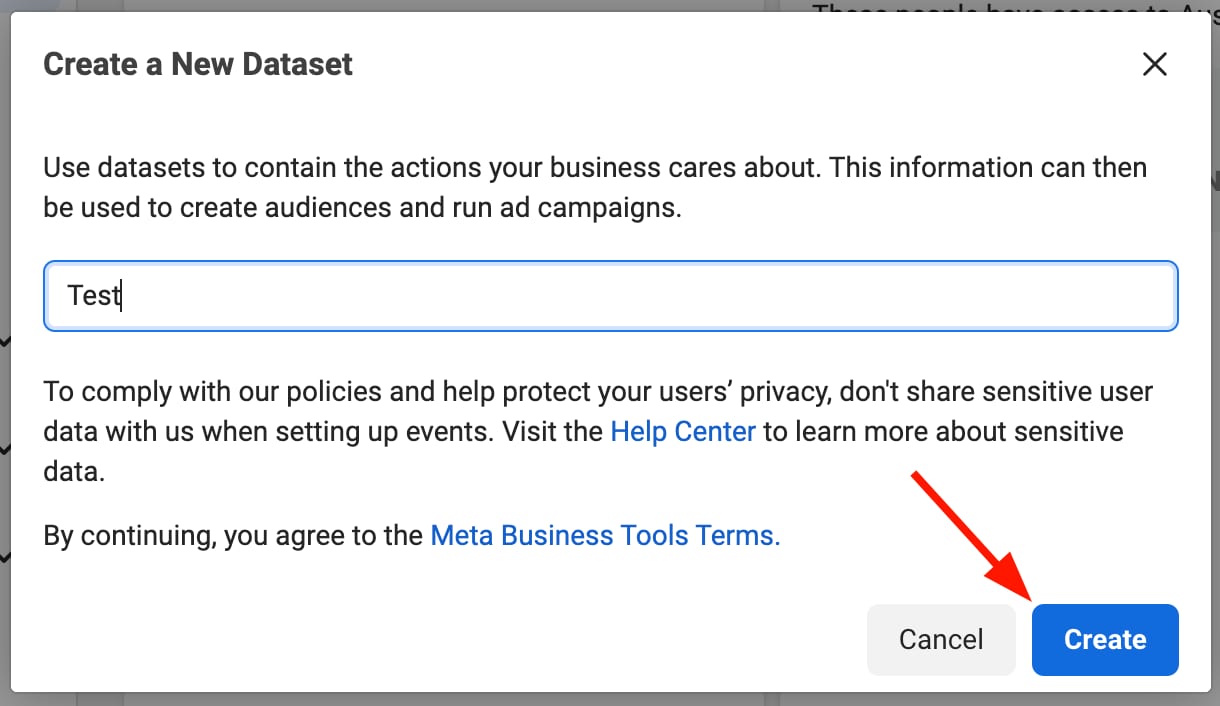
3. Insert the name of your dataset, and click on Create:
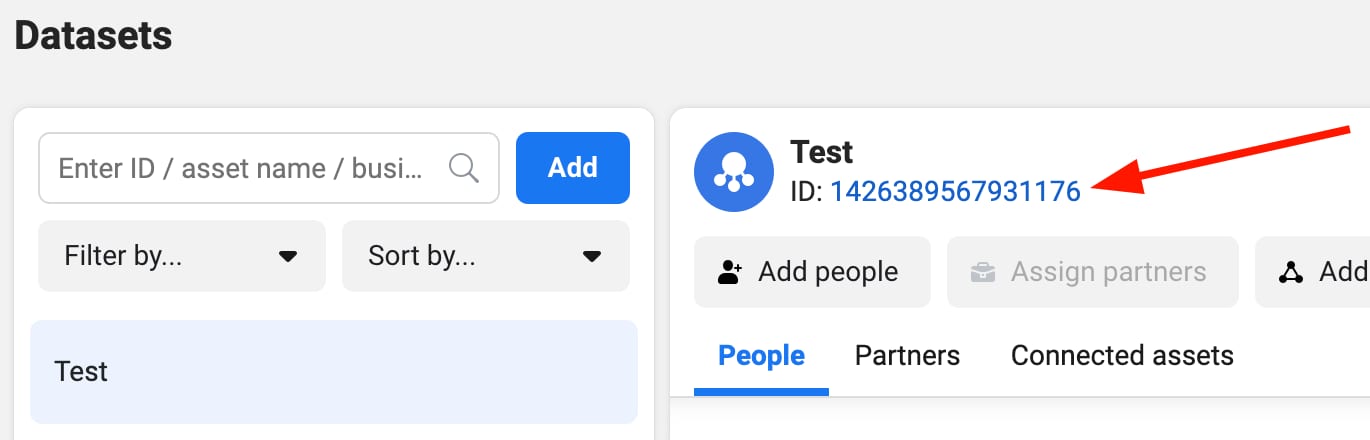
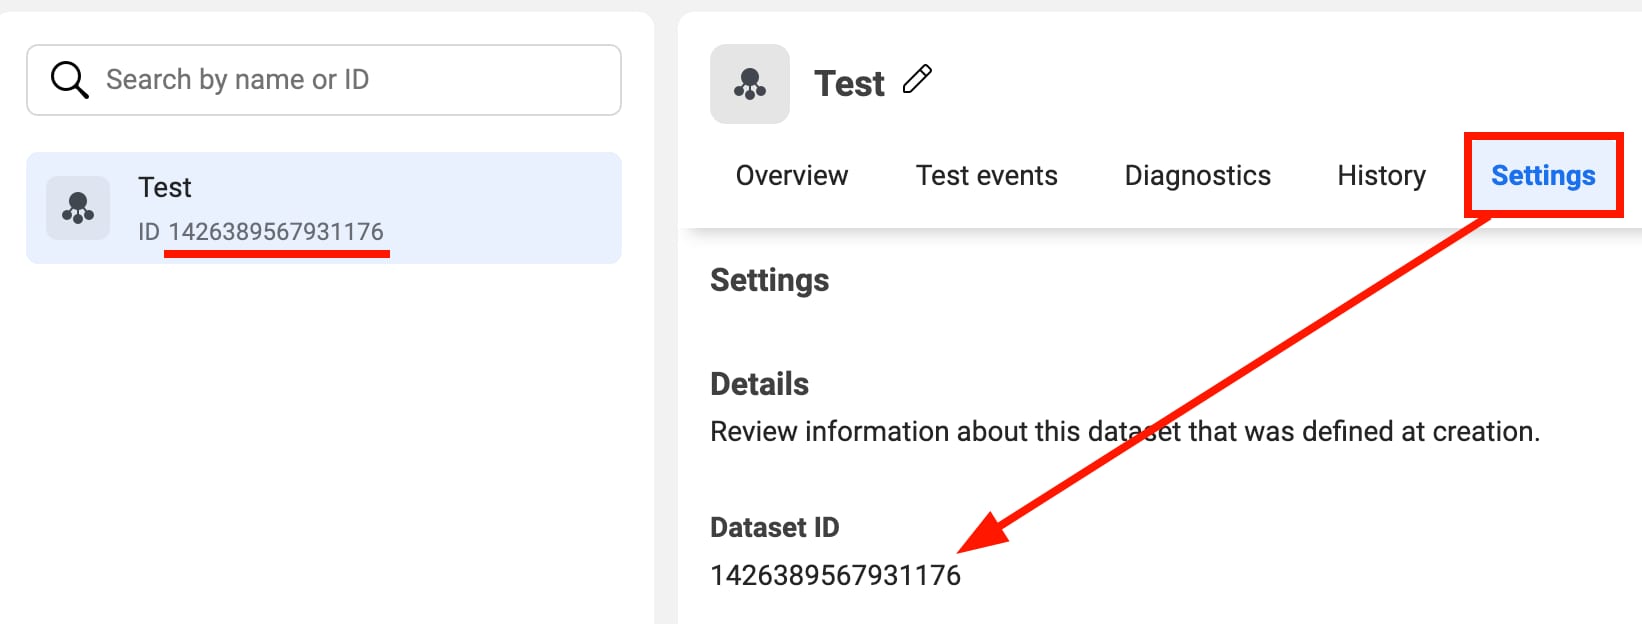
Finally, copy the ID and add it to your website’s integrations settings as described below:
Adding a Dataset to Your Website
1. Find and copy your dataset ID in your Events Manager. You can find it under the title of your dataset or in its settings:
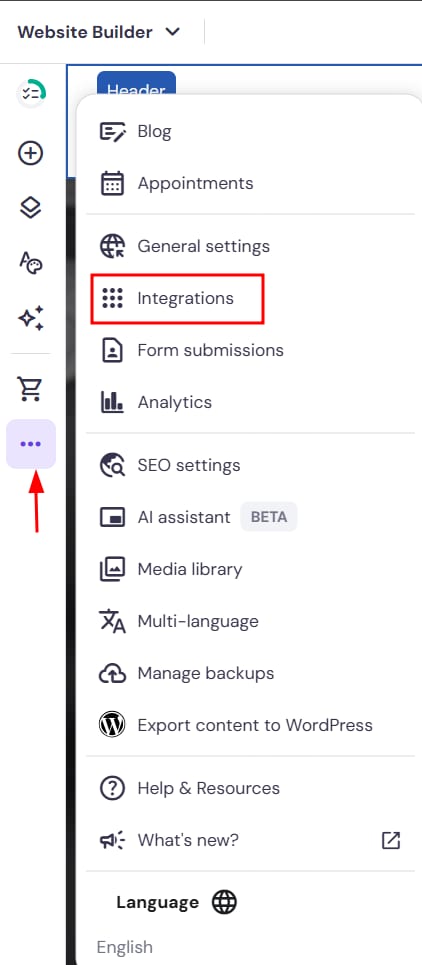
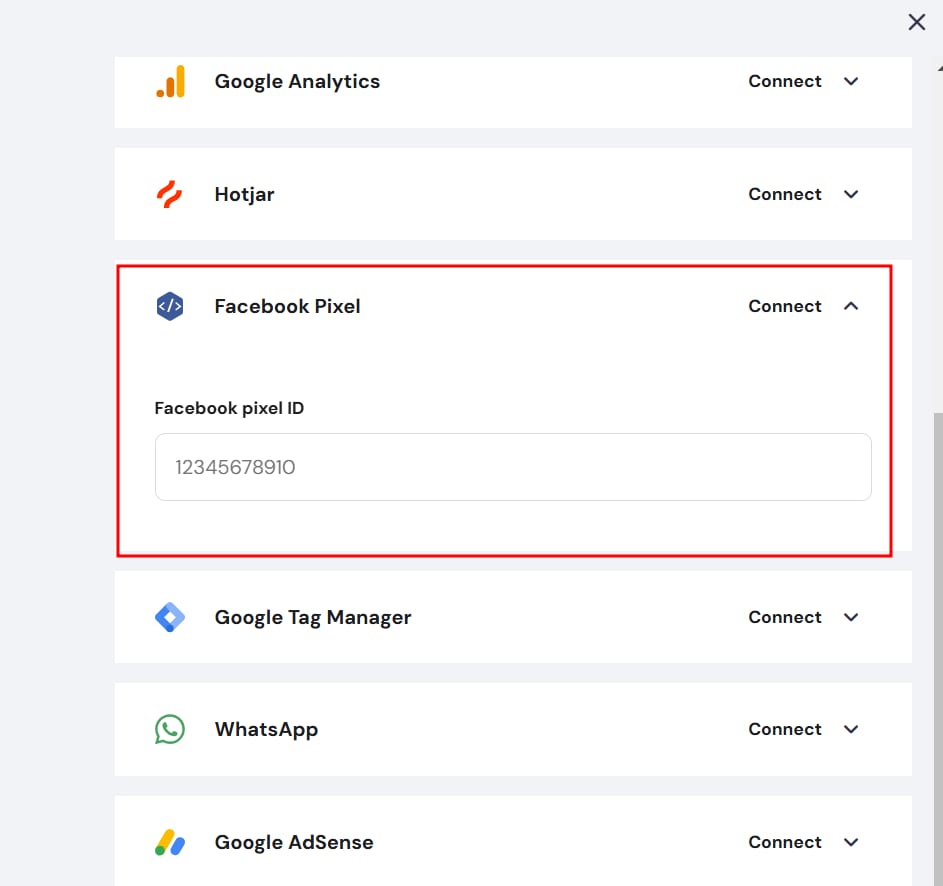
2. In the website builder, open the integrations settings. Find the Facebook Pixel field, and insert your dataset ID there:
3. Save the changes and update your website.
Checking if a Meta Pixel Is Connected Successfully
First, make sure that:
-
Your website is published, and your Meta page is public
-
A cookie banner is enabled on your website
-
You’ve added your pixel ID to your website’s integrations settings
-
Make sure there are no multiple IDs: the pixel ID should be added only once, as adding a Meta Pixel twice could cause duplicate or incorrect data in reports
-
(optional) You’ve added your website’s domain to the “allow” list on Facebook pixel settings
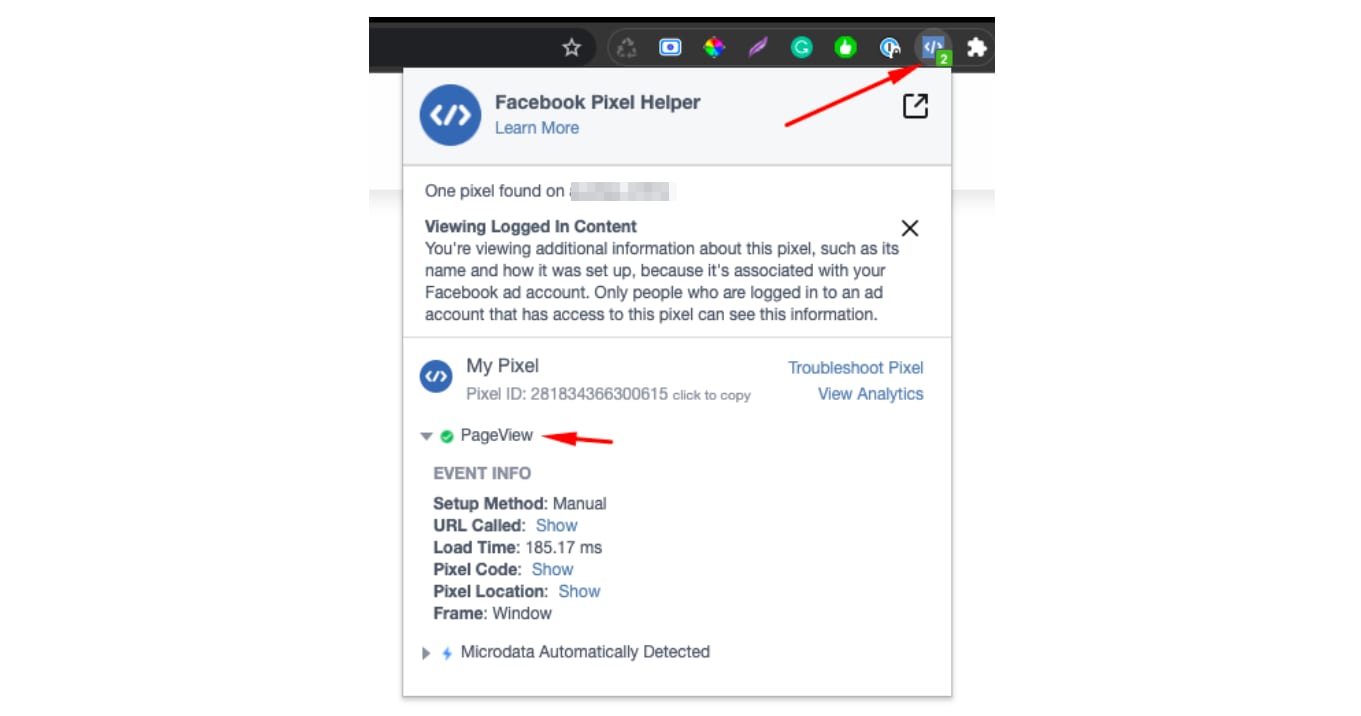
Now, it’s time to check it on your live website. You can use the Facebook Pixel Helper extension (available with the Chrome browser) that shows if the integration is valid and what events are being tracked:
-
Open this link and follow the on-screen instructions to add the Facebook Pixel Helper to your browser
-
Access your website online and allow cookies
-
Click on the extension to view the data; you will see both general data and event information:

NOTE
-
If you can’t find the extension in the browser bar, click on the puzzle icon (it’s in the top right on Chrome) and pin your most-used extensions so that they’re always visible and easily accessible:
