Google Analytics helps understand a website’s visitors and check the performance of your site.
The below-given instructions apply to sites created with Hostinger Website Builder 💡
Before You Begin
At the moment, there are two types of Google Analytics properties:
-
Google Analytics 4 (Measurement ID: G-XXXXXXX) – recommended
-
Universal Analytics (Tracking ID: UA-XXXXXX-X)
For now, both types of properties are supported, but it’s highly recommended to use Google Analytics 4, as the other one stopped processing data on July 1, 2023.
For tracking scripts to work properly, make sure that a cookie banner is enabled on your website 💡
Connect Google Analytics to Your Website
To connect Google Analytics to your website, you only need to know the Measurement ID of your Google Analytics 4 property.
Within the editor, open your website’s integrations settings, find the Google Analytics field, and insert your Measurement ID there:
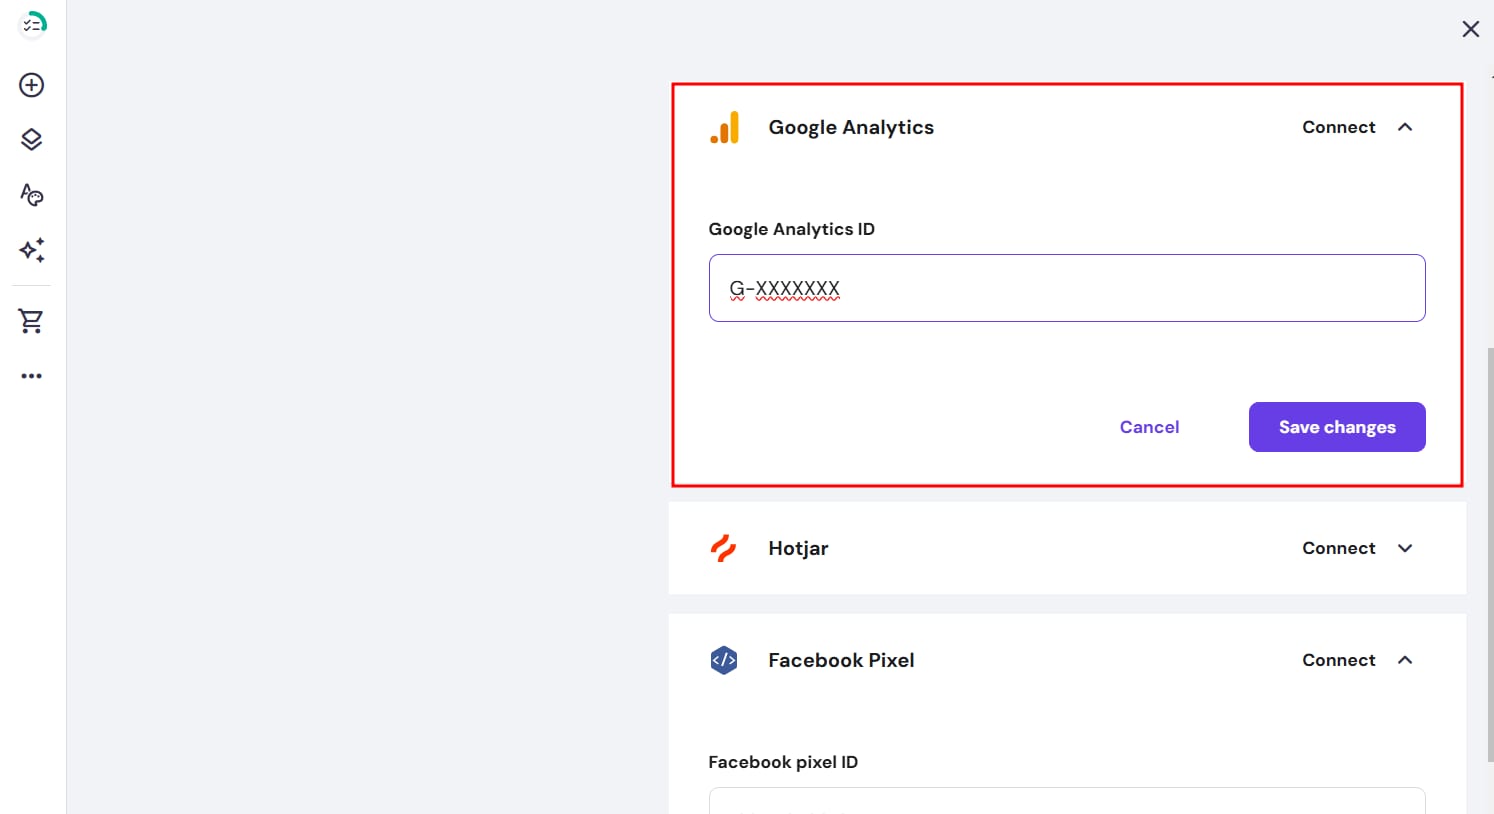
Save the changes, and update your website. You should receive the first reports in 24 hours.
Find Your Measurement ID
-
Sign in to your Google Analytics account
-
Click on Admin in the bottom left
-
At the top of the Property column, select your property
-
In the Property column, click on Data streams
-
Click on the data stream for which you need the ID
-
The ID (G-XXXXXXX) appears in the top right
Or follow this instruction by Google Analytics.
Create a New Google Analytics 4 Property (Optional)
This is an optional step for those who don’t use Google Analytics 4 yet and/or want to create a new Google Analytics 4 property 💡
1. In your Google Analytics account, open the Admin section in the bottom left and click on Create property:

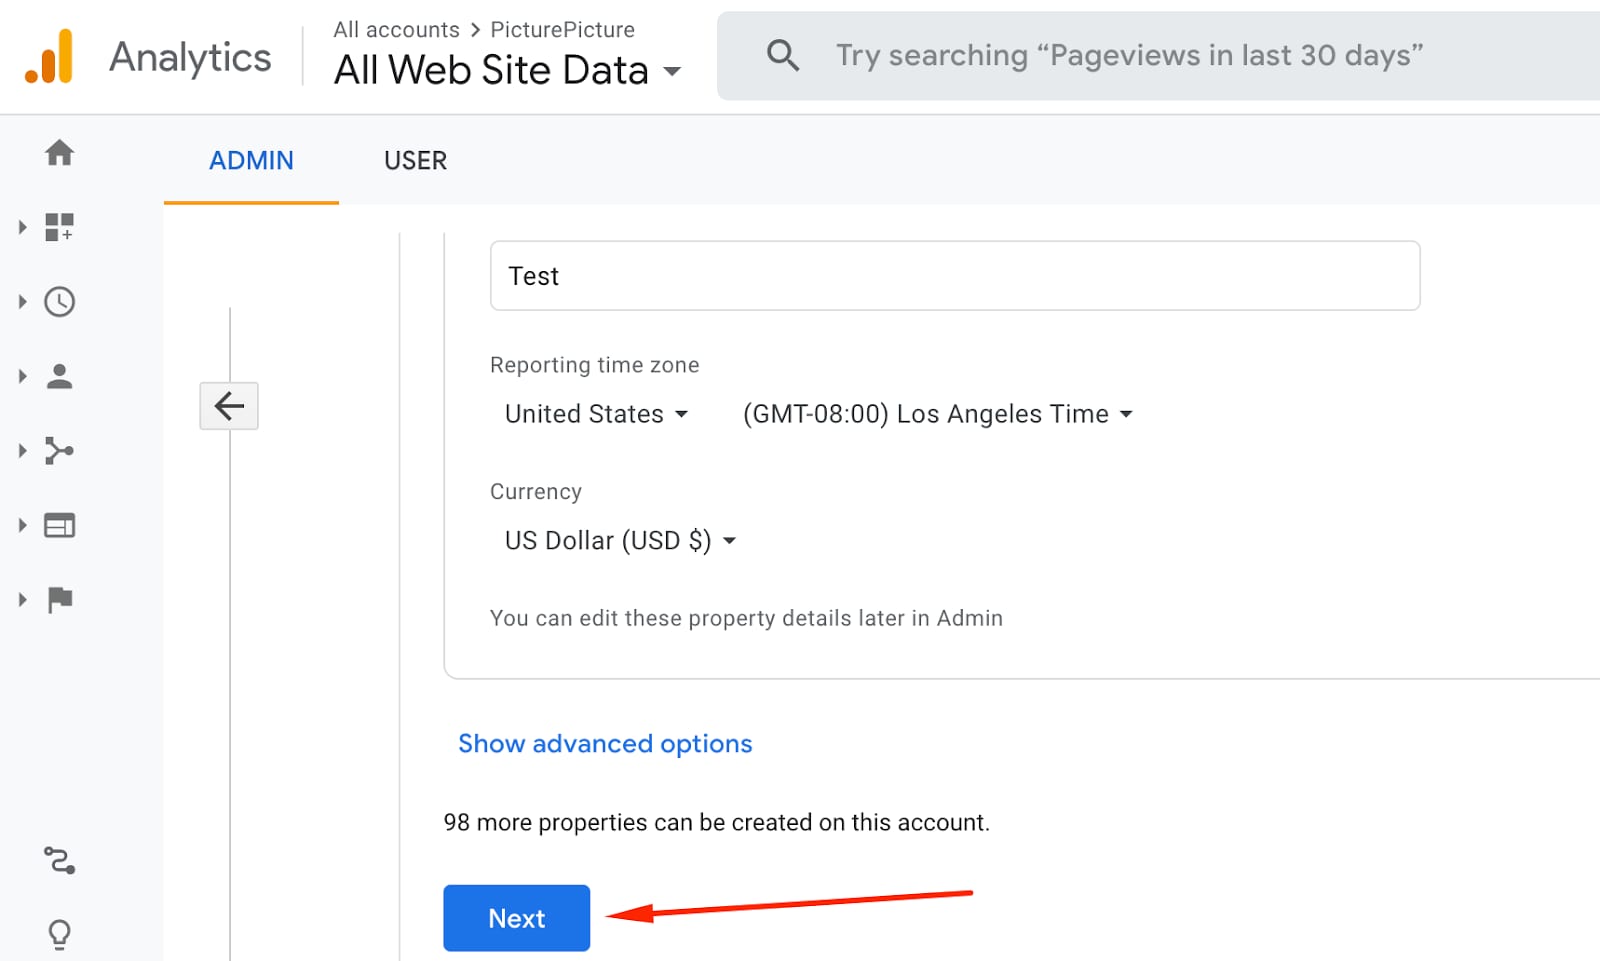
2. Provide the necessary details: property name, time zone, currency, and click on Next:
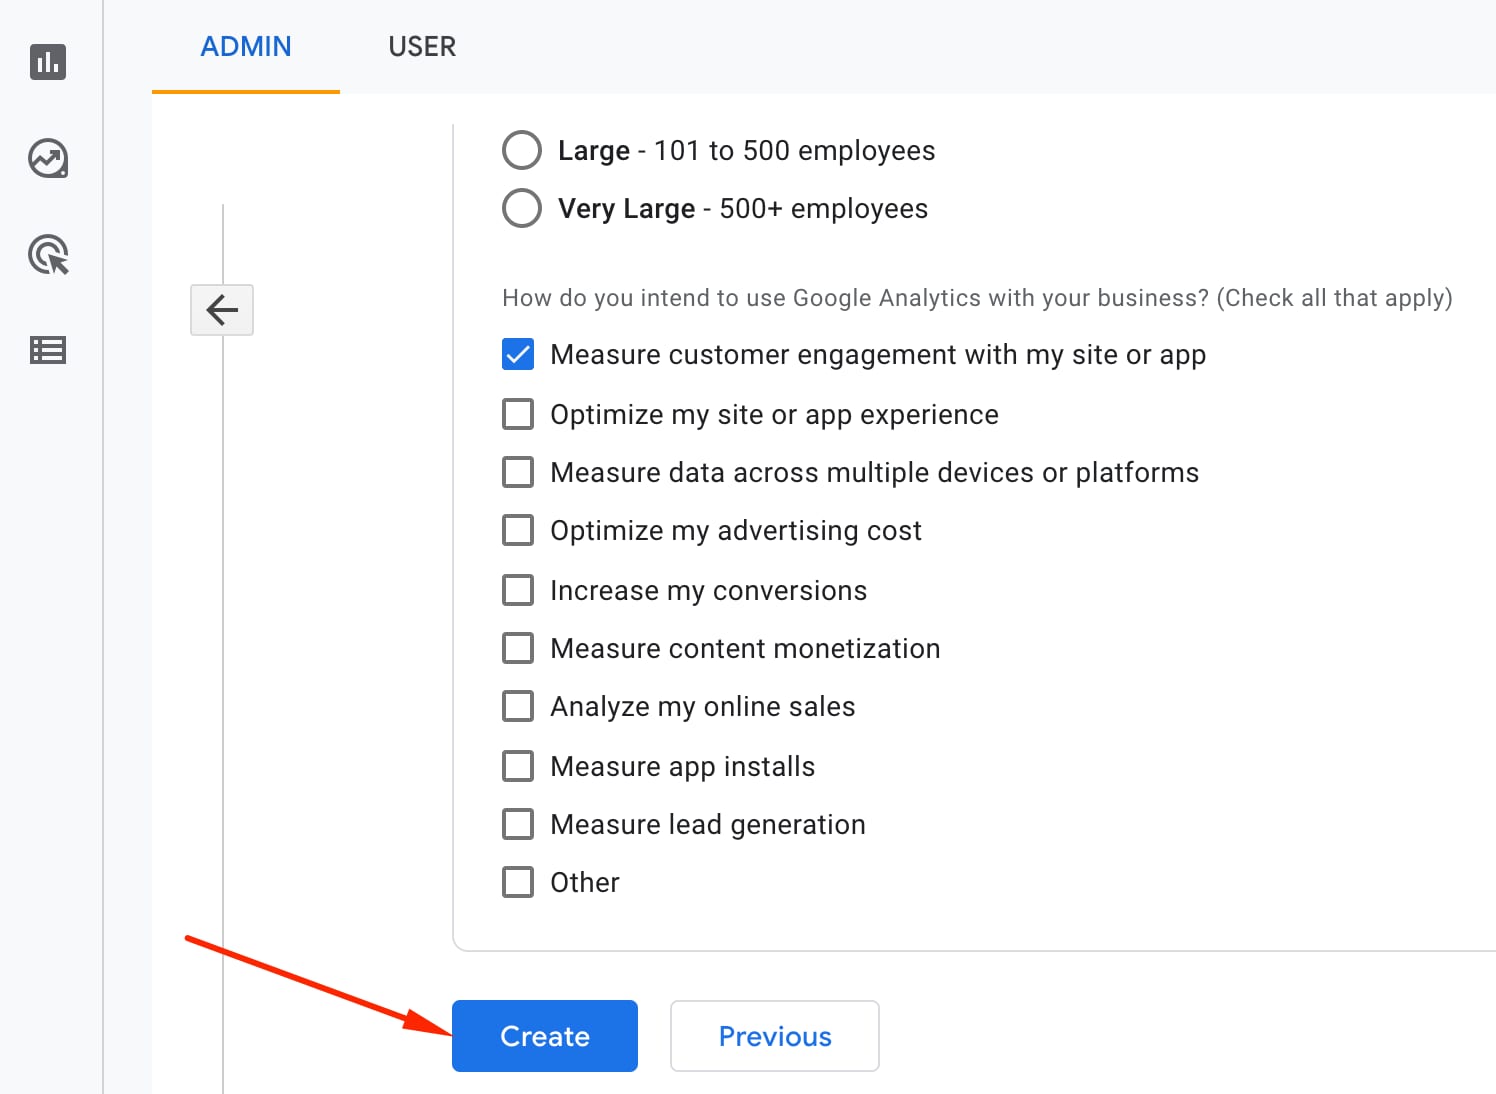
3. Fill in your Business information and click on Create:
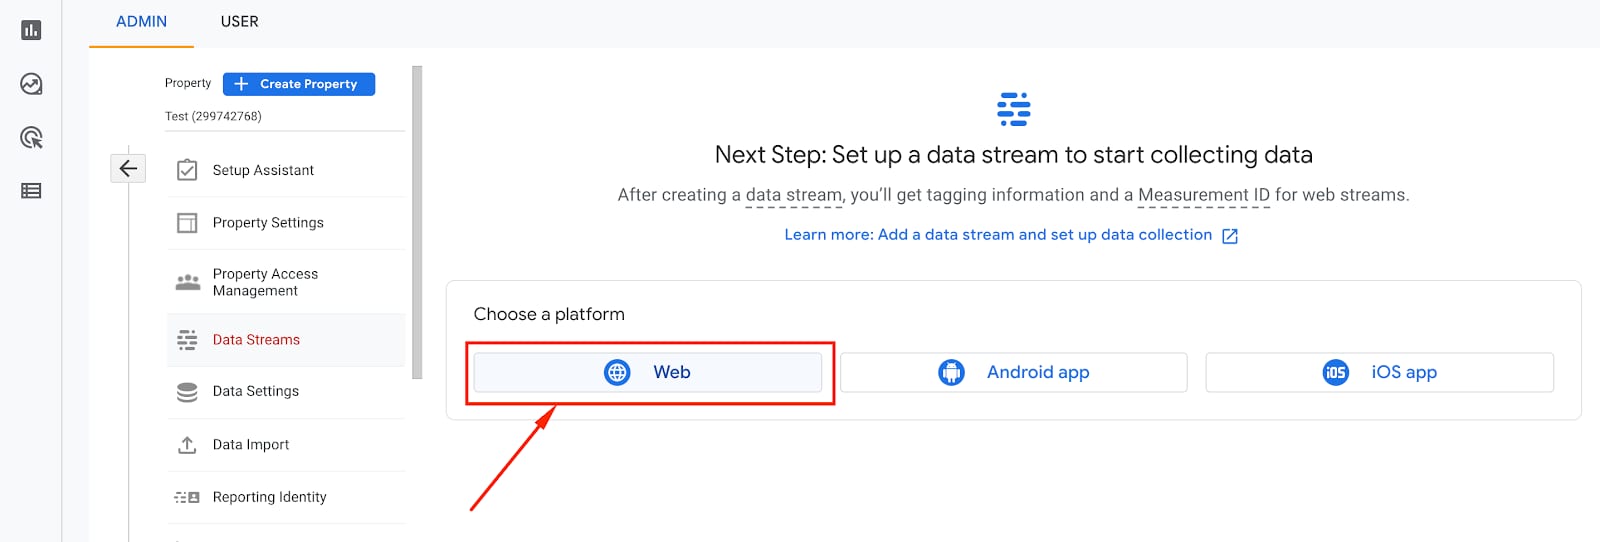
4. For a platform to collect data from, select Web:
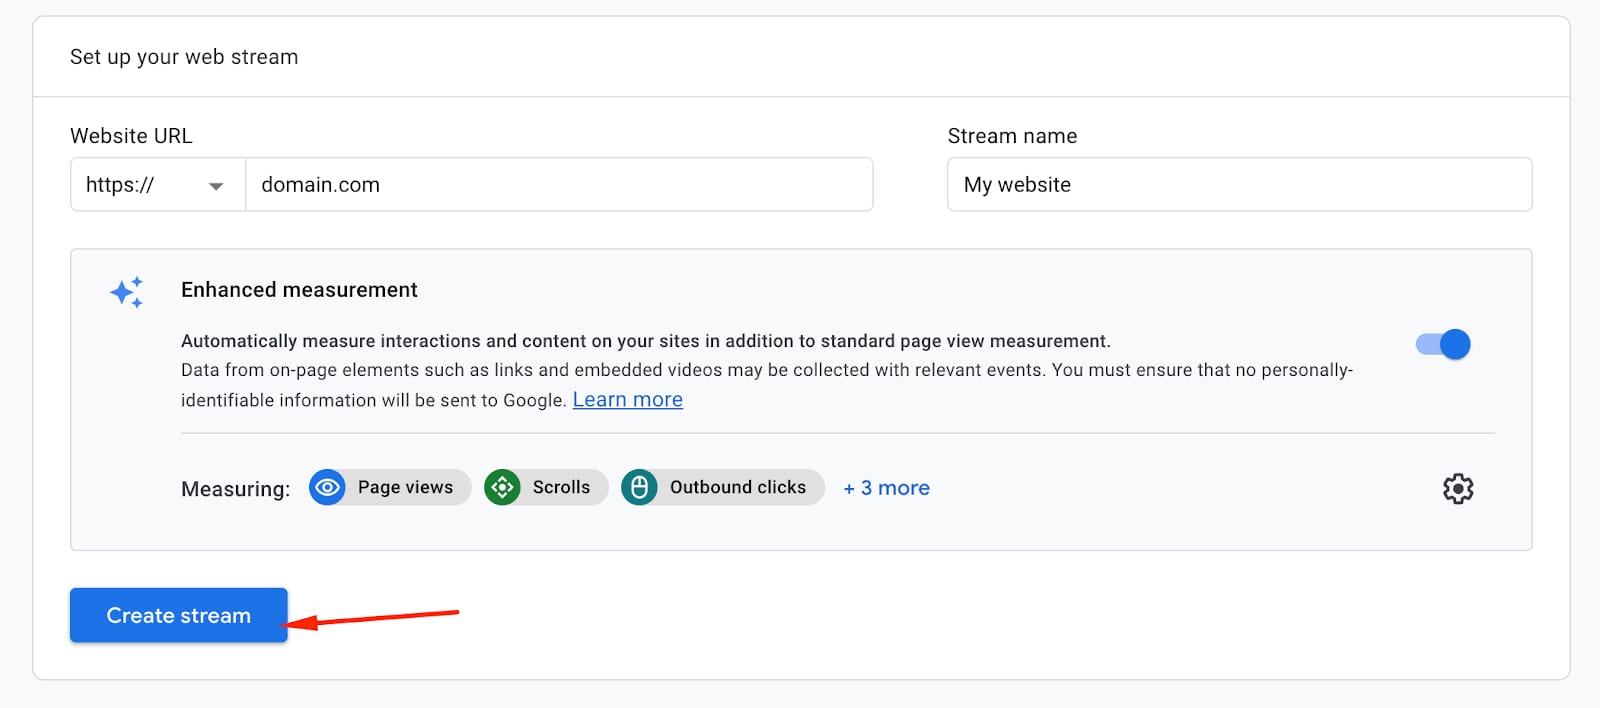
5. Insert your domain name and the name of your web stream. Customize the settings if needed, and click on Create stream:
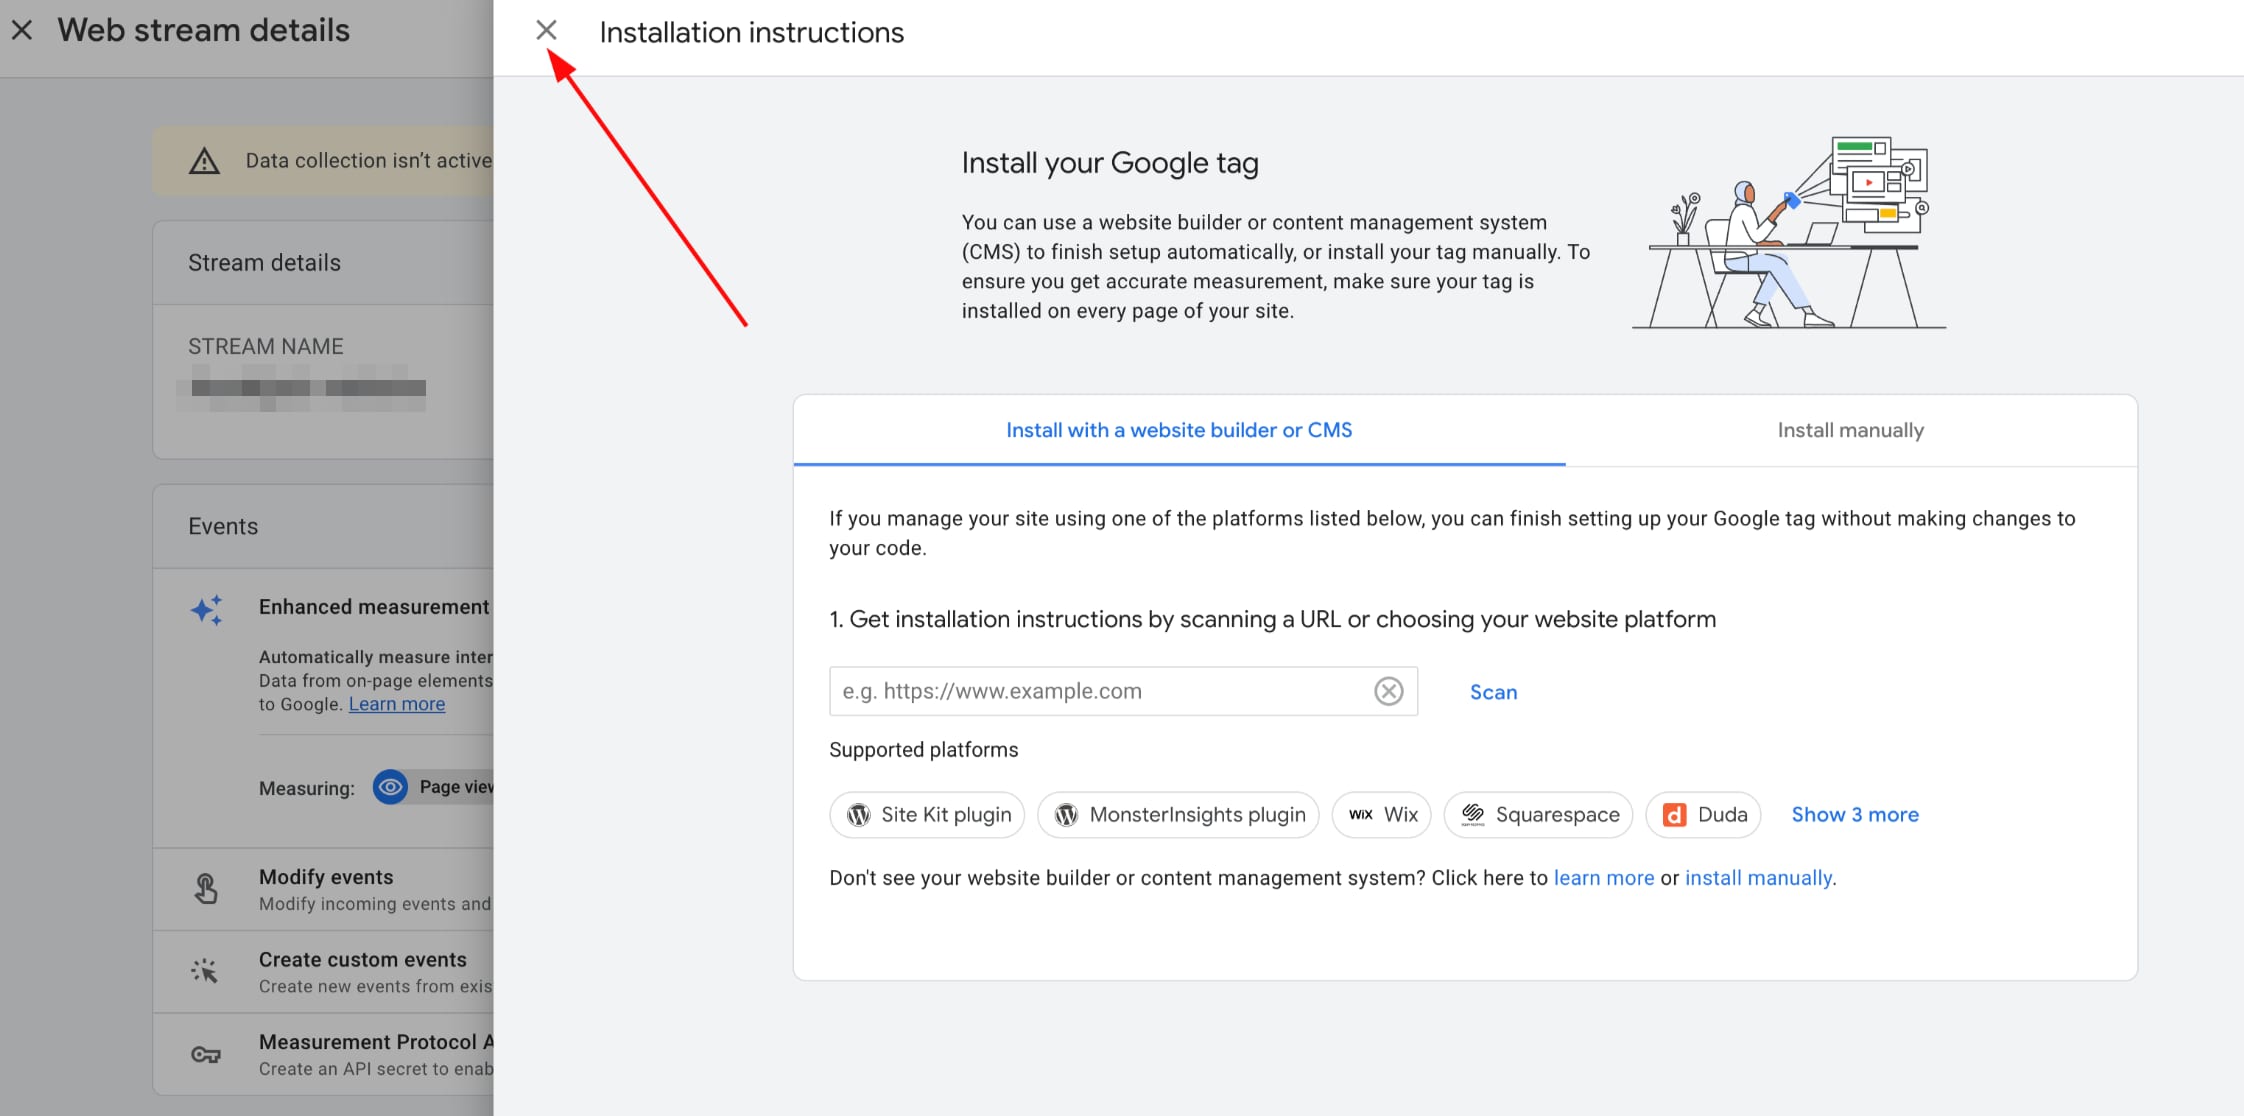
You may be asked to insert your Google tag into your website. Dismiss that window and find the measurement ID instead – that’s all you need to know to connect Google Analytics to your website:
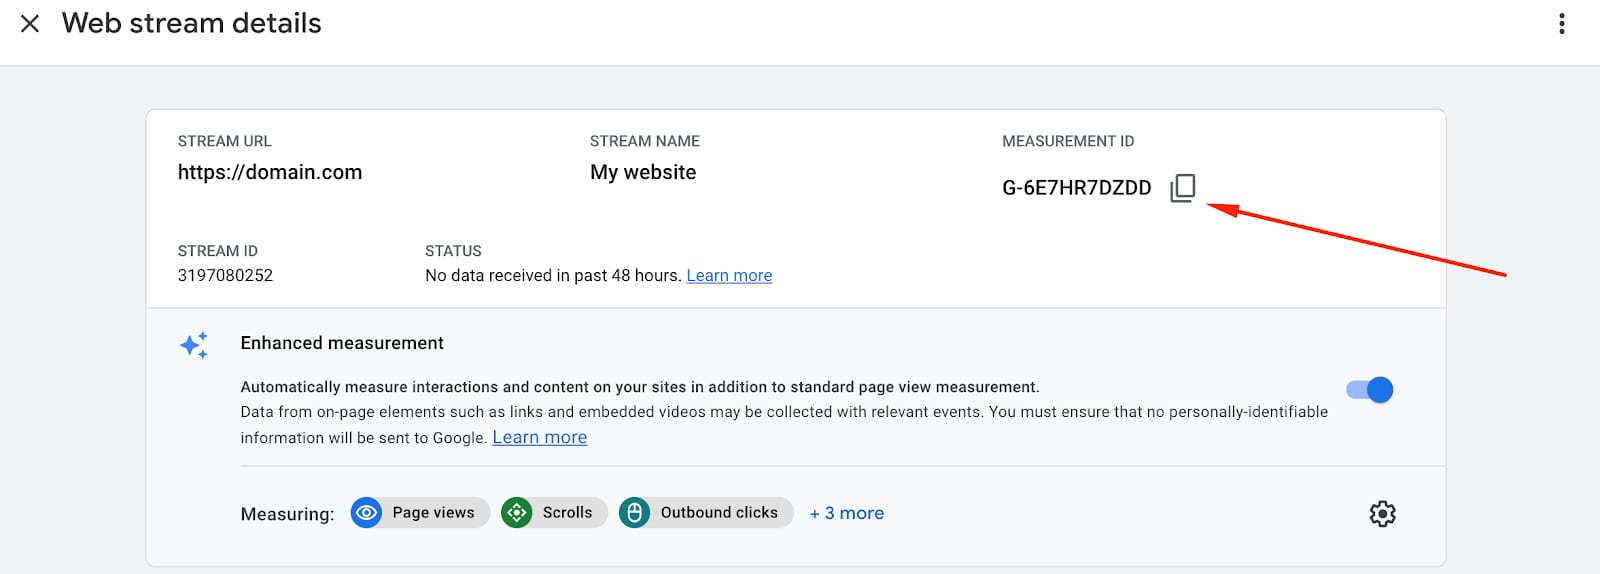
6. You will find the Measurement ID on the right:
Troubleshoot
First, make sure that you’ve inserted the correct tracking ID (G-XXXXXXXXXX) in your website’s integrations settings:

It’s also important to update your website once any code or ID is added, edited, or removed from the integrations settings, as this is how the changes are updated in your website’s source code.
If everything seems to be set up correctly, but you still can’t see any data in Google Analytics yet, don’t worry – the first reports arrive 24 hours after successfully integrating Google Analytics into your website.
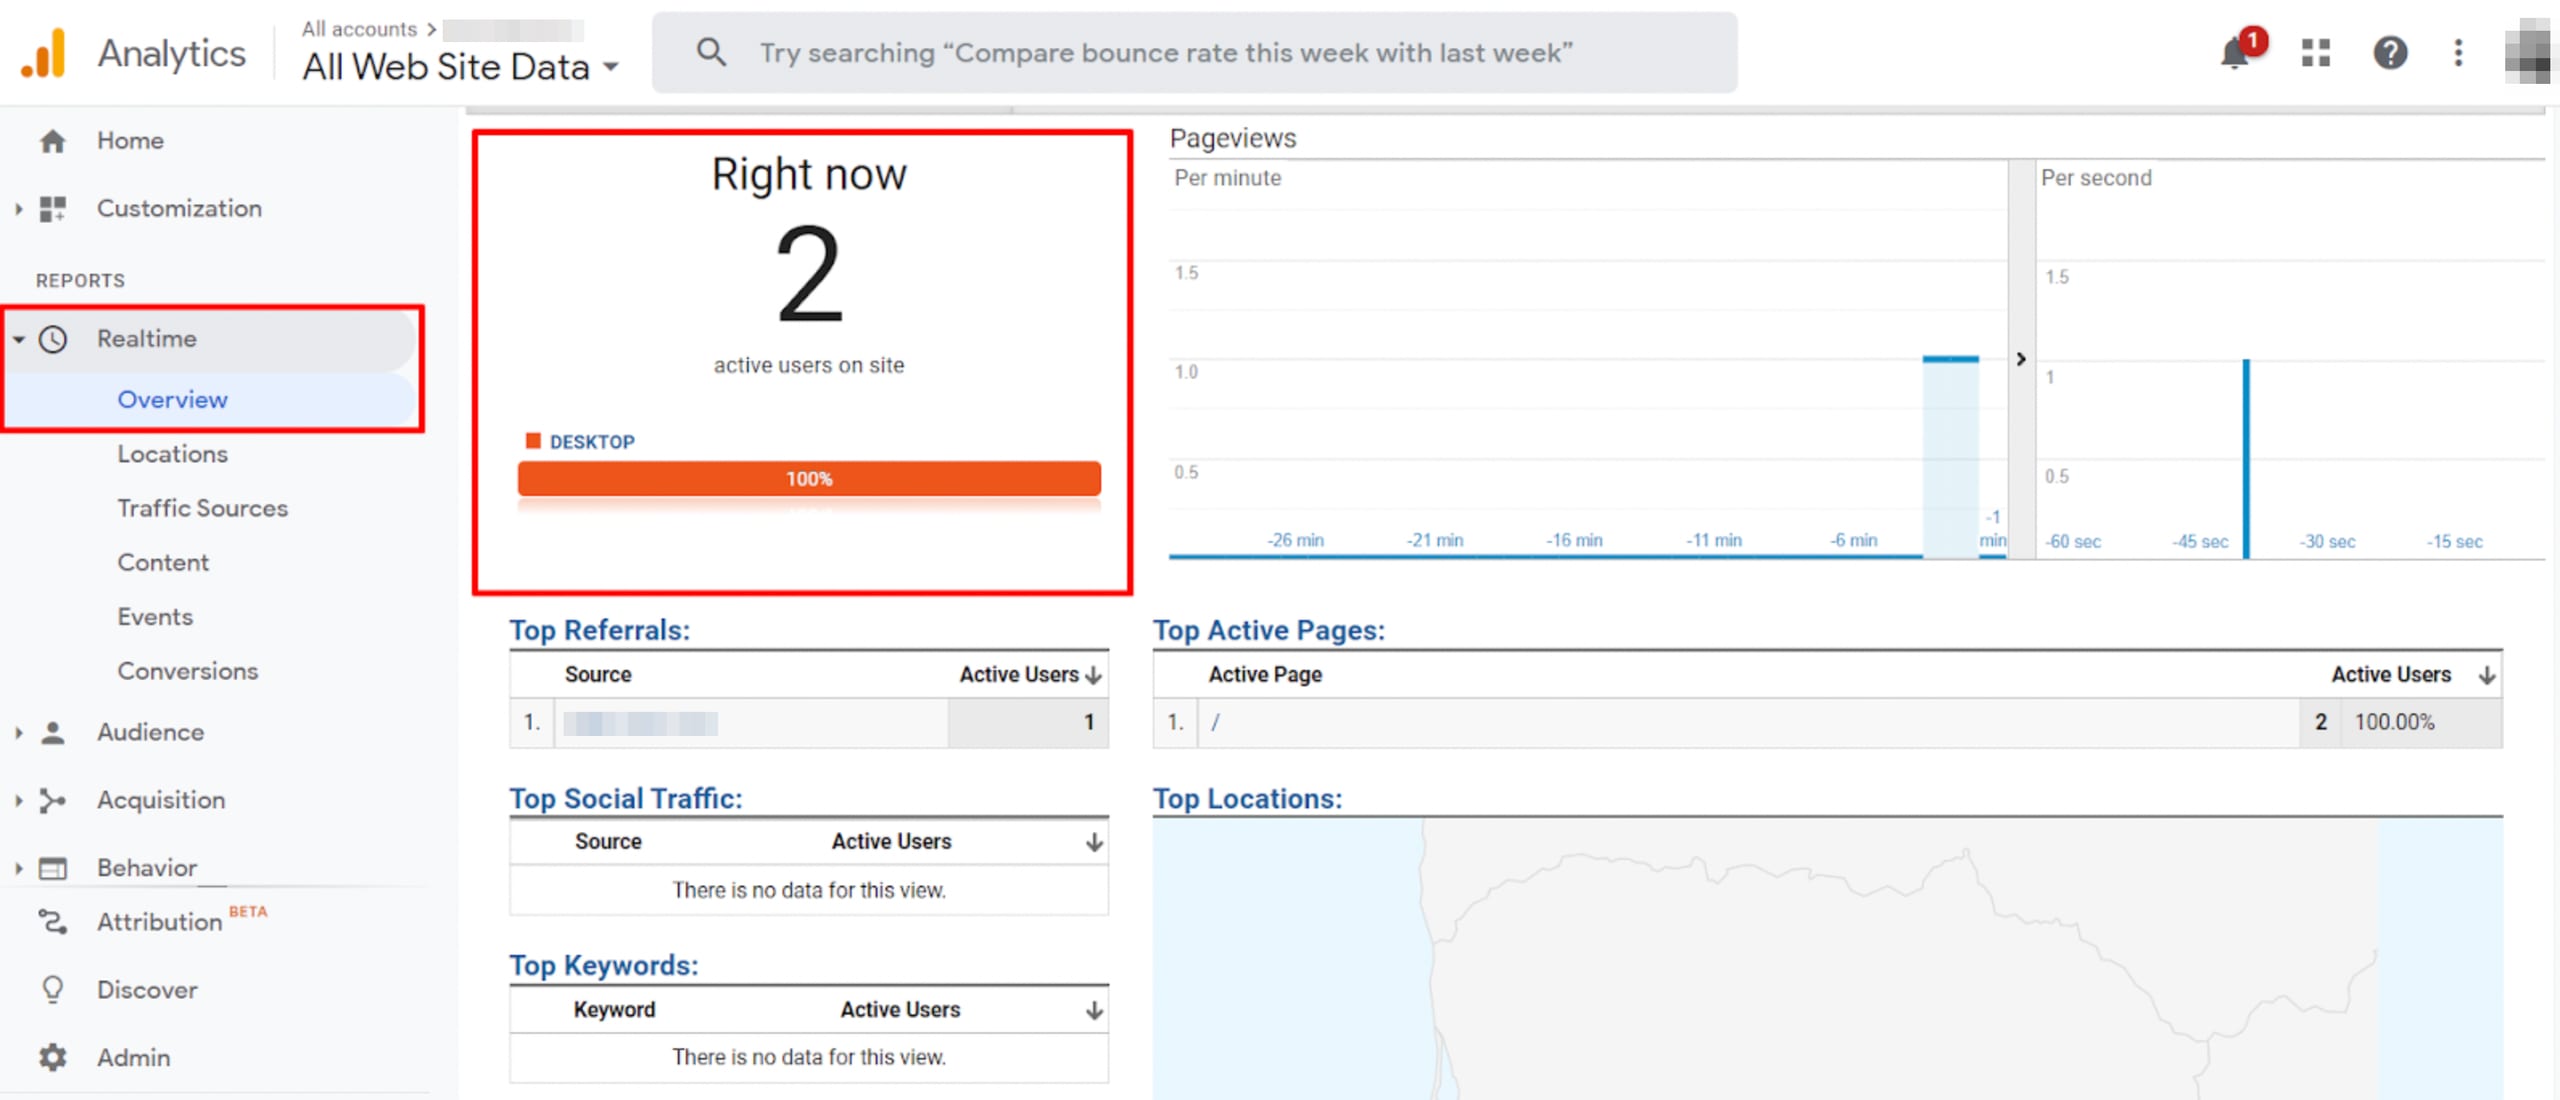
Yet, if you’re eager for statistics, you can check the Realtime report. Open your website, and, in another tab, go to Google Analytics → Realtime → Overview. If you have your website open, you should see at least one visitor (yourself) there, which means that your Google Analytics has been set up correctly:
To learn more, check out Google Analytics Academy courses 💡