With the help of custom code, you can connect third-party integrations or verify the ownership of your website or domain for various services and platforms, e.g., Google Search Console, Facebook, AdSense, and the like. Snippets added here are auto-placed based on tag type: <meta>, <link>, and <style> tags go to <head>, while <script>, <noscript>, and <iframe> tags go to the end of <body>. If you need a <script> to load from <head> specifically, add the data-render-head attribute to the tag. If instead you want to manually add code to the <body>, follow our article about it.
If you use Hostinger Website Builder and want to add custom code to your site, follow the instructions below 👇
Integrating Custom Code
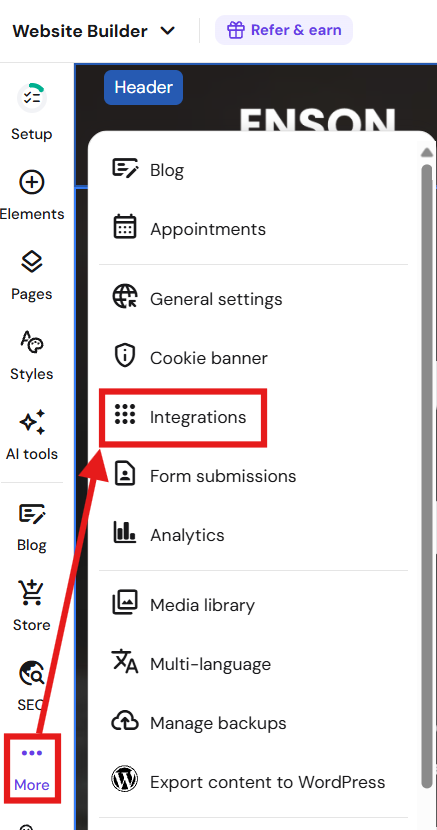
Within the builder, go to the three dots → Integrations:
Paste the code into the Custom code field:

You can add as many codes there as you need. Just make sure to paste one snippet of code below another, and don’t paste one in the middle of another code.
Finally, save the changes and update your website.
Changes made by custom code are visible in the website’s preview mode and online, not within the editor 💡
To confirm the code is live, open your website in a browser → right-click → Inspect → use Ctrl+F / Cmd+F to search for a keyword from your snippet.
Troubleshooting
If the integration is not working as expected, make sure that you’ve inserted the correct script and updated your website. Updating your website is necessary to push the newly added script to your website’s source code.
If your site breaks after adding code: go to Integrations – Custom Code, remove all snippets, republish, then re-add them one by one to find the culprit.