In Hostinger Website Builder, you can change the line spacing in two ways:
-
Globally – affects all text elements of a particular style
-
Locally – affects a particular text element
Changing the Line Spacing Globally
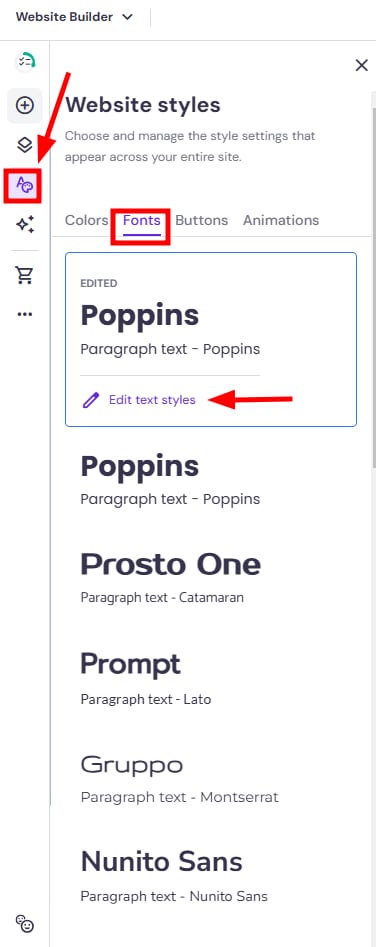
1. Expand the Website styles panel on the left. Open the Text tab and click Edit text styles:
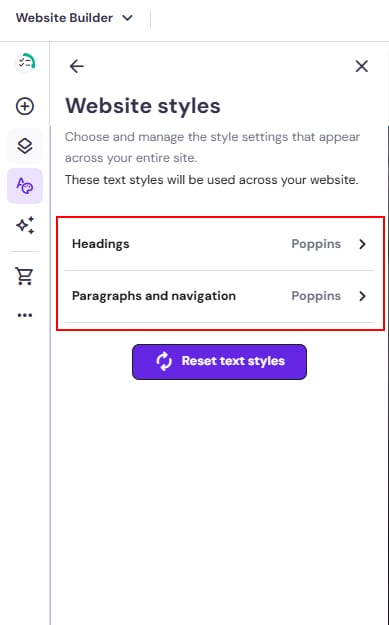
2. Select Headings or Paragraphs and navigation, depending on what you’d like to change:
3. Select the particular text style (Heading 1, Heading 2, etc.) and change the Line height:
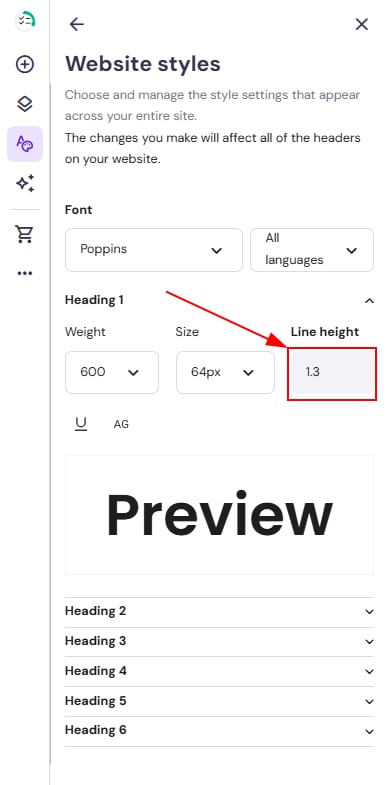
The line spacing will change for all texts written in the particular style you edit, e.g., Heading 1.
Changing the Line Spacing for a Particular Text Element
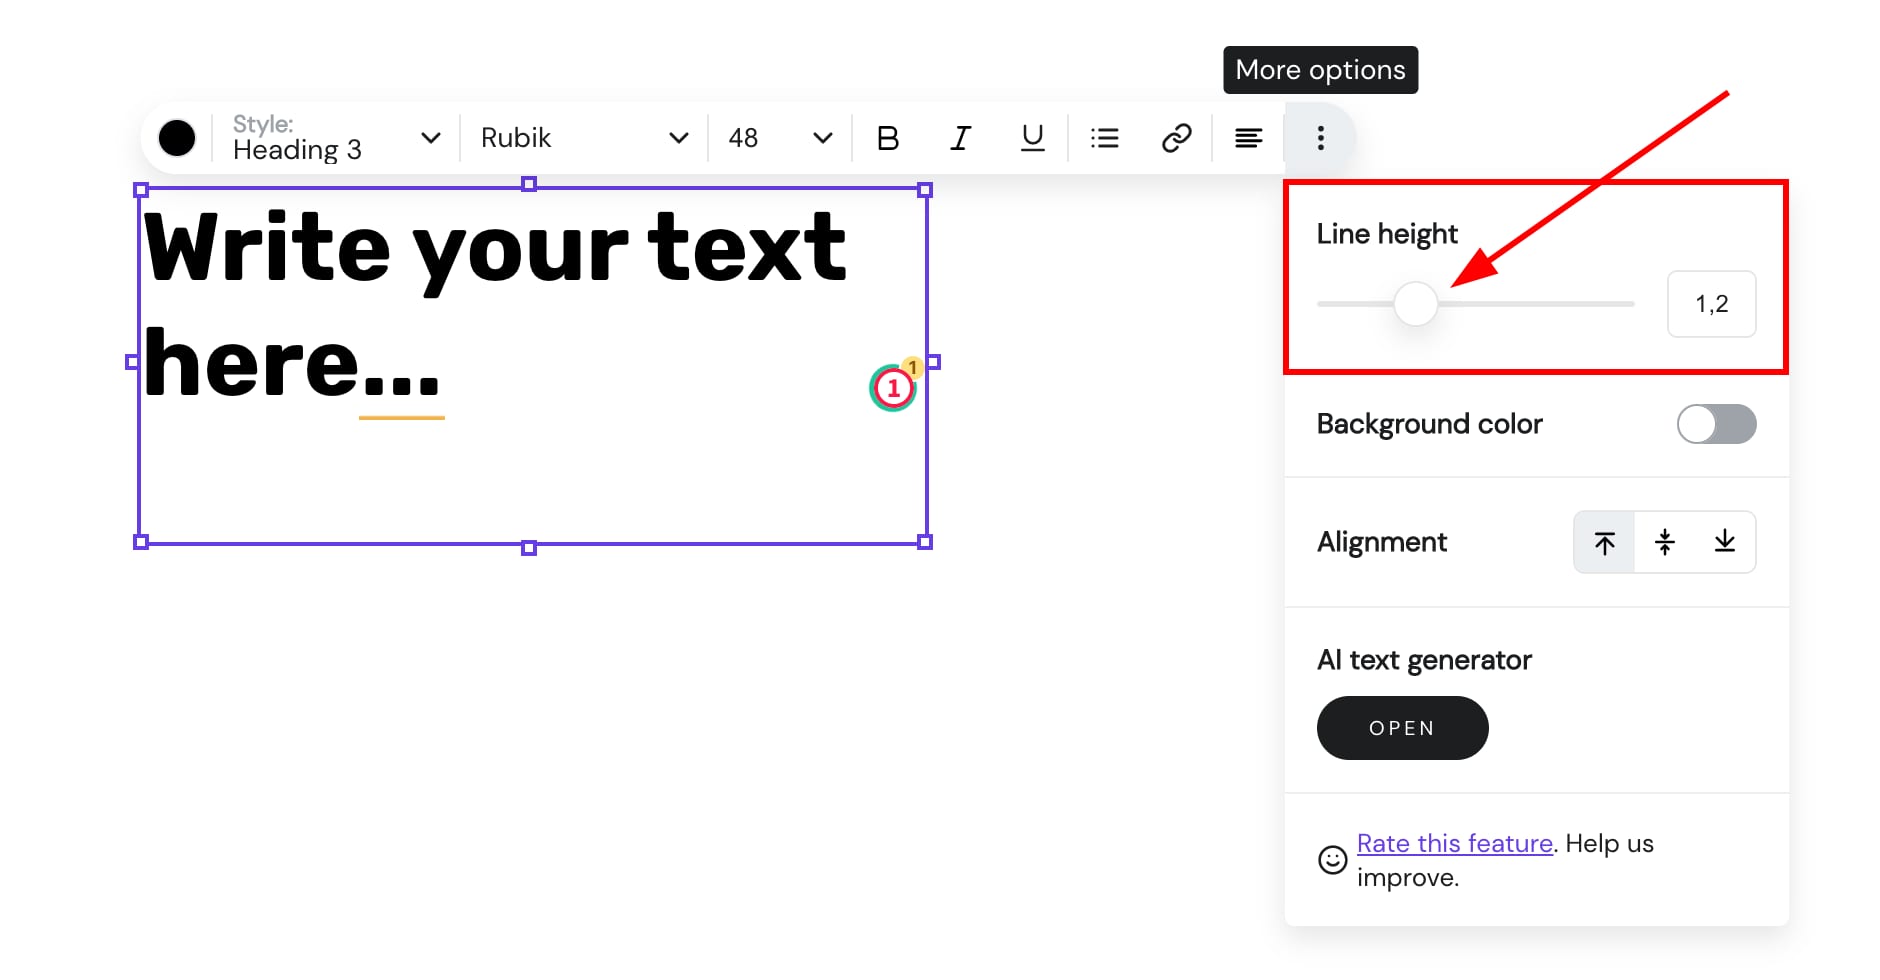
Click on a preferred text element and select Edit text. Then, click on the ellipsis ⋮ button to see more options and change the line height:
In text elements:
-
ENTER – starts a new paragraph
-
SHIFT+ENTER (Windows) or COMMAND+ENTER (macOS) – starts a new line