A good logo serves as a visual anchor for a brand, instantly conveying its identity and values to consumers. It is a vital tool for building brand recognition, trust, and loyalty, making it easier for businesses to stand out in a crowded marketplace and establish a lasting connection with their target audience.
If you don’t have a logo yet, you can create one using Hostinger AI Agents — the Business Advisor will guide you through generating a logo for your brand.
Adding or replacing a logo
To add or replace the logo on a website created with Hostinger Website Builder, follow these steps 👇
1. Within the builder, click on the header section and select Edit header

The logo is visible in the website’s navigation menu, also called the header section, which is the topmost section of your website. If you can’t see the header section, it’s likely that all your website pages are hidden from the navigation menu.
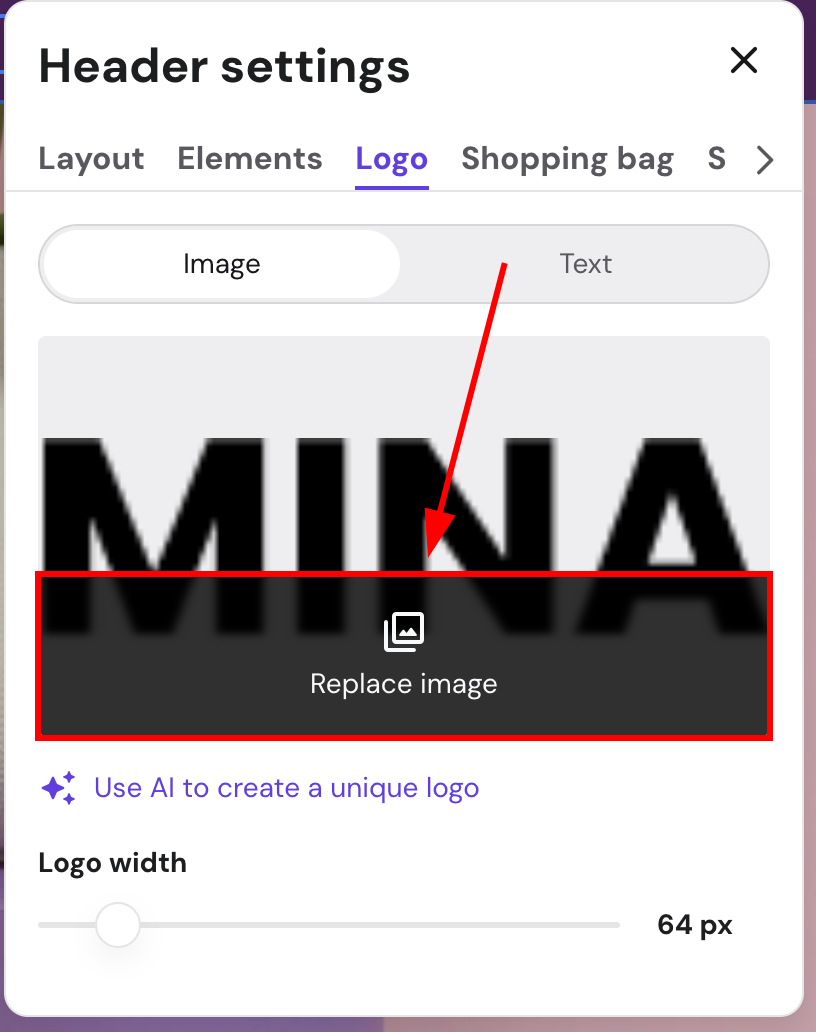
2. Open the Logo tab and click on Replace image:
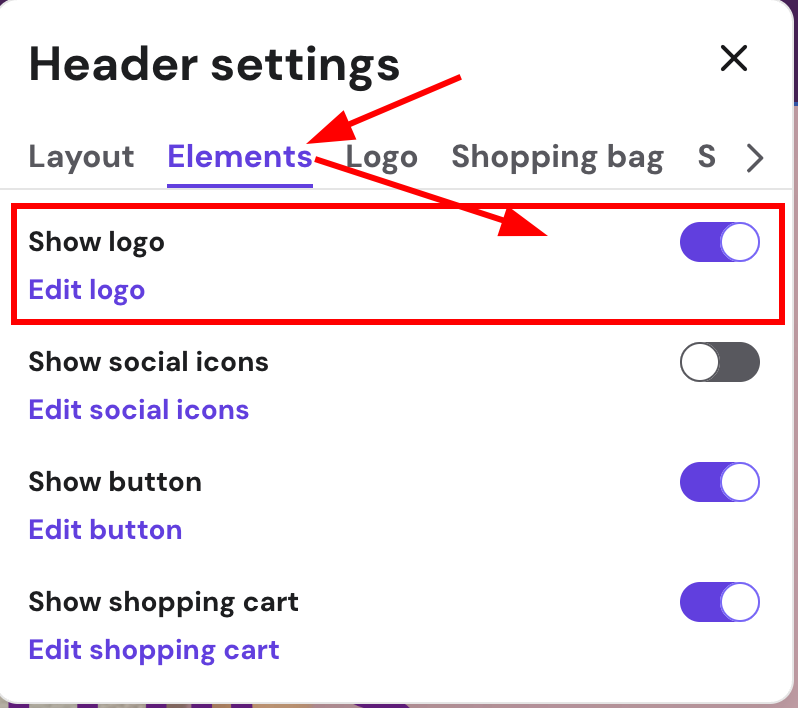
If the logo is disabled, go to Elements and click on Show logo:
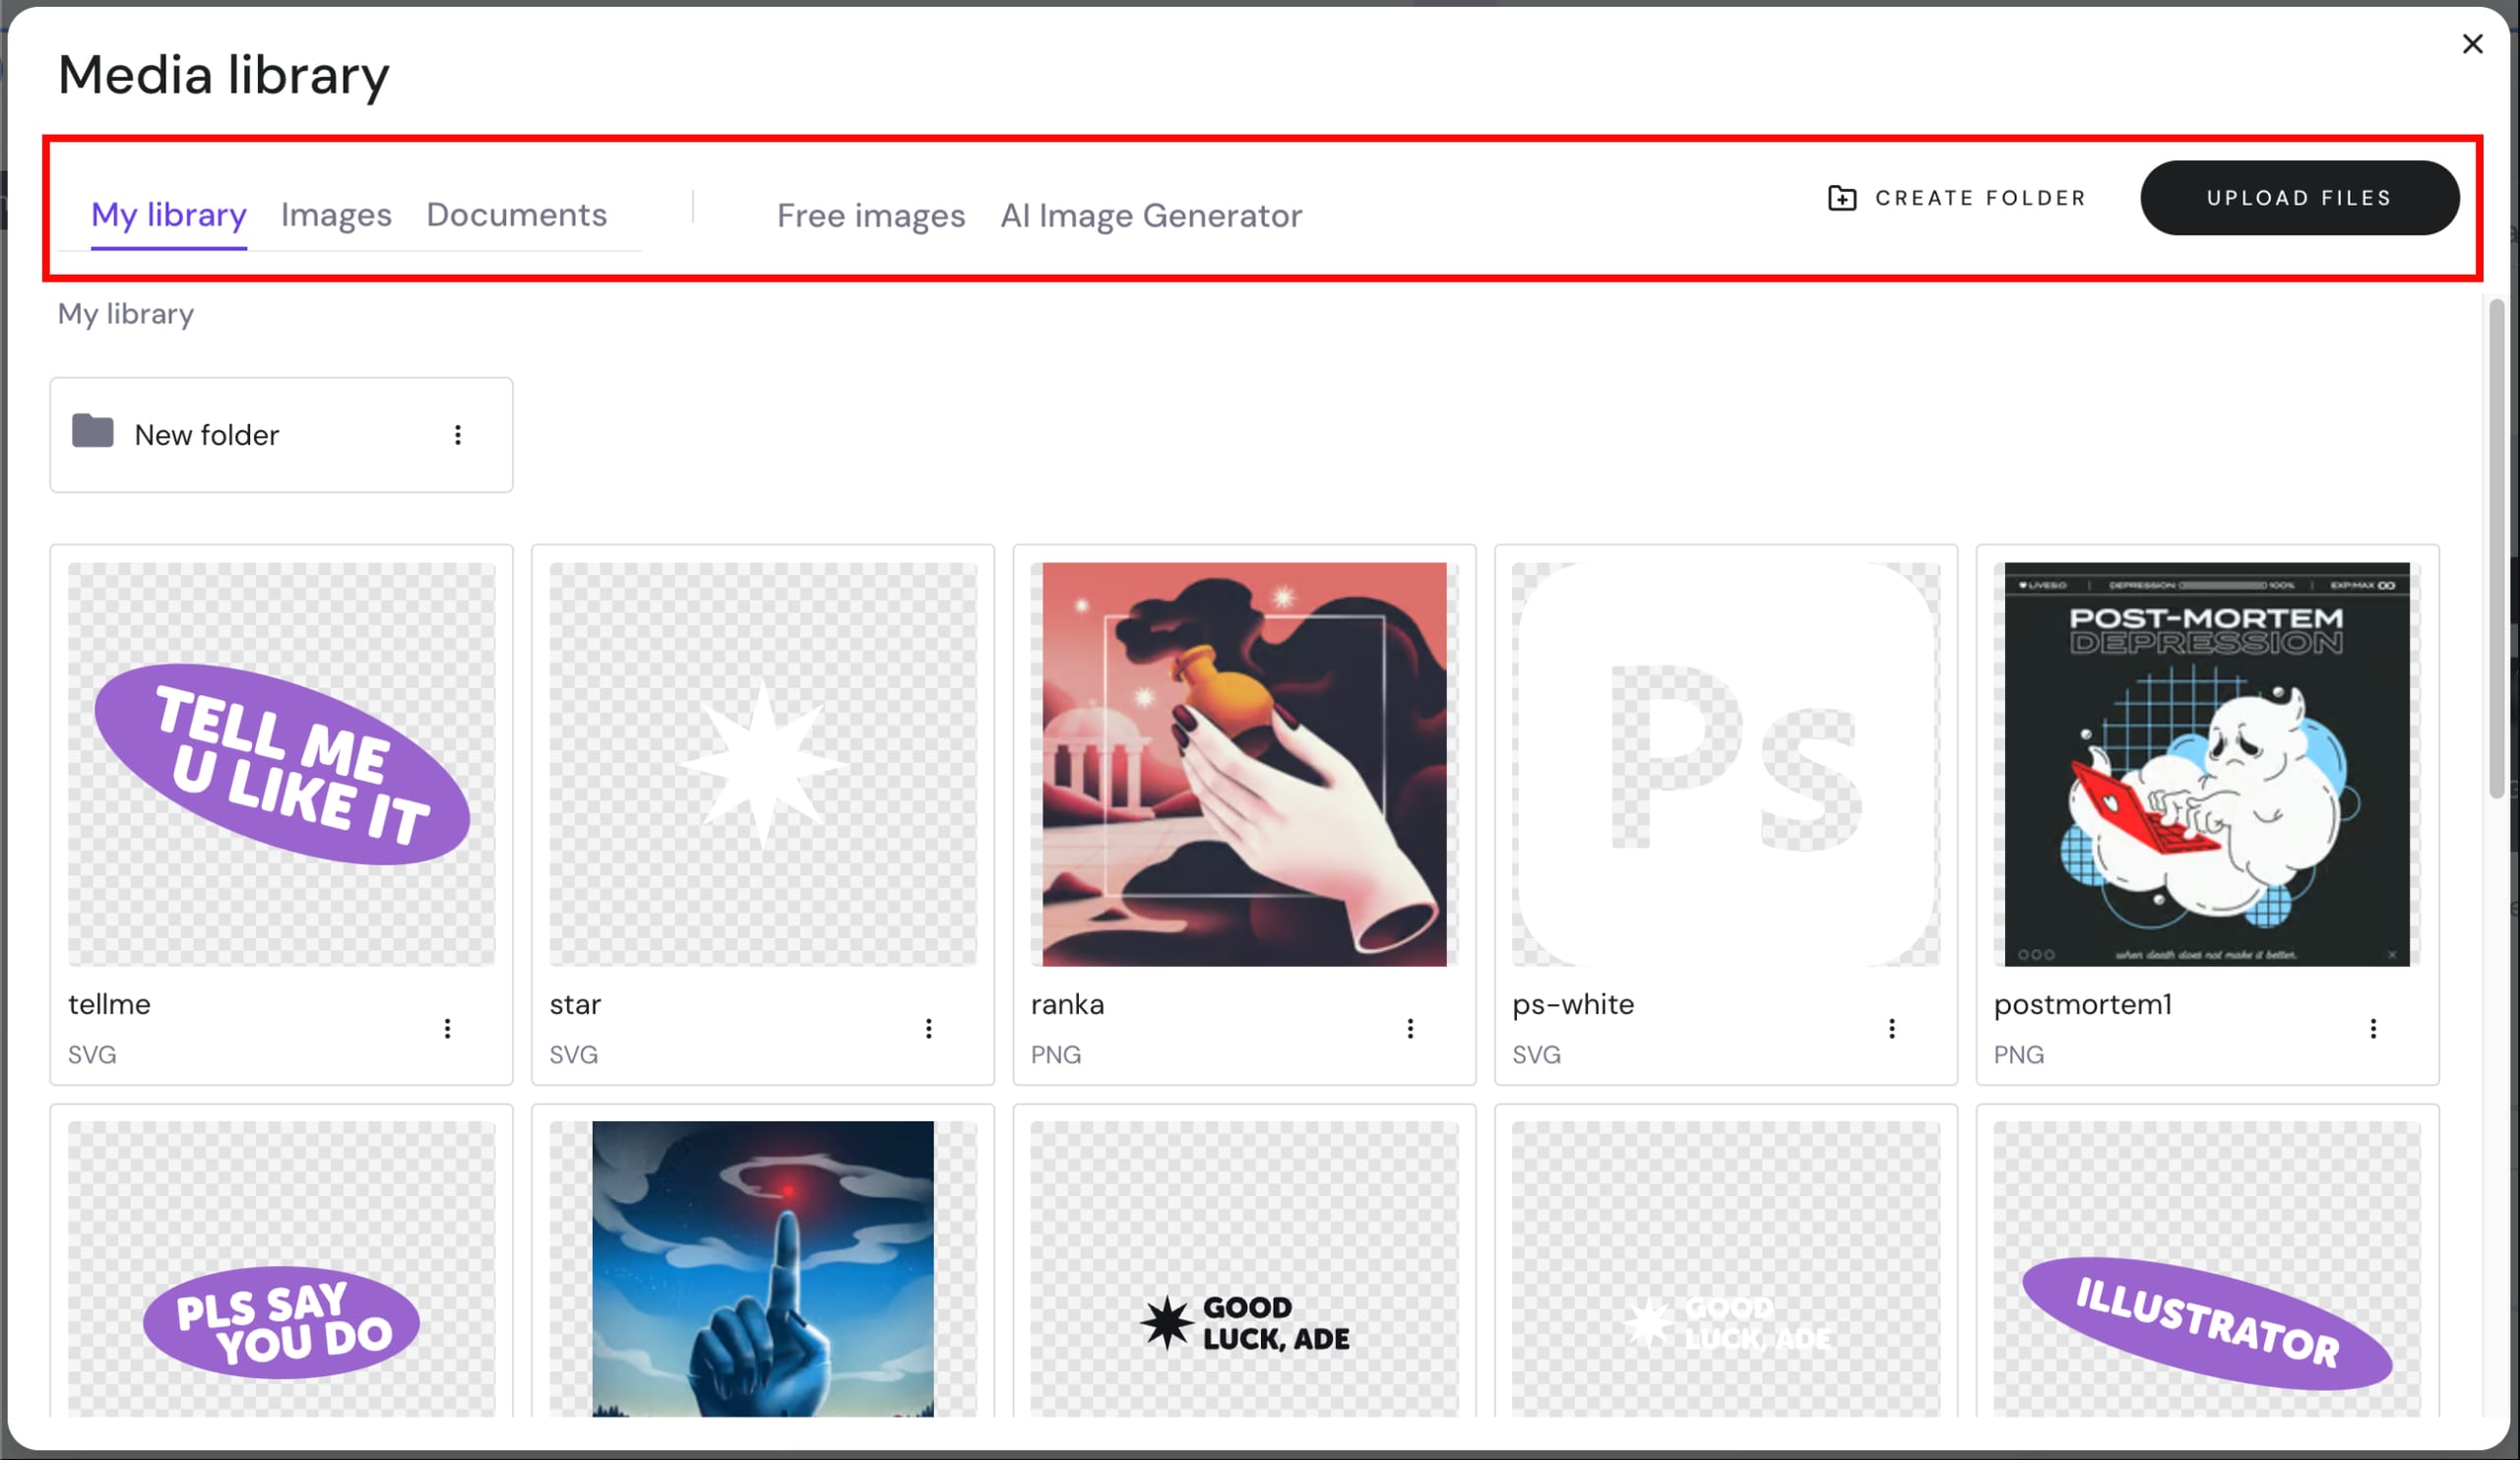
3. Select an image from the media library, browse free images, or upload your own:
Repositioning a logo
To edit the position of a logo in the header, you need to select Edit header:

Then, edit the logo position, as show here:
![]()
Resizing a logo
To resize the logo on a website created with Hostinger Website Builder, follow these steps 👇
1. Within the builder, click on the header section and select Edit header
2. Then, resize the logo by dragging the Logo width as below:
![]()
NOTES
-
The recommended logo file format is .PNG, or .SVG
-
If you run an online store, you may also upload the logo in the Store settings → Company information – this way, the logo will be automatically displayed on invoices
Currently, you are unable to edit and style the logo image inside Hostinger Website Builder. It’s recommended to use an external image editing tool to generate the logo following the file format and add it to your editor 💡