An email alias is an alternative name for your email account. If you use Hostinger Email and want to create an alias, follow the steps below 👇
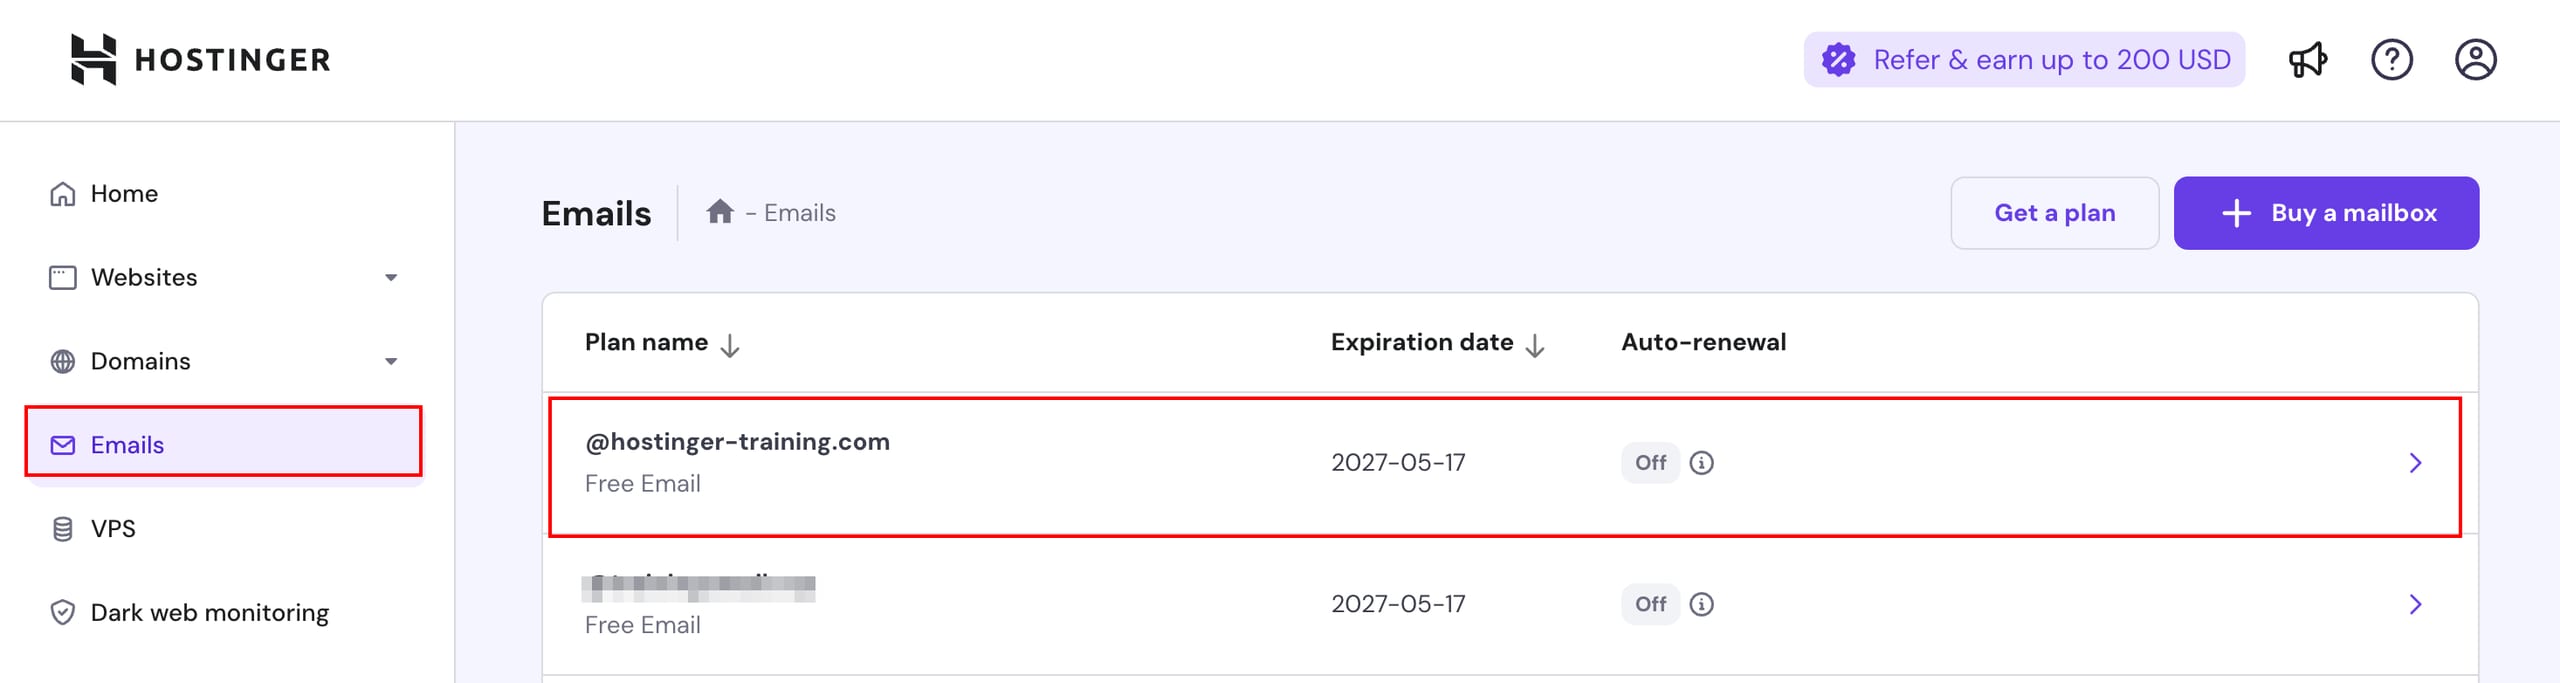
Navigate to the Emails section of hPanel and click on anywhere next to the domain or subdomain of the plan you want to manage.
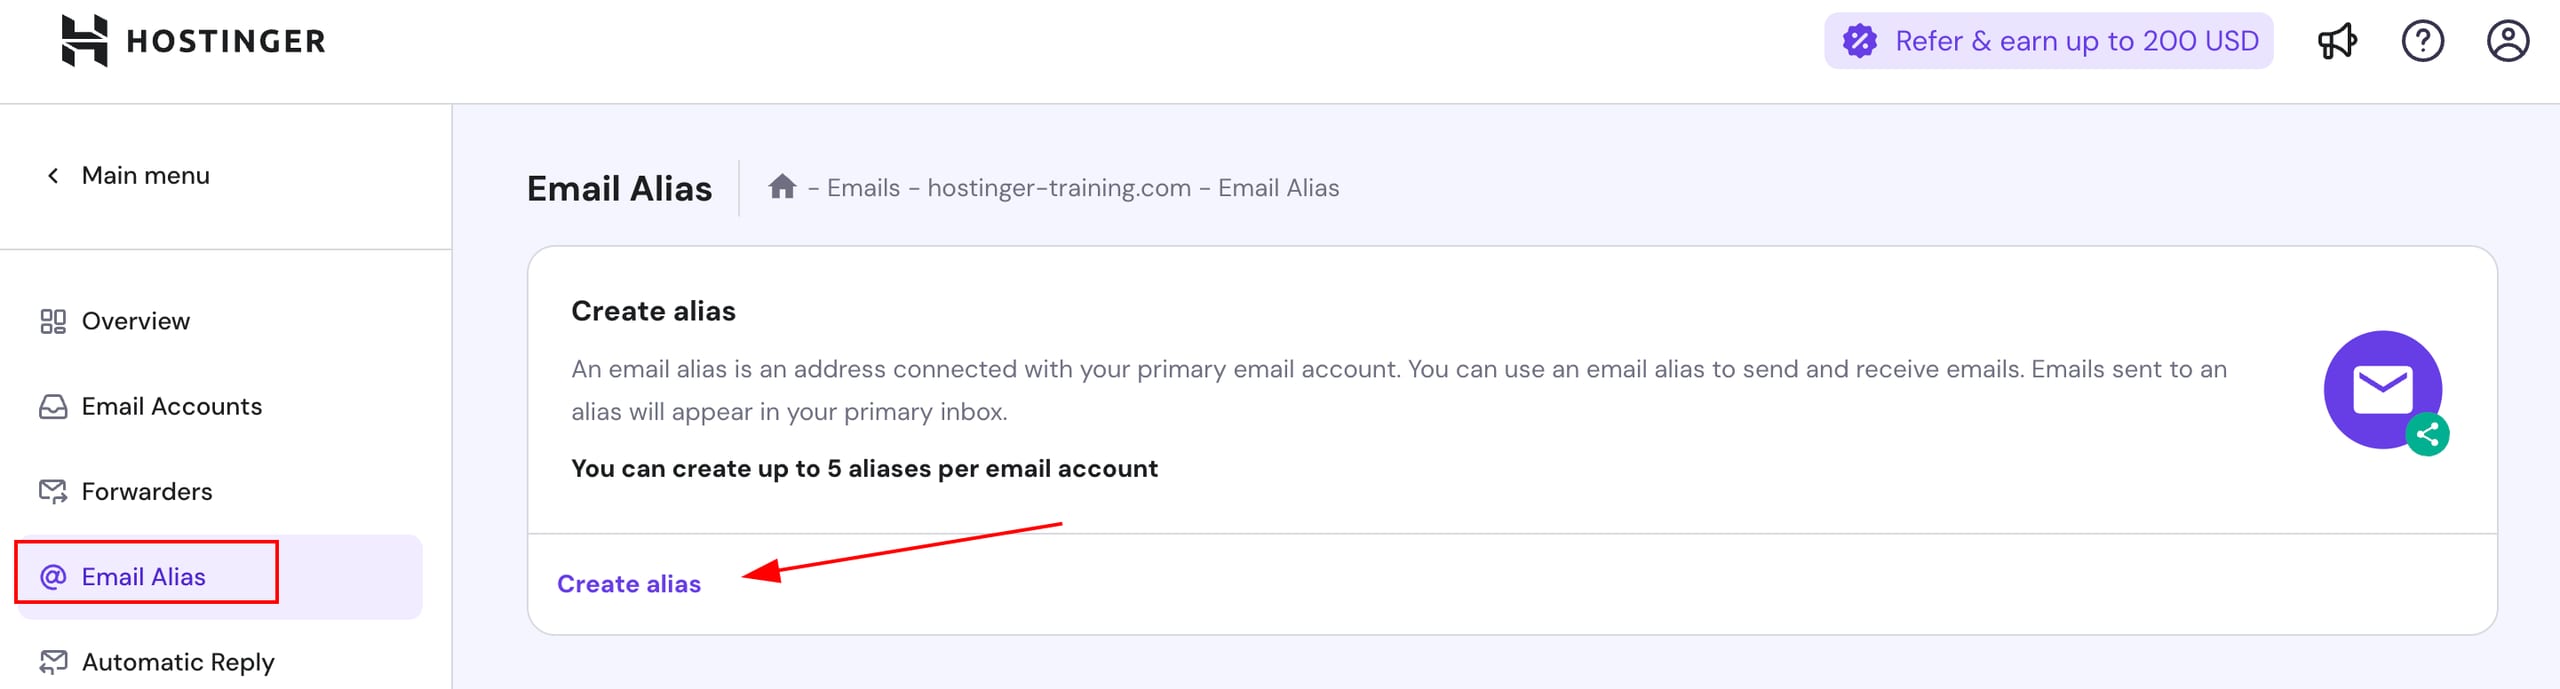
Once there, click on Email Alias section, on the left side menu of the email account in question, and select Create Alias:
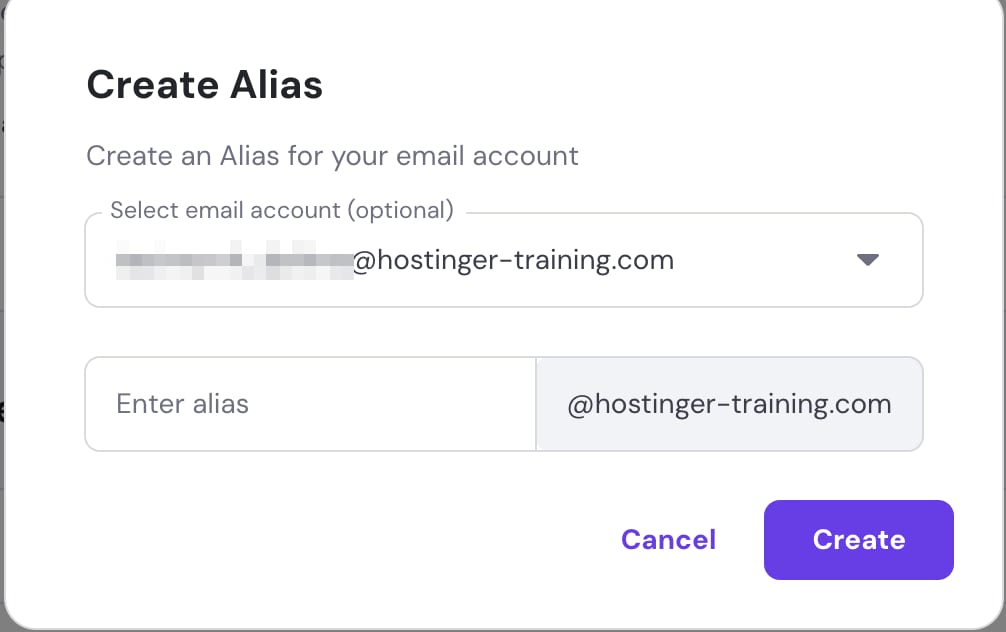
Select the email account to which the alias will be linked to (optional), then enter the alias name for the email account, and click on Create:
Once created you will be able to see and manage all the email aliases in the Email Alias section:
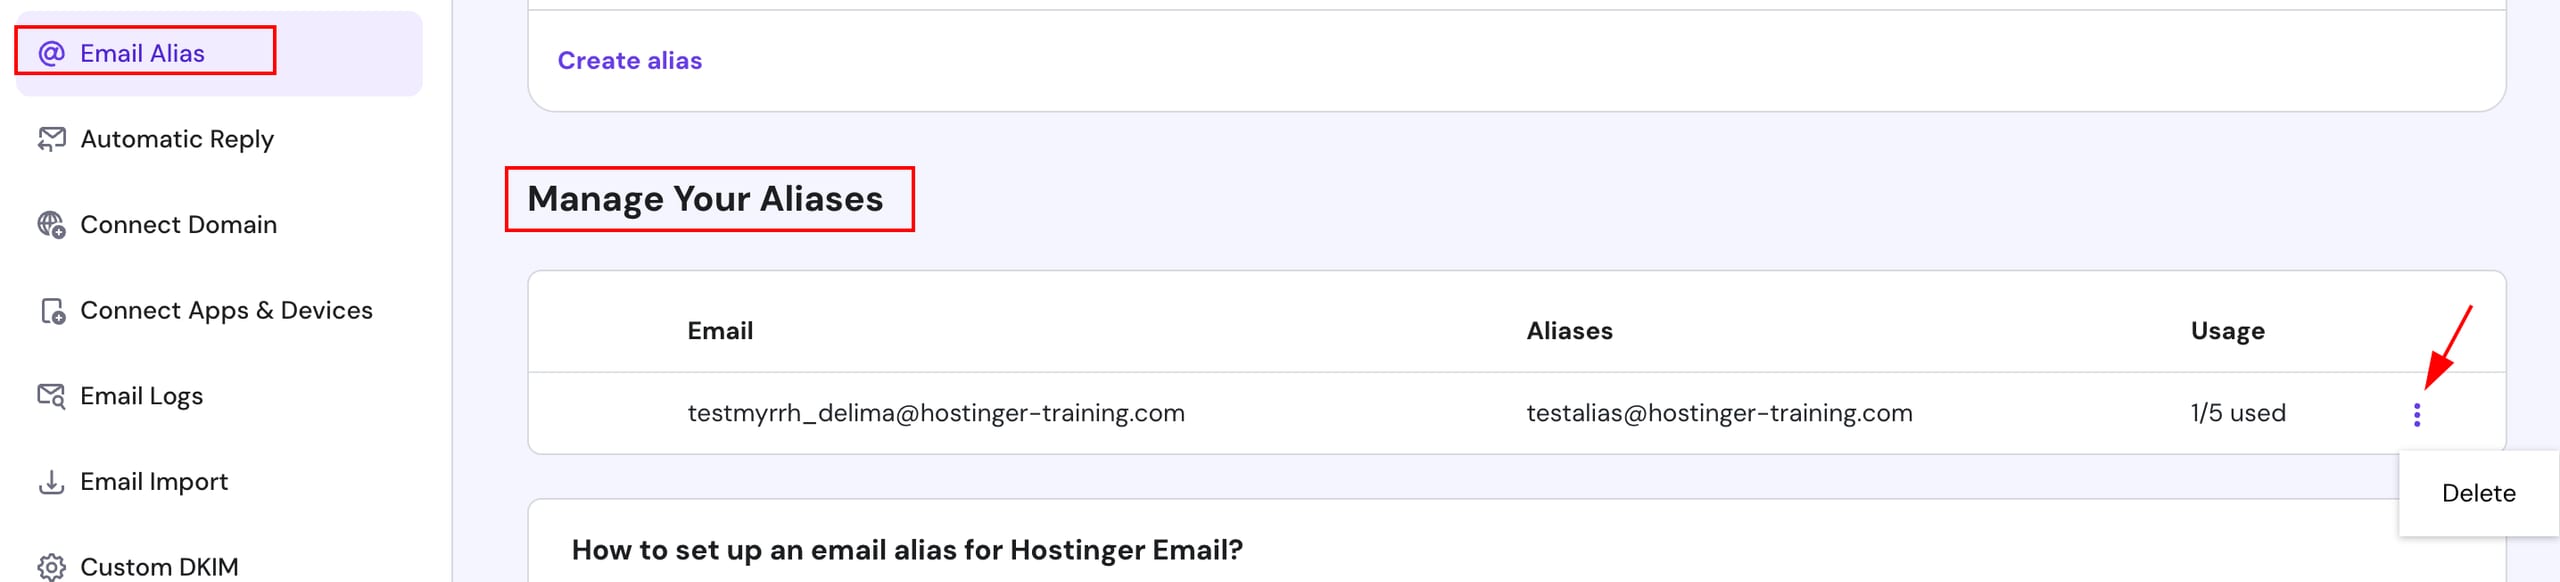
To manage your alias, you can use the Delete button to remove any unnecessary Aliases and free up the slot in case you would like a different Alias name.
To send emails using alias, you need to select From section to change the sender email address.
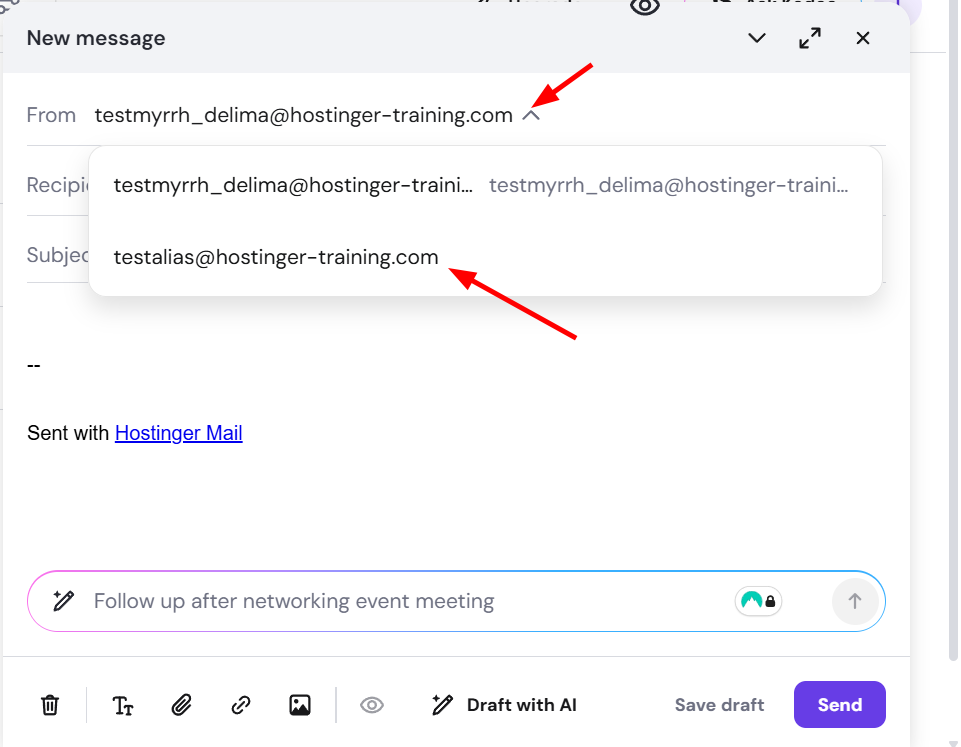
That’s it! From now on, all messages sent to the alias will be forwarded to the main email address. You will also be able to send emails from the alias.