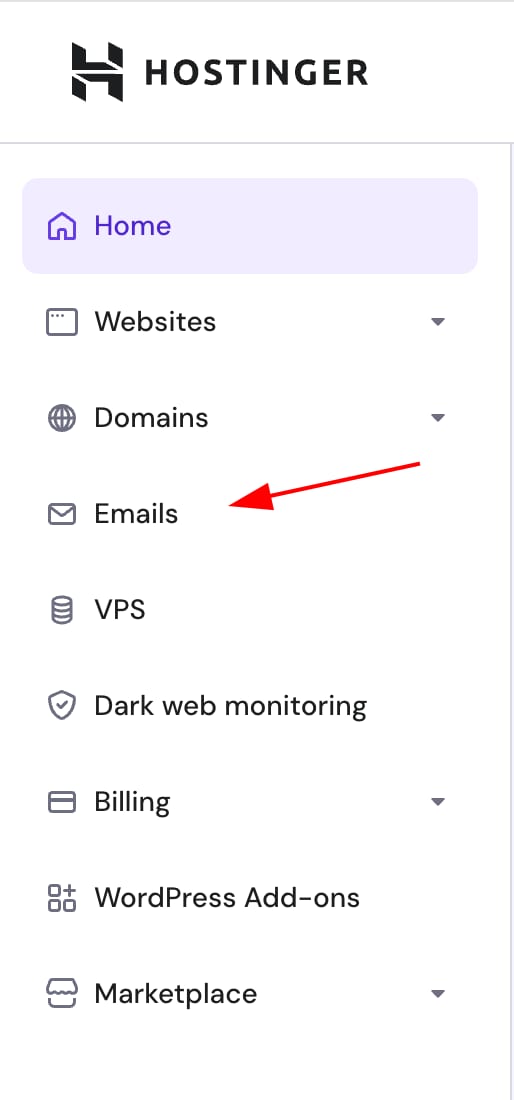
When managing your email services at Hostinger, you’ll find everything you need in the Email section of your hPanel. Here’s a quick guide on what you can access and manage there.
Select the Emails area on the side bar of your hPanel:
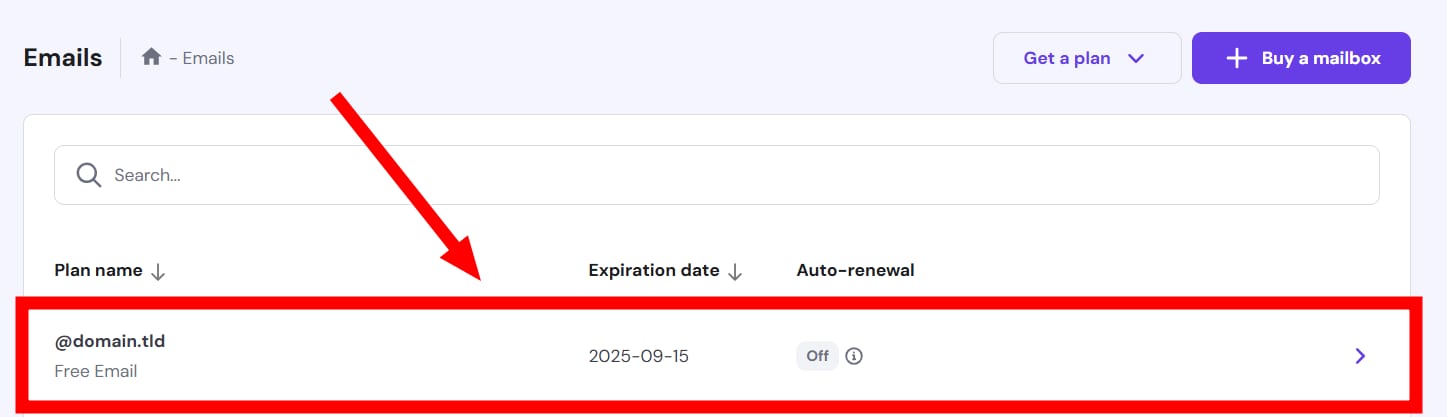
And then click anywhere in the plan linked to the domain or subdomain you want to manage emails for:
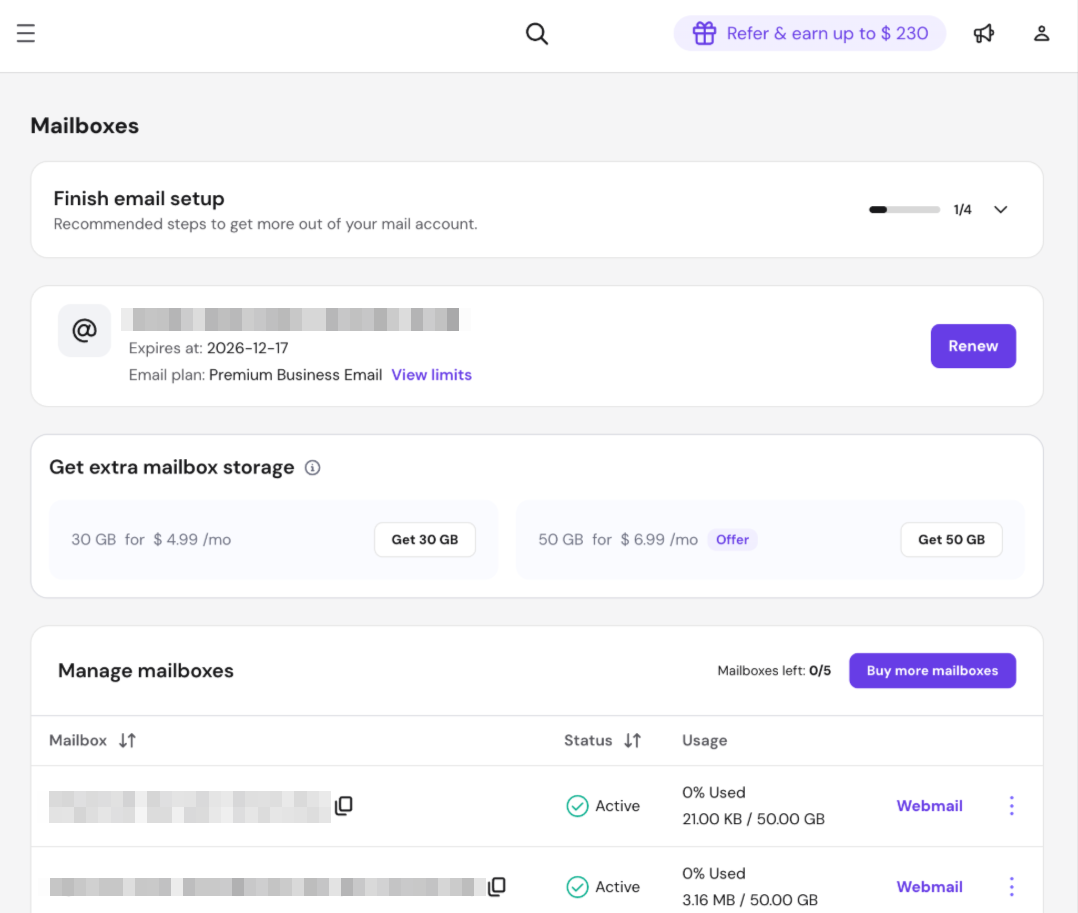
Mailboxes
The Mailboxes page now consolidates all email management in one place:
- Getting Started guide
- Plan details (linked domain, expiration, plan name and limits)
- Mailbox list with quick actions (webmail access, settings, password reset, forwarders, aliases, auto-reply)
Email Accounts
This section lists the most recently created email accounts under your current plan.
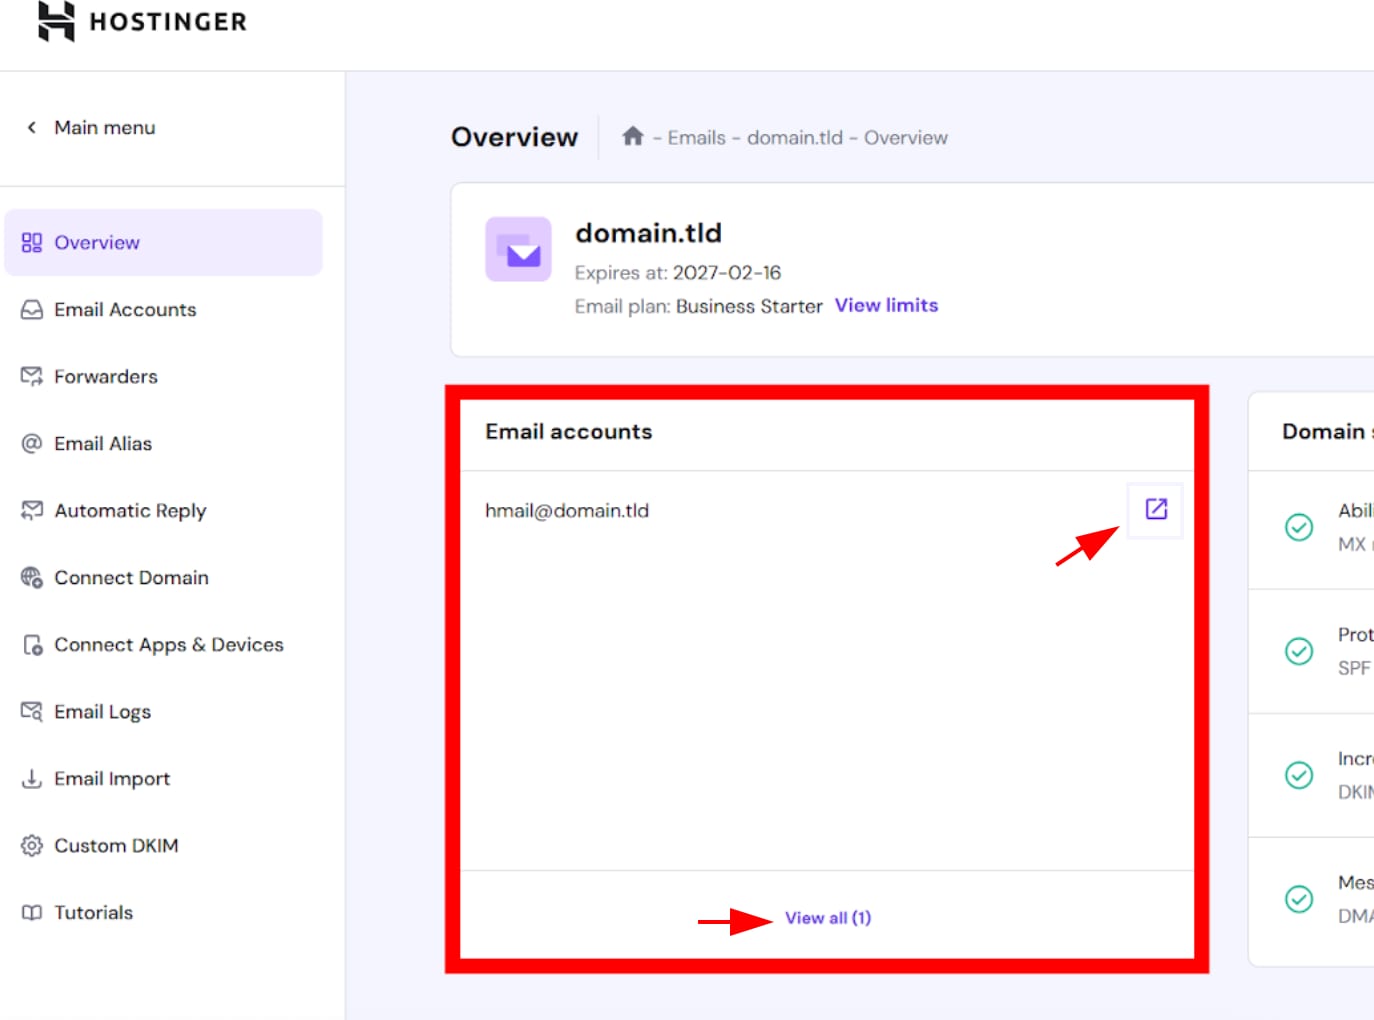
You can quickly access any of them by clicking the shortcut icon ⇲ next to the address, and to view all email accounts, click the View all emails option.
Domain Settings
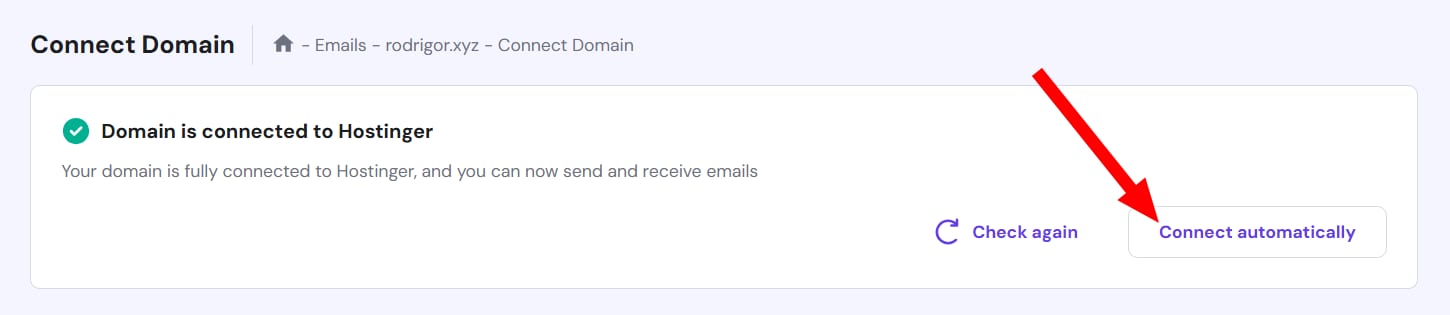
Here, you can verify your domain’s connection to the email service. The system checks whether all necessary DNS records are correctly configured.
-
If everything is correctly set up, you’ll see a green status icon:

-
If any record is missing or incorrect, a warning icon will appear. You can click Add Records next to the status to fix the issue.

If your domain uses Hostinger’s nameservers and you are using Hostinger Email, you can fix DNS issues automatically by clicking Connect automatically.
If your domain is connected to external nameservers, on the “Connect Domain” tab, you can find the list of the required DNS records for Hostinger Email. You can then manually update them at your domain provider’s platform.
