For websites built using file-based systems—such as WordPress, Joomla, or custom HTML—you can manage and transfer data using an FTP connection. This feature is available on Hostinger web, cloud, and Agency hosting plans and allows you to move large amounts of data between your local computer and your account efficiently.
Step 1 – Preparations
First, make sure that:
-
An FTP client is installed on your device; we recommend FileZilla (client version).
-
You have your website’s FTP information ready. You can find it by navigating to Websites → Dashboard, searching for FTP Accounts in the sidebar, and clicking on it.
If you need to create or reset your FTP password, refer to this guide: How to change your FTP password on hPanel.
Step 2 – Connection
Using FileZilla as an example, you have two main options to establish a connection.
Option 1 – Direct Access
Open FileZilla and fill in the Quickconnect section with the FTP details you got from the FTP Accounts section:

-
Host: The FTP IP
-
User: Your FTP username
-
Port: 21
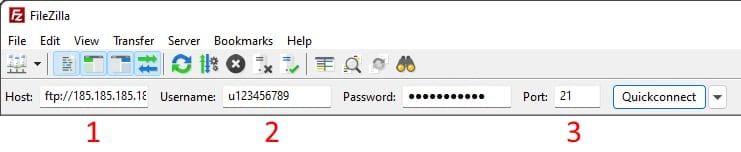
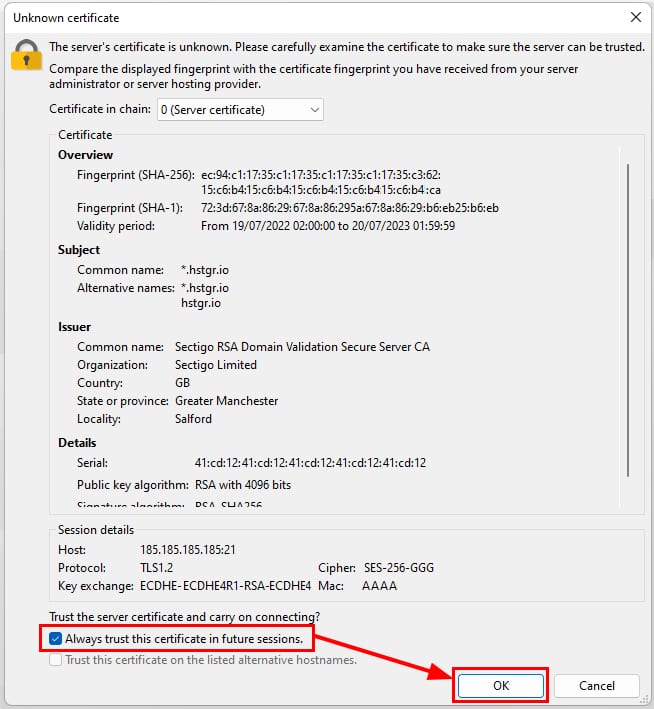
Enter your FTP account password in the corresponding field and click Quickconnect. The first time you connect to a server, you may encounter an Unknown certificate message. To proceed, check the Always trust this certificate in future sessions option and click OK:
If successfully connected, you will get a Status: Logged in message in the area below the Quickconnect bar.
Option 2 – Site Manager
With Site Manager, you can save your connection details, adjust the encryption type, or the protocol (FTP or SFTP).
-
Open Site Manager in FileZilla:

-
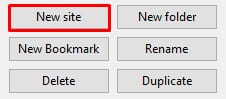
Click on New site:
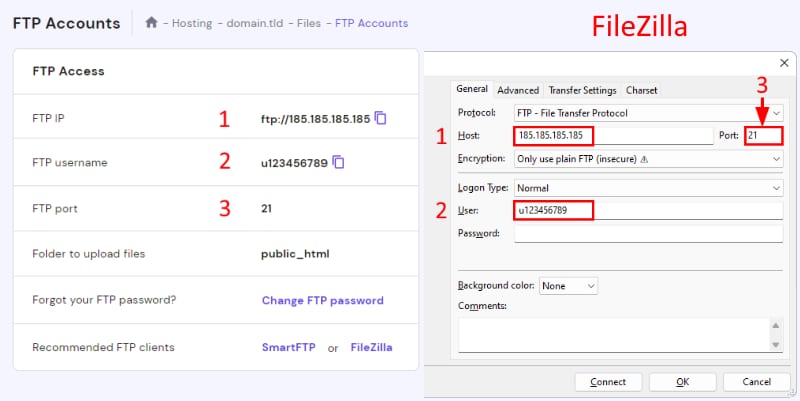
Then, configure the settings as follows, using the information from the FTP Accounts section:
-
Protocol: Selcect FTP – File Transfer Protocol from the dropdown.
-
Host: The FTP IP
-
Port: 21
-
Encryption: Select Only use plain FTP
-
Logon type: Normal
-
User: FTP username
-
Password: Your FPT password
Click on Connect, and if the details entered are correct, a Status: Logged in message will confirm the connection.
For more information on navigating the FileZilla interface to upload and download files, refer to this tutorial: How to use FileZilla.
NOTE
- The FTP feature is enabled by default on web, cloud, and Agency hosting plans. This setting is fixed and cannot be changed, except on VPS plans.