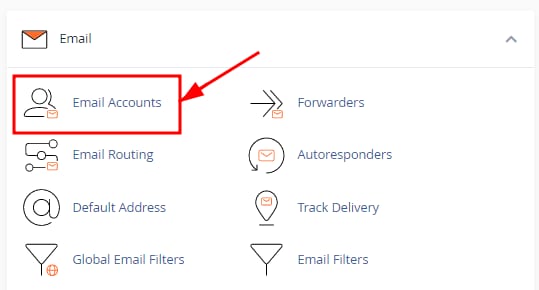
You can easily manage your email accounts from your cPanel. Just head to the Email section and select Email Accounts:
How to Create an Email Account
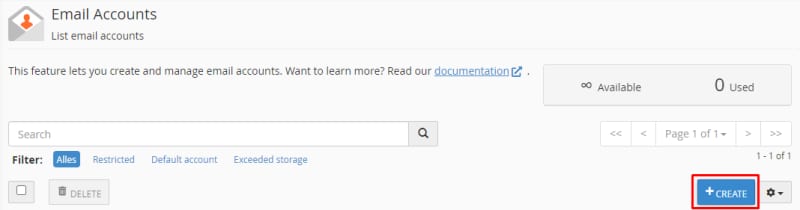
Once on the Email Accounts section, click on Create:
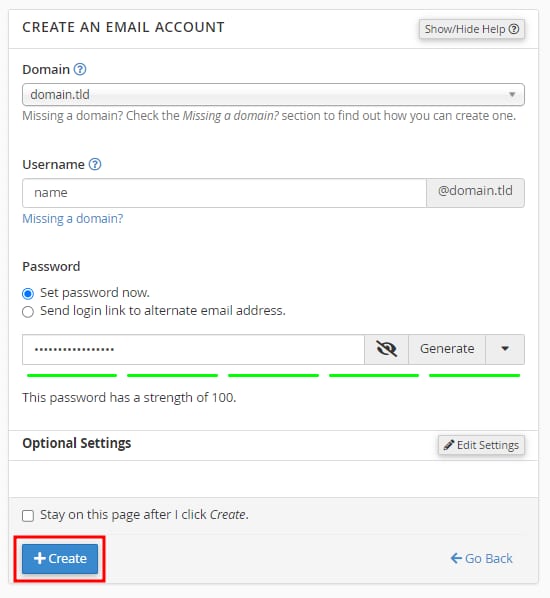
In the next page, enter the following:
-
Domain – select the domain or subdomain from the dropdown list
-
Username – specify the username for your email account. Please note that the username cannot contain the word cpanel
-
Password – choose to set the password right away or send a login link. The password has to meet cPanel’s password strength recommendations
-
Optional Settings – click Edit Settings to access options for adjusting storage space (which must be within your current hosting plan’s total disk space limit), creating folders, and sending a welcome message
Once all is good to go, click on Create:
To create an email account for an IDN domain (Internationalized Domain Name), convert it to Punycode and add the domain name to your hosting plan 💡
How to Manage Email Accounts
You can find the list of existing mailboxes and their management options on the Email Accounts section:

-
Open the webmail client
-
Manage the email account’s settings, including the option to delete it
-
Get the configuration details to connect your email account to a device or email client
NOTE
-
Email account deletion is not reversible. When a mailbox is removed, all messages previously stored in the account are permanently deleted