An automatic reply sends a pre-written message to anyone who emails you. This feature is highly useful for out-of-office notices or message acknowledgements. You can set this up in Webmail or in hPanel.
Before you start
- Ensure you have an active Hostinger Email account.
- Note that automatic replies cannot be created for mailboxes with the following administrative usernames to preserve email reputation: administrator, bounce, request-, do-not-reply, majordomo, listserv, donotreply, facebook, linkedin, list-, mailer (mailer-daemon), myspace, noreply, owner, postmaster, twitter, webmaster.
Method 1 – Set up an automatic reply in Webmail
You can manage automatic replies directly from Hostinger Webmail without leaving your inbox.
- Go to mail.hostinger.com and log in with your full email address and password.
- Click the Settings (⚙️) icon in the top-right corner.
- Select All settings ❯ open Automatic reply from the left menu.
- Toggle the automatic reply On.
- Configure the following fields:
- Subject – Enter the subject line for your auto-reply.
- Schedule – Set Start and End dates, or choose to start immediately. Select Never end to run indefinitely.
- Message – Write your reply body (rich text or plain text).
- Click Save to activate.
- During the scheduled timeframe, all emails sent to your mailbox will receive the automatic reply.
Active reply banner
When an automatic reply is currently running, a banner will appear on the Webmail main page to remind you it’s active. This makes it easy to spot and manage without navigating to Settings.
Delete directly from Webmail
You can now delete an active automatic reply without leaving Webmail:
1. Click Settings (⚙️) in the top-right corner.
2. Select All settings → Automatic reply.
3. Toggle the automatic reply Off, or use the Delete option to remove it entirely.
Time-specific scheduling
When setting up or editing your automatic reply, you can now select a specific time alongside the start and end dates — giving you more precise control over when replies are sent and stopped.
Note
- Display name handling for emails sent by the automatic reply is planned for a future update.
Method 2 – Set up an automatic reply in hPanel
The hPanel automatic reply page is still available. However, it may be removed in the future as Webmail now offers the same feature with an improved experience.
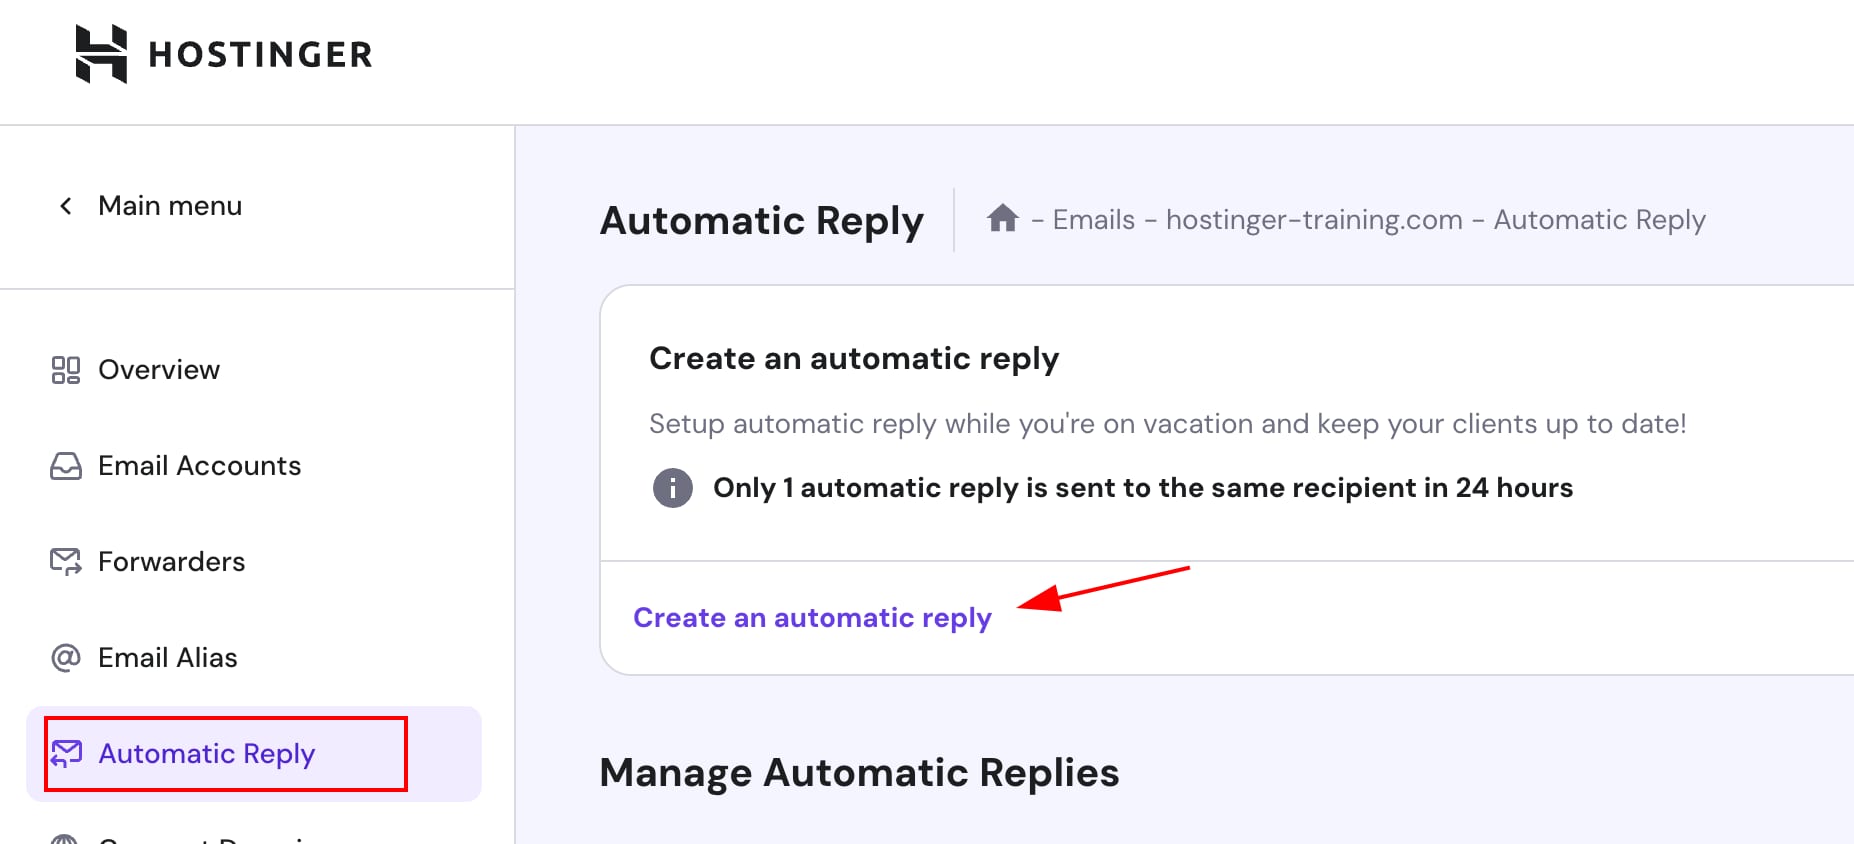
- Navigate to the Emails section of hPanel and click on Manage next to your domain or subdomain.
- Select Automatic Reply on the left sidebar and click on Create an automatic reply.

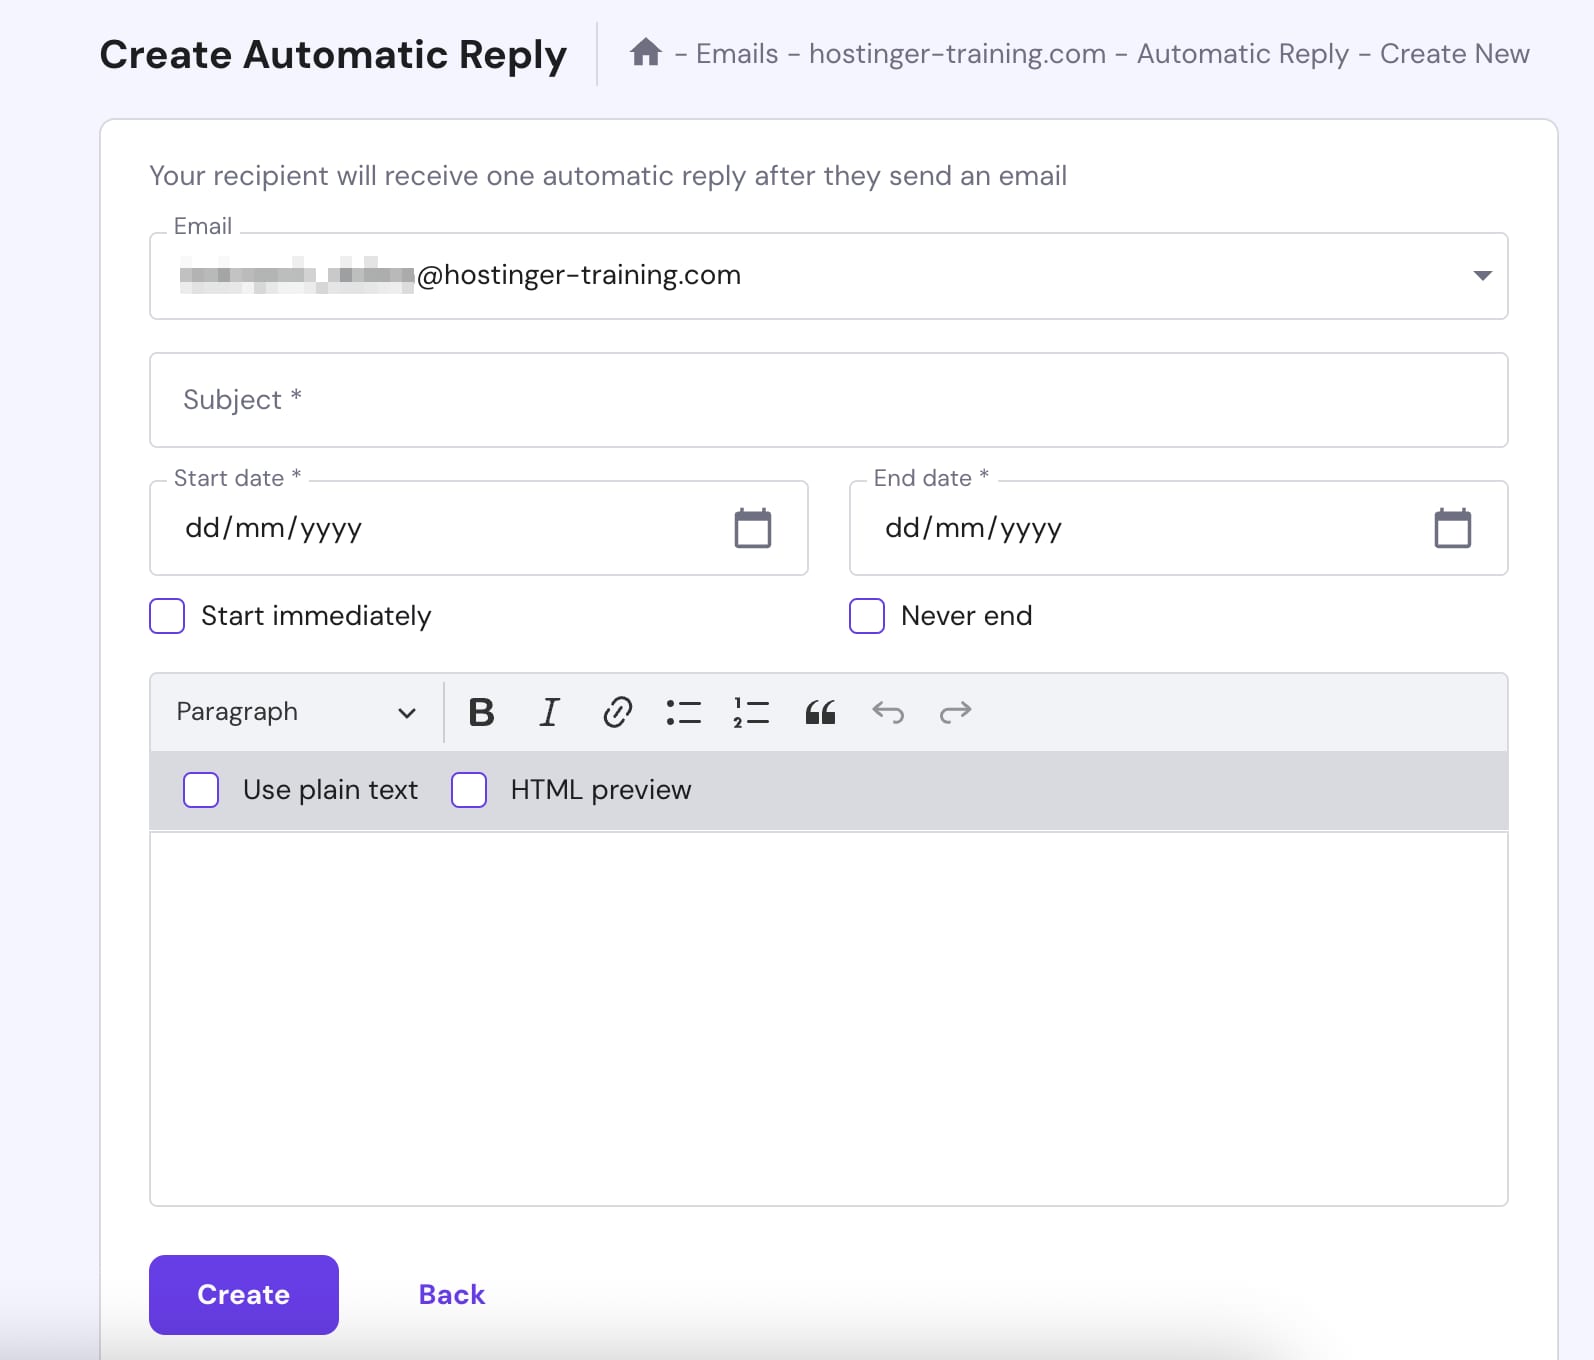
- Set up the automatic message by filling in the following fields:
- Email address – Select the email address from the dropdown list to apply the autoresponder.
- Subject – Compose a message subject for the automatic replies.
- Schedule – Define a start and end date for when the automatic response should activate and stop sending. Alternatively, choose to start right away, or select Never end to run it indefinitely.
- Message – Compose the message body. You can use rich text or plain text.

- Click on Create.
Avoid using emojis in the subject or message, as they are not supported and the automatic reply will not save. Once configured, all incoming messages sent to the specified email address within the scheduled timeframe will receive the automatic message.
How to Manage Automatic Replies
If you created your autoresponder via hPanel, you can edit or remove it at any time.
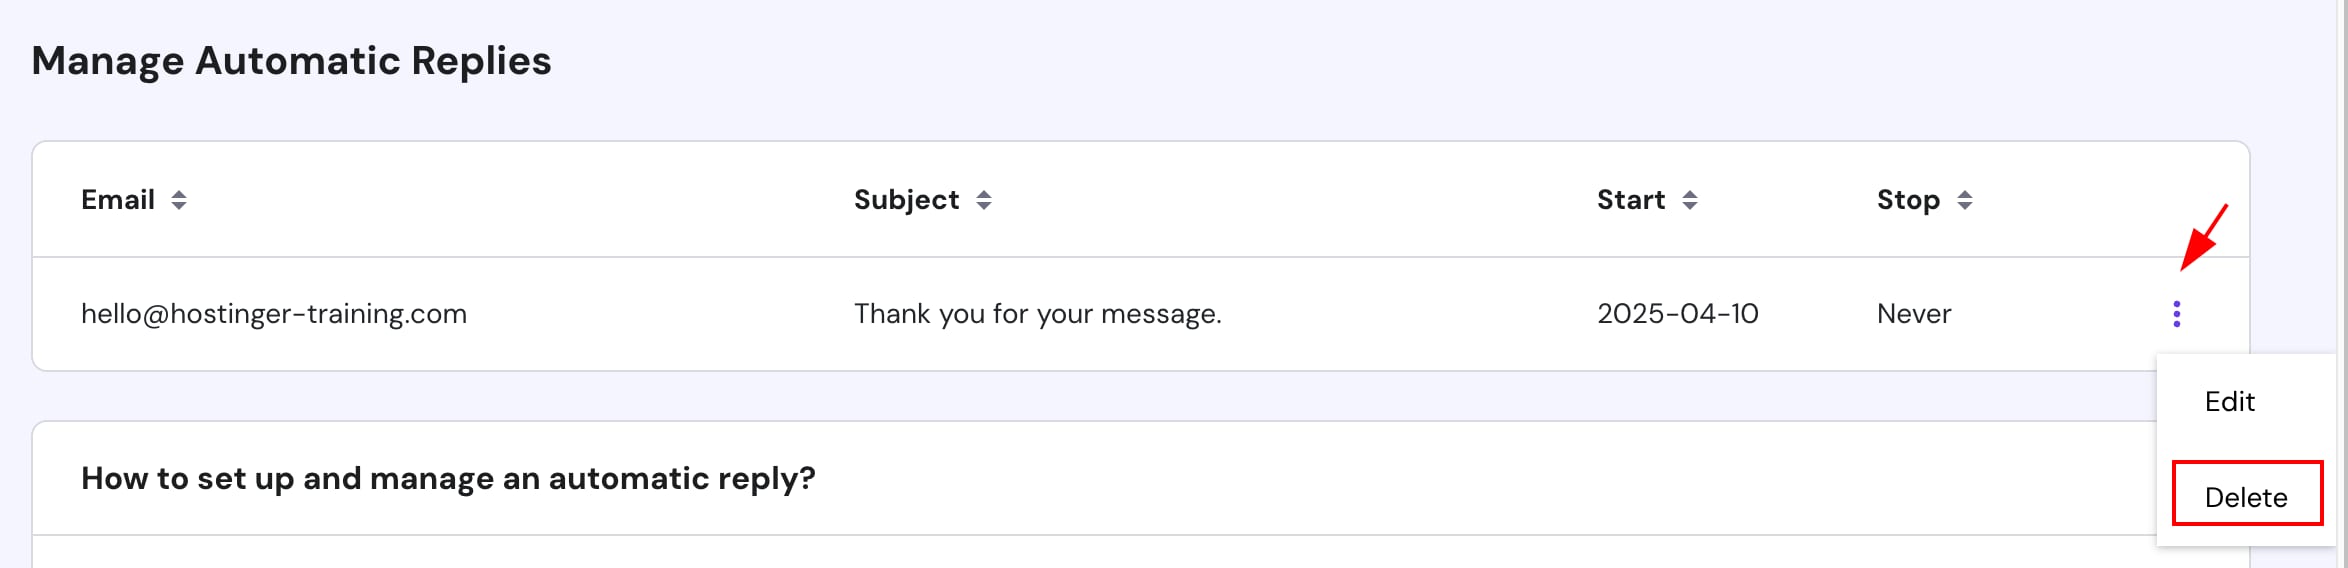
- In the Automatic Reply section of hPanel, navigate to Manage Automatic Replies.
- Click on the options (⋮) button next to the mailbox.

- Select your preferred action:
- Edit – Modify the message, subject, or dates, make the desired updates, and click on Save to apply the changes.
- Delete – Remove the automatic reply.
- After deletion, automatic replies will immediately stop sending. You can re-create a deleted autoresponder at any time.
You can now efficiently ensure your incoming correspondents receive immediate updates using Hostinger Email autoresponders.