Git is a Version Control System (VCS) used to track changes in files and coordinate work among developers. This integration allows you to seamlessly deploy PHP files, WordPress websites, and custom static projects from GitHub directly to your hosting plan.
Before you start
- Git integration is available for custom PHP and HTML websites hosted on web and cloud hosting plans.
- For Node.js websites, refer to the guide on deploying Node.js from a GitHub repository. instead.
- Git integration is not available on agency hosting.
- Hostinger Horizons and Hostinger Website Builder websites do not support Git integration.
Set up Git deployment
Git deployment on hPanel uses GitHub OAuth, allowing you to connect your GitHub account and deploy directly from your repositories — no SSH key setup required. You can deploy PHP files, WordPress websites, and similar projects using this integration.
For the initial deployment of a Git repository:
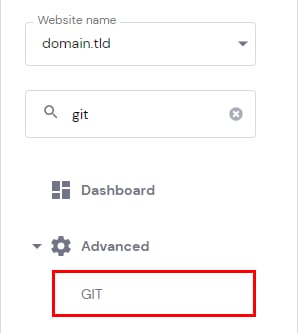
- Go to hPanel → Websites.
- Locate the website and click on Dashboard next to it.
- On the sidebar, select Advanced → Git.
- Click Continue with GitHub to connect your GitHub account via OAuth.

- Install and authorize the Hostinger extension on your GitHub account or specific repository when prompted by GitHub.
- Once authorized, select the repository you want to deploy from the list and click Next.
- Confirm your deployment settings:
- Repository: Pre-filled based on your selection.
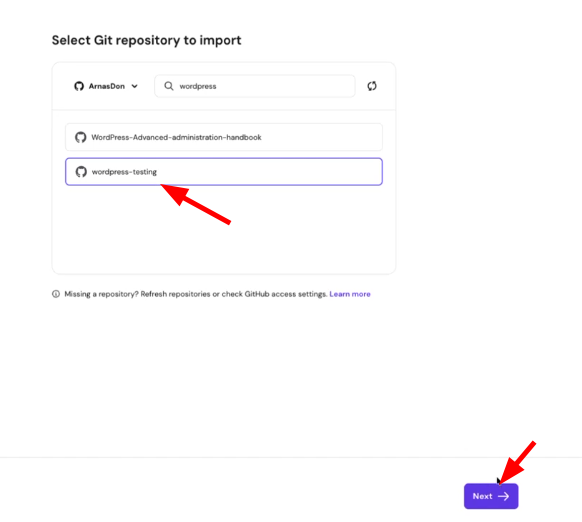
- Branch: Select the branch you want to deploy (defaults to
main). - Root directory: The folder where your repository files will be deployed. Defaults to
public_html. You can change this to any valid directory on your hosting account (e.g.,public_html/my-project) - Click Deploy.

- An automated confirmation message appears when the deployment is complete. Click Go to dashboard to return to your Git management screen.
- Repository: Pre-filled based on your selection.

Manage your deployed Git repository
From your Git overview section, you can monitor and control your active repository settings:
- View repository details: Check your active connected repository and GitHub account credentials.
- Auto-deployment status: Review automated settings where any updates merged into your deployment branch automatically trigger a new deployment.
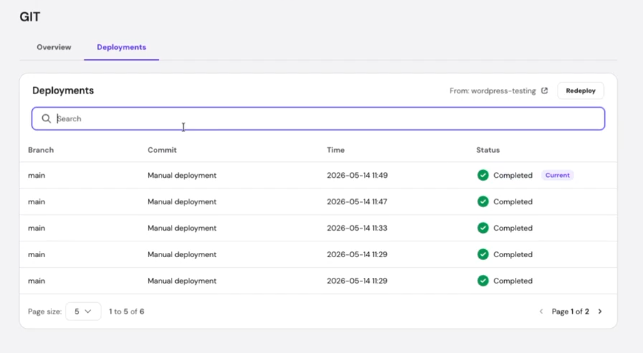
- Manual deployment: Click Redeploy to manually fetch and apply the latest changes from your repository.
- Deployment history: Access the Deployments tab to review previous deployment details, including the branch name, commit ID, timestamp, and status.
- Disconnect repository: Click the options button ⋮ → Disconnect from repository if you need to unlink your project. Your website files will reflect the deployed state of your chosen repository branch.

NOTE
- Disconnecting or changing your deployment repository will cause newly deployed files to overwrite existing data in your target directory.