How to migrate emails to a new provider
Jul 02, 2026
/
Justina B. & Saulius L.
/
12 min Read

To migrate emails, back up your current mailbox, create matching accounts on the new service, and move your messages using a built-in importer or IMAP, which most email apps support. Then update your Domain Name System records and test that mail arrives before you switch.
Only your messages and folders move as data. Your contacts need a separate import, your settings have to be recreated by hand, and DNS is a configuration step, not something that transfers.
The right method depends on your old provider, your new provider, the size of your mailbox, and whether you’re moving a single inbox or several business accounts. You can migrate emails by using:
- Built-in import tools
- IMAP or server-to-server migration
- Manual transfer with a desktop email client
- Hostinger Mail migration
- DNS records and post-migration checks.
What is email migration?
Email migration is the process of moving your mailbox data from one email provider, account, or mail server to another. In plain terms, it’s how you take everything in your old inbox and set it up again somewhere new.
It helps to know what actually transfers. Standard IMAP-based migration only moves your email messages and folders. It always leaves out your contacts, calendars, tasks, filters, signatures, and forwarding rules, so you need to import your contacts separately and recreate the rest manually.
This matters most with a custom domain. You’ll need to update your DNS records so your mail points to the new server, and those changes can take 24 to 48 hours to take effect. So expect a delay before your email works properly.
Which email migration method should you use?
The best method depends on what your old and new providers support and how much mail you’re moving. A built-in importer is usually the easiest route when your new provider has one, while IMAP migration is the most common choice for custom-domain inboxes.
Here’s how the main options compare:
| Method | Best for | What it transfers | Main requirement | Key limitation |
| Built-in importer | Moving to a provider that offers a native import or migration tool | Messages and folders, sometimes contacts and settings | Access to the new provider’s import tool and your old login | Only works if your new provider offers one |
| IMAP or server-to-server migration | Custom-domain inboxes and moves between hosting providers | Messages and folders | IMAP access on both the old and new mailboxes | Skips contacts, calendars, filters, and signatures; Hostinger’s IMAP Sync tool also caps transfers at 3 GB |
| Desktop email client transfer | When both accounts support IMAP, but no importer is available | Messages and folders you move across | An email client like Outlook, Thunderbird, or Apple Mail | Slower for large inboxes |
| Webmail export and import | Smaller mailboxes, using a backup file exported from any provider | Messages from an exported EML or Mbox file | An export file from your old mailbox | Hostinger Webmail caps each file at 256 MB |
| Third-party migration tool | Complex moves, or when you also need contacts and calendars transferred | Messages, folders, and often contacts and calendars, which IMAP can’t move | A paid tool that supports both providers | Added cost and setup |
Match your choice to what you need to bring across, whether that’s mail only or contacts and calendars too. Whichever method you pick, a little prep first will save you headaches later.
How to prepare for email migration
Before you move anything, back up your current mailbox, write down your settings, and check how much mail you need to transfer. A few minutes of prep here prevents lost messages and broken delivery later. Here’s what to handle before you start:
- Back up everything in your current mailbox.
- Write down your current email settings.
- Check your mailbox size against the new account’s limits.
Back up your current emails
Save a copy of your emails before you change anything, so nothing is lost if the migration runs into a problem. Each provider handles exports differently:
- Gmail – Use Google Takeout to download your full mailbox as an archive. The download link expires in about seven days and allows up to five downloads, so save the file to your computer or an external drive right away.
- Outlook – In classic Outlook, export your mail to a PST file from the File menu. In the new Outlook, go to Settings, then Files, then Export instead.
- Apple Mail – Select a mailbox in the sidebar, then choose Mailbox and Export Mailbox from the menu bar. It saves your messages as an .mbox file.
The exact export steps to back up your emails vary by provider, so check your provider’s tool first. Don’t delete or cancel your old mailbox until the backup and migration are complete, because canceling too early can permanently lose mail.
If you’re moving between two Hostinger accounts, export your data before you release the domain from the old plan. Hostinger’s Customer Success team can’t access or download your email data for you, so make sure you’ve saved everything first.
Document your email settings
Write down every custom setting from your old account so you can rebuild it on the new one. These don’t transfer automatically, so a quick list now saves guesswork later. The key things to save:
- Forwarders, aliases, and catch-all addresses.
- Autoresponders, signatures, filters, and labels.
- Blocked senders.
- IMAP, POP3, and SMTP server settings.
- App passwords for any account that uses two-factor authentication.
App passwords are easy to overlook. An account with two-factor authentication often requires one, rather than your normal login, to connect during migration.
Check your mailbox size and storage limits
Check how big your mailbox is, because its size affects how long migration takes, which method works best, and how much storage you need on the new account. A 200 MB inbox and a 20 GB inbox call for different approaches.
You can usually find your mailbox size on your account’s storage or settings page. Once you have that number, check it against your new provider’s limits before you start. If you’re moving to Hostinger Mail, two limits are worth knowing up front:
- Your new account needs enough storage to hold everything you’re importing. Hostinger Mail gives you 1 GB per mailbox on a 1-year trial, bundled with hosting, and up to 50 GB on paid plans. Check your mailbox against that and upgrade if you’re close to the limit.
- Hostinger Webmail import and export files are capped at 256 MB.
Split a file larger than 256 MB into smaller pieces, or move your mail with an email client over IMAP instead.
How to migrate emails using a built-in import tool
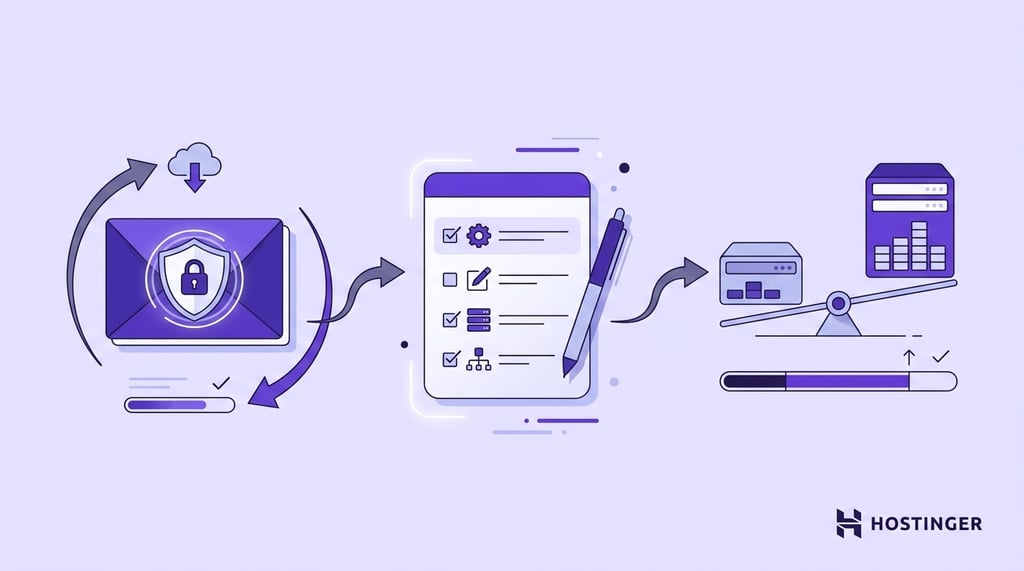
A built-in import tool is usually the easiest way to migrate emails when your new provider offers one. You point it at your old account, and it pulls your messages across for you. The general process looks the same across providers:
- Open the import or migration tool in your new provider’s settings.
- Choose your old provider from the list, or pick the IMAP option.
- Authorize your old account, or enter its mailbox and IMAP details.
- Select what to bring over, such as users, folders, date ranges, or data types, if the tool offers those choices.
- Start the import and keep an eye on the progress.
What’s available depends on your provider:
- Google Workspace has a data migration tool, but only an administrator can run it from the admin console.
- Personal Gmail offers only a limited, POP3-based import under Settings, so it won’t sync your folders the way a full importer does.
- Microsoft 365 has an IMAP migration tool, but it skips messages larger than 35 MB and caps each mailbox at 500,000 items.
Try the importer before any manual method when your provider has one. Check these limits first if your mailbox is large, since anything skipped will need a second pass with another method.
How to migrate emails using IMAP or server-to-server migration
IMAP migration syncs your messages and folders straight from your old server to your new mailbox. It connects to both accounts at once and copies everything over, making it the go-to method for custom-domain email and for moving between hosting providers.
It works because IMAP keeps your mail on the server, unlike POP3, which pulls messages down to a single device. Knowing how IMAP and POP3 differ helps you confirm that your old account supports syncing. Here’s how it goes:
- Create the mailbox on your new provider.
- Collect the IMAP details from your old provider, including the server name, port, and login.
- Enter those source credentials in your new provider’s migration tool.
- Choose the destination mailbox.
- Start the migration.
- Check that your folders and messages came across.
Keep one thing in mind: IMAP moves your messages and folders, but it won’t bring your contacts, calendars, tasks, filters, signatures, or forwarding rules. You’ll set those up separately.
If you’re using the IMAP Sync tool to migrate to Hostinger, set up your Hostinger Mail DNS records first so new mail lands in the new mailbox while you move old messages over. The tool caps each transfer at 3 GB, so split a larger mailbox or switch methods if you go over.
How to migrate emails manually with a desktop email client
You can migrate emails manually with a desktop email client when both accounts support IMAP, but neither offers an automated importer. The trick is to connect both mailboxes in one app, then copy your mail from the old one to the new one.
Thunderbird, classic Outlook, and Apple Mail all work well for this, and the steps are similar in each:
- Add your old account to the client over IMAP.
- Add your new account over IMAP as well.
- Wait for both mailboxes to finish syncing.
- Copy your messages and folders from the old account to the new one. Dragging moves them rather than copying them, so hold Ctrl on Windows or Cmd on a Mac to copy and keep your originals safe.
- Give the client time to upload the copied mail to the new server.
- Confirm everything arrived by checking your new mailbox in Webmail.
If you’re moving from Gmail, watch for duplicates. Gmail uses labels rather than true folders, so the same message can sit under several of them, and copying label by label can duplicate it on the new side. Copying once from the All Mail folder avoids that.
This method is reliable, but it can be slow for large inboxes because every message is uploaded over your connection. New Outlook for Windows also has drag-and-drop limits across accounts, so classic Outlook or Thunderbird are the more reliable picks here.
If you’re setting up a client for the first time, you can follow the steps to set up Outlook or Thunderbird before you begin.
How to migrate emails to Hostinger Mail
To migrate emails to Hostinger Mail, create new accounts, recreate your old settings, update your DNS records, and then move your messages and contacts. It’s the same logic as any migration, with Hostinger’s own tools handling the sync. Here’s the full flow:
- Create your email accounts.
- Recreate your previous configurations.
- Add the required DNS records and wait for them to take effect.
- Migrate your email messages.
- Import your contacts.
- Set up your devices and email clients.

1. Create your email accounts with Hostinger Mail
Setting up a free email account in hPanel takes four steps:
- Log in to hPanel, navigate to Emails
- Click on Start Free.
- Choose your domain and click Confirm.
- Enter your email, name, and password, then click Create.
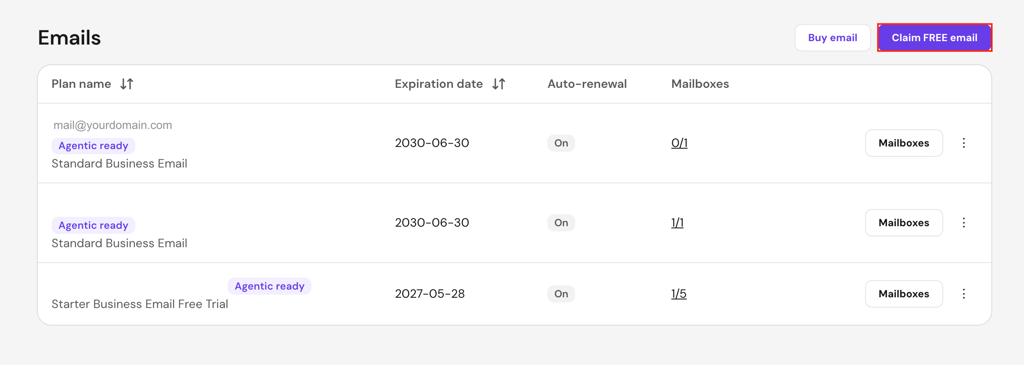
If you’ve already activated email on another domain, click Claim free email instead. If you purchased a standalone Business Email plan, go to hPanel, Emails, locate the plan, and click Setup.
Keep the same mailbox names from your old provider when you can, so the change is invisible to anyone emailing you. To consolidate, import old mail into a different mailbox, like support@yourdomain.com, into contact@yourdomain.com. Creating an email account takes a minute or two.
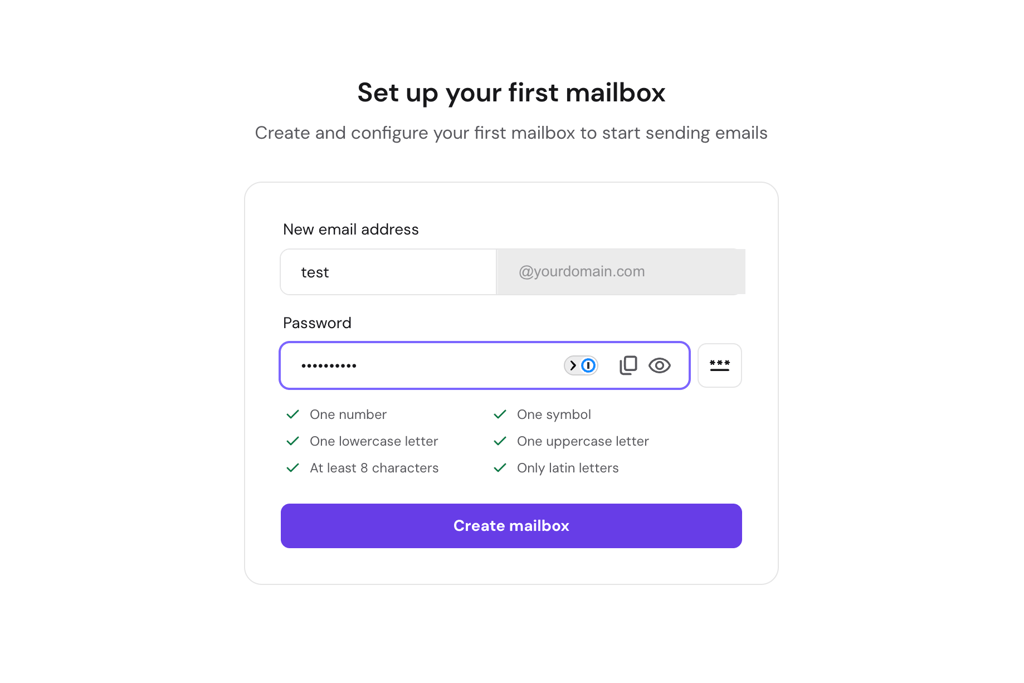
Important! Hostinger Email mailbox names only support letters, numbers, and periods. Hyphens, underscores, and other special characters aren’t allowed. If your old address used these, you’ll need to choose an alternative format.
Some hosting plans include Titan Email instead, which has its own interface and shows a Titan logo next to your domain in hPanel. If that’s your setup, follow Titan’s account creation, but the rest of this process still applies.
2. Recreate your previous email configurations
Recreate the settings from your old account in Hostinger Email, since they’re tied to your previous provider and won’t carry over on their own. Set up each one again so your mail behaves the way it used to. The settings to rebuild include:
- Forwarders, so mail keeps reaching the right inbox.
- To collect messages sent to misspelled addresses on your domain.
- Aliases and autoresponders, so extra addresses land in one inbox and anyone who emails you gets an automatic reply, including any out-of-office replies.
- Email signatures and filters, so your contact details appear at the end of each message, and incoming mail sorts into the right folders.
Once these are back in place, your new mailbox will handle incoming mail the same way your old one did.
3. Add Hostinger Email DNS records
Add Hostinger Email’s DNS records to your domain so mail routes to the new server. You’ll work with four record types:
- MX records, which tell other mail servers where to deliver messages for your domain.
- SPF records, which list the servers allowed to send mail on your domain.
- DKIM records, which add a signature that proves your messages are genuine.
- DMARC records, which tell receiving servers what to do with messages that fail those checks. Hostinger highly recommends adding them too.
Open your domain’s DNS settings in hPanel and add the values Hostinger lists for each record type. Hostinger shows the exact DNS records you need for email, and getting your SPF, DKIM, and DMARC records right keeps your messages out of spam folders.
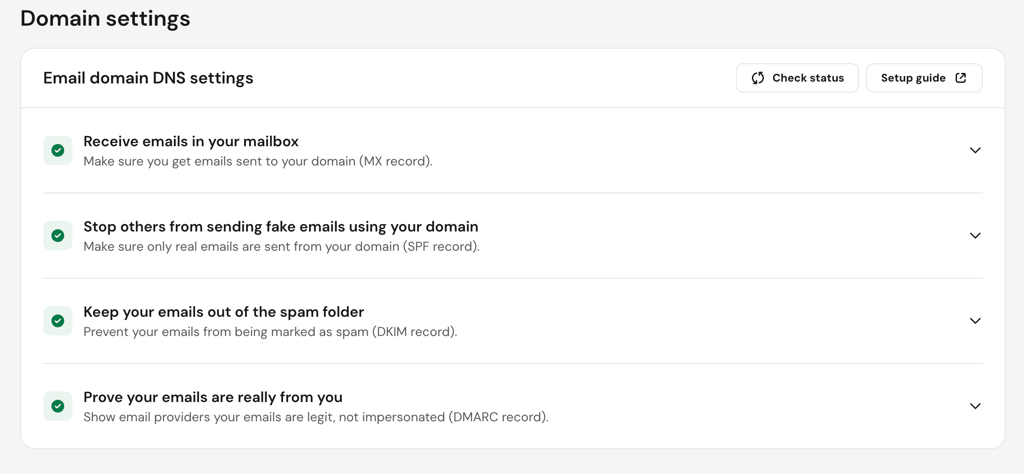
Make sure only Hostinger Email’s records are left in your DNS zone. Old MX, SPF, DKIM, or DMARC records from your previous provider can clash with the new ones, leading to email delivery issues or lost emails.
After you save the records, give them time to update across the internet. DNS changes can take up to 48 hours to fully propagate, and your mail may be patchy until they do.
4. Migrate your email messages
Once your accounts and DNS are ready, move your actual messages using one of Hostinger’s three import options. Check that the new mailbox has enough storage for everything you’re bringing in before you start. Your options are:
- The Email Import tool, found on the Email Accounts page, syncs messages from your old provider over IMAP. You enter your old account’s IMAP details and choose where the mail lands.
- Hostinger Email Webmail, where you upload a backup file you exported earlier.
- The IMAP Sync tool, which copies mail directly between two mailboxes.
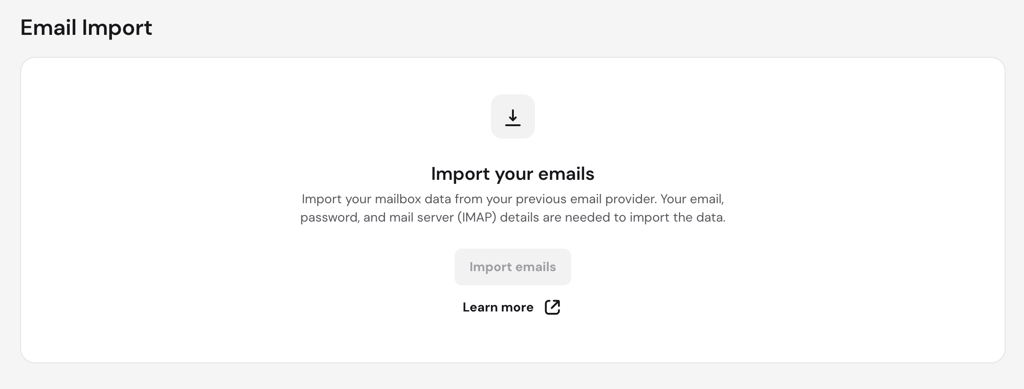
Keep the 256 MB Webmail limit in mind. If your export file is bigger, split it into smaller files or use an email client over IMAP. To move between two Hostinger accounts, export your mail via Webmail or IMAP, then import it into the new account.
5. Import your contacts
Import your contacts separately, since they don’t move with your messages. Most providers let you export contacts as a CSV or vCard file, which you then import into Hostinger Email through Webmail.
How you export depends on your old provider, so grab the contacts file from there first, then upload it to the new side.
6. Set up your devices and email clients
Update your devices and email apps with Hostinger Email’s settings so they connect to the new mailbox. Your phone, desktop client, and any website plugins use these server details to send and receive mail, so each one needs the new values. Here are the Hostinger Email settings:
| Incoming mail, IMAP | Incoming mail, POP3 | Outgoing mail, SMTP |
| Host: imap.hostinger.com | Host: pop.hostinger.com | Host: smtp.hostinger.com |
| Encryption: SSL/TLS | Encryption: SSL/TLS | Encryption: SSL/TLS |
| Port: 993 | Port: 995 | Port: 465 |
Most clients also need your full email address and password to log in. Restart the app and send a quick test message to confirm it works once you’ve updated everything. If that test fails with an encryption error on port 465, switch to STARTTLS on SMTP port 587 instead.
If your plan uses Titan Email, its server settings are different, so use the values from Titan’s setup instructions instead. Don’t forget your other tools, either. Any CMS plugins, contact forms, or apps that send email from your domain also need the new settings.
What to check after email migration
After migration, run a few checks to confirm everything works before you rely on the new mailbox. Work through this list:
- Send a test email from your new mailbox to confirm outgoing mail works.
- Open your folders, labels, and attachments to check that they all came across.
- Confirm your forwarders, filters, autoresponders, aliases, and catch-alls are working.
- Update your email signature to reflect your new address and details.
- Check your spam and junk folders in case anything landed there.
- Verify your MX, SPF, DKIM, and DMARC records are in place. A free tool like DNS Checker at dnschecker.org shows whether they’ve taken effect worldwide.
- Update any CMS plugins, CRM tools, contact forms, and email apps with the new settings.
- Tell your important contacts your email has moved, so they reach you at the right address.
Keep your old mailbox active until DNS has fully updated and all checks pass. Once mail flows reliably to the new account, you’re safe to close the old one.
Common email migration issues and how to fix them
Most migration problems trace back to a handful of common causes, and each has a quick fix. Here are the ones you’re most likely to run into.
Authentication errors
Authentication errors almost always stem from incorrect login credentials or a disabled setting. Double-check your mailbox password and your IMAP or SMTP host, port, and encryption type.
Confirm IMAP is enabled on the old account too, since some providers switch it off by default. An account with two-factor authentication usually requires an app password, rather than your normal password, to connect.
Missing emails or folders
Missing messages or folders usually mean an incomplete sync, not lost mail. Check for folders that were skipped, a sync that stopped partway, IMAP folders that aren’t subscribed to, or filters that moved messages to an unexpected location.
In a desktop client, mail can also look missing while the search index rebuilds or because the client only keeps recent messages offline by default. Logging in to Webmail on the new provider is the quickest way to confirm what actually arrived.
Slow email transfer
A slow transfer usually comes down to your mailbox size and the method you picked. Speed depends on how much mail you’re moving, your old server’s limits, your connection, and the migration method.
Use an IMAP migration for large mailboxes, or split your mail into smaller files if you’re importing through Webmail. Hostinger’s IMAP Sync tool caps each transfer at 3 GB, so a mailbox larger than that must be split or handled using another method.
New emails still arrive in the old inbox
New mail still arriving in your old inbox almost always means your DNS records haven’t finished updating, or an old record is still in place. The most common cause is a leftover MX record pointing to your previous provider, which splits delivery between the two.
Remove the old provider’s MX record so only Hostinger’s remains, then keep the old account active until mail reliably reaches the new one.
Email service disabled in hPanel
A Hostinger email service that’s been turned off or has expired stops delivery completely. Check that your plan is still active in the Emails section of hPanel, and renew or reactivate it if it’s lapsed.
Why migrate emails to Hostinger Mail?
Hostinger Mail is worth a look if you want professional, domain-based email that’s simple to move to and manage. It runs on your own custom domain, so your address matches your website and brand. A few things make the switch easier:
- Bring your old and current email addresses with you so nothing gets left behind.
- Setup and migration are built into hPanel, with import tools that handle the syncing.
- It connects to apps you already use, like Outlook and Gmail.
- The Standard and Premium plans include AI features like smart replies, instant summaries, and conversational search, plus the AI assistant Kodee built into your inbox. The Starter plan includes the same features with 10 AI credits a month, which is a good way to try them out.
- Agentic Mail connects your inbox to automation tools like n8n, Make, and Zapier, giving AI agents a dedicated address that triggers workflows when mail arrives. It comes with the Premium plan.
Moving from a personal inbox like Gmail, Yahoo, or Outlook is also a chance to put your email on your own domain. You keep your existing messages while making future emails look more professional and on-brand. It’s worth knowing how to get a business email before you start.


Justina is a Content Writer passionate about marketing, with a background in social media and customer success management. She also loves reading books, traveling and exploring new places as well as cooking, and trying out new recipes. Follow her on LinkedIn.

As VP of Product at Hostinger, Saulius oversees Web Hosting Platform & Tools, Managed WordPress, and WebPro Experience. Saulius enjoys observing users through their daily life activities, looking for problems to solve, and building products that make users more efficient online, help them spend more time on the things they love, and leave all the rest for technology to solve. Follow him on LinkedIn.