Event RSVP website: collect guest responses online
May 20, 2026
/
Dainius K.
/
6 min Read
An event RSVP website helps hosts collect guest responses, share event details, and manage attendance in one place. Instead of tracking replies through texts, emails, or spreadsheets, guests can respond through a simple online page.
With AI and vibe coding, you can describe how the RSVP website should work — event details, guest form, attendance options, meal choices, plus-ones, and confirmation messages — and quickly turn it into a working web app.
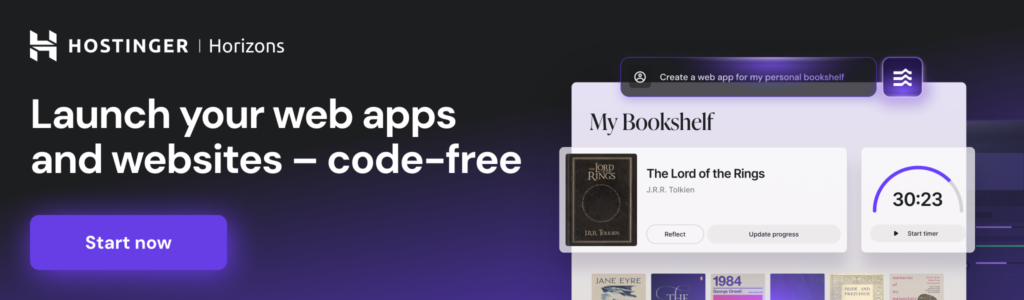
Using Hostinger Horizons, you can create and customize an event RSVP website without writing code. Add RSVP forms, guest dashboards, invitation pages, and response summaries through simple follow-up prompts.
TL;DR: How do you create event RSVP website fast?
- Define the event details. Start with the event name, date, time, location, dress code, and host message so guests know what to expect.
- Generate the RSVP page with AI. Ask Hostinger Horizons to create the event page, guest response form, and confirmation flow.
- Add response tracking. Include attending, not attending, plus-one, meal preference, and notes so hosts can plan accurately.
- Publish and share the RSVP link. Launch the website and send one link through invitations, messages, QR codes, or social posts.
Step 1: Define the problem your event RSVP website solves
This tool helps event hosts, couples, planners, businesses, communities, and families do guest response collection so they can know who is coming and plan the event with less confusion.
For example:
- Wedding hosts can collect guest replies. RSVP forms make it easier to manage attendance, plus-ones, meal choices, and deadlines.
- Event planners can track responses in one place. A response dashboard removes the need to chase replies across multiple channels.
- Businesses can manage invite-only events. Teams can collect attendee details for workshops, launches, dinners, or networking events.
Decide whether your RSVP website focuses on weddings, private parties, business events, community gatherings, or all-purpose event replies.
Step 2: Outline what to include in the first version of your event RSVP website
Focus on the core RSVP experience first.
- Event landing page. Show the event title, date, time, location, description, dress code, and host message so guests have all important details.
- RSVP form. Let guests enter their name, email, attendance status, plus-one details, meal preference, and notes.
- Confirmation message. Show a clear response confirmation so guests know their RSVP was submitted.
- Guest response dashboard. Let hosts review who is attending, who declined, and who has not responded yet.
Start with a simple event page and RSVP form, then add reminders, QR codes, or guest lists later.
Step 3: Create a user flow from start to finish
Design the RSVP process so guests can respond quickly.
- Landing → Guest opens the event RSVP website and sees the event details.
- Input → Guest fills out the RSVP form with attendance, plus-one, meal choice, and notes.
- Processing → The system saves the response and updates the host dashboard.
- Result → Guest sees a confirmation message with event details or next steps.
- Next step CTA → Host reviews responses, sends reminders, exports the guest list, or shares the RSVP link again.
Step 4: Generate the first version with Hostinger Horizons
Open Hostinger Horizons and describe your RSVP website clearly.
For example: “Create an event RSVP website where hosts add event details, guests submit RSVP responses, and hosts can view attendance summaries.”
Horizons will generate a working preview where you can test the event page, RSVP form, confirmation message, and response dashboard.
You can refine it with prompts like:
- “Add meal preference options.”
- “Add plus-one fields.”
- “Add RSVP deadline reminder text.”
- “Show attending, not attending, and pending response totals.”
Step 5: Customize the design and layout
Make the RSVP website feel polished and easy to use.
- Use a clear event hero section. The date, location, and RSVP button should be visible immediately.
- Keep the RSVP form short. Guests are more likely to respond when the form only asks for essential details.
- Match the event style. Colors, fonts, and imagery should fit the event type, whether it is formal, casual, corporate, or festive.
- Optimize for mobile. Most guests will open the RSVP link from a phone.
Use the select-and-edit feature in Hostinger Horizons to refine the invitation section, form layout, buttons, and response dashboard.
Step 6: Add logic, calculations, or scoring
Event RSVP websites benefit from response tracking and guest count logic.
- Attendance totals. Count attending, declined, and pending guests so hosts can plan seating, food, and space.
- Plus-one calculation. Add extra guests to the total headcount so the final number is accurate.
- Meal choice summary. Count meal preferences for catering or event planning.
- RSVP deadline logic. Highlight late responses or close the form after the deadline if needed.
Prompt example:
“Calculate total attending guests including plus-ones, show meal choice totals, and highlight responses submitted after the RSVP deadline.”
Step 7: Test your event RSVP website before publishing
Test the website as both a guest and a host.
Submit sample responses with attending, not attending, plus-one, and meal choices to make sure the dashboard updates correctly.
Checklist:
- RSVP form submits correctly. Guest responses should save without errors.
- Guest totals update accurately. Attendance and plus-one counts should reflect submitted responses.
- Confirmation message appears. Guests should know their response was received.
- Mobile layout works smoothly. The RSVP page should be easy to open, read, and submit from phones.
If issues appear, use follow-up prompts in Hostinger Horizons to improve form logic, response tracking, or layout.
Step 8: Publish and share your event RSVP website
Once the RSVP website works properly, click Publish.
You can share the link through digital invitations, social media, email, messaging apps, printed cards, or QR codes.
Common use cases include:
- Wedding RSVP pages.
- Birthday party replies.
- Corporate event attendance.
- Community meetup registration.
- Baby shower or engagement party RSVPs.
Step 9: Improve your event RSVP website after launch
Once guests start responding, improve the website based on planning needs.
Possible upgrades include:
- Guest list export.
- Automated reminder messages.
- Private invite codes.
- Seating group notes.
- Event schedule and map sections.
These improvements can be added with follow-up prompts in Hostinger Horizons.
Why should you create event RSVP website?
An event RSVP website makes guest management easier for both hosts and attendees.
It allows users to:
- Collect guest responses in one place.
- Track attendance and plus-ones.
- Share event details clearly.
- Reduce manual follow-up.
- Plan food, seating, and capacity more accurately.
Event RSVP websites are useful for weddings, parties, business events, community gatherings, fundraisers, showers, and private celebrations.
What features should a good event RSVP website include?
- Event details section. Guests need the date, time, location, dress code, and event description before responding.
- Simple RSVP form. Attendance status, guest name, plus-one, meal choice, and notes cover most event planning needs.
- Response dashboard. Hosts need a clear view of who is attending, declining, or pending.
- Confirmation message. Guests should feel confident that their RSVP was received.
- Mobile-friendly design. RSVP links are usually opened from phones, so the page must be easy to use on small screens.
What initial prompt should you use to build event RSVP website in Horizons?
Use the prompt below in Hostinger Horizons to generate your event RSVP website. Simply copy and paste it into the chat to create your first working version instantly. As you build, you can add follow-up prompts to adjust form fields, guest tracking, design, reminders, or event sections based on your RSVP workflow using vibe coding.
Prompt example:
Create an event RSVP website.
Include an event landing page with event name, date, time, location, dress code, host message, and RSVP deadline.
Add an RSVP form with guest name, email, attendance status, plus-one option, meal preference, and notes.
Show a confirmation message after submission.
Create a host dashboard showing attending guests, declined guests, pending responses, plus-one totals, and meal choice totals.
Allow hosts to export or copy the guest list.
Make the design elegant, clear, modern, and mobile-friendly.
Pre-filled prompt template example:
Create an event RSVP website for weddings, parties, and private events.
Allow hosts to customize event title, date, location, invitation message, schedule, and RSVP deadline.
Let guests submit whether they are attending, not attending, or unsure.
Include plus-one fields, dietary restrictions, meal choices, and a message to the host.
Display RSVP responses in a simple dashboard with attendance totals and guest notes.
Add a shareable RSVP link and QR code placeholder.
Make the interface polished, friendly, and mobile-responsive.
What are common mistakes to avoid when building event RSVP website?
An event RSVP website should make replying easy and planning clearer.
- Too many form fields. Long RSVP forms can discourage guests from responding, so keep the first version focused on essential details.
- No plus-one tracking. Headcounts can become inaccurate if extra guests are not counted clearly.
- Missing confirmation message. Guests need reassurance that their response was submitted.
- No RSVP deadline. A clear deadline helps hosts plan food, seating, and capacity on time.
- Poor mobile usability. Most guests will respond from phones after opening a link or QR code.
- No host dashboard. Without response summaries, hosts still have to track replies manually.
How can you leverage Hostinger Horizons to build event RSVP website?
- Use AI chat to refine RSVP workflows. Add guest forms, plus-one tracking, meal choices, deadlines, and response dashboards through prompts.
- Improve the invitation page quickly. Adjust event sections, typography, colors, buttons, and confirmation messages without coding.
- Add planning features over time. Include guest list export, reminders, invite codes, maps, schedules, and seating notes.
- Scale into an event tools platform. Combine RSVP pages with invitations, gift wishlists, QR codes, event schedules, and feedback forms.
What other tools can you build with Hostinger Horizons?
- Wedding Invitation generator. Create digital invitations with event details, designs, RSVP links, and shareable pages.
- Interactive gift wishlist. Let hosts share gift ideas, track reserved items, and coordinate presents for weddings, birthdays, and celebrations.
- Create QR code generator. Create QR codes that link guests directly to RSVP pages, maps, schedules, or event details.
- Create event management web app. Manage registrations, guest lists, schedules, check-ins, and event planning tasks.
- Create menu generator. Build event menus, catering options, drink lists, and meal choice previews.

Dainius Kavoliunas is the Head of Product for Hostinger Horizons, with a passion for building innovative solutions. As an expert in product management, he combines deep expertise in UX, experimentation, and data analysis with a technical background to lead product strategy and build strong teams. He is particularly excited about the practical applications of AI and its potential to transform how we work and live. Follow him on LinkedIn.